Views: 222 Author: Tomorrow Publish Time: 2025-02-01 Origin: Site


Content Menu
>> Step 1: Measure the Interior
>> Step 4: Hem the Edges (Optional)
>> Step 7: Add Pockets (Optional)
● FAQs
>> 1. What type of fabric is best for lining a wicker picnic basket?
>> 2. Can I use fabric glue instead of sewing?
>> 3. How do I clean my lined picnic basket?
>> 4. Can I use an insulated liner?
>> 5. How can I personalize my picnic basket liner?
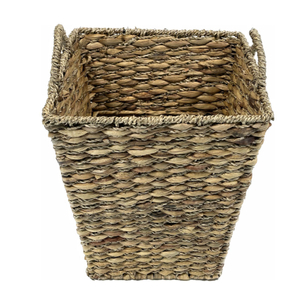
Lining a wicker picnic basket not only enhances its aesthetic appeal but also provides a protective layer for your food and items. This detailed guide will walk you through the process of lining your wicker picnic basket, ensuring that it looks beautiful and serves its purpose effectively.
- Wicker picnic basket
- Fabric for lining (cotton or linen recommended)
- Scissors
- Measuring tape
- Fabric glue or hot glue gun
- Needle and thread (optional)
- Ribbon or trim (optional for decoration)
- Iron (for smoothing fabric)
- Sewing machine (optional for quicker sewing)
Begin by measuring the interior dimensions of your wicker picnic basket. This will help you determine how much fabric you need for the lining.
1. Measure the length and width of the bottom of the basket.
2. Measure the height from the bottom to the top edge of the basket.
Make sure to note these measurements down accurately. If your basket has a unique shape, consider creating a paper template to ensure a perfect fit.
Selecting the right fabric is crucial. Here are some factors to consider:
- Durability: Choose a fabric that can withstand wear and tear, especially if you plan to use your picnic basket frequently.
- Washability: Opt for fabrics that are machine washable, as spills are likely during picnics.
- Design: Pick a pattern or color that reflects your personality or matches your picnic theme. Floral patterns, gingham checks, or solid colors can all add charm.
Using the measurements obtained, cut your fabric accordingly:
- For the bottom piece, cut a rectangle that matches the bottom dimensions of your basket, adding about 1 inch to each side for seam allowance.
- For the side pieces, cut strips of fabric long enough to wrap around the sides of the basket, adding extra fabric for folds at both ends.
If you want to add pockets for utensils or napkins, cut additional small rectangles that can be sewn onto the side pieces.
If you want a neater finish, hem the edges of your fabric:
1. Fold over each edge about 1/4 inch and press it down with an iron.
2. Sew along the folded edge to secure it.
This step is optional but recommended for a polished look.
Now it's time to attach the fabric to your basket:
1. Start with the bottom piece. Apply fabric glue or hot glue to the bottom of the basket.
2. Press the fabric onto the glued area, ensuring it lies flat without wrinkles.
Next, attach the side pieces:
1. Apply glue to the sides of the interior of your basket.
2. Press each side piece onto the glued areas, ensuring they adhere smoothly.
If you want additional security, you can sew the sides in place using a needle and thread or a sewing machine.
To enhance functionality, consider adding pockets to your liner:
1. Cut small rectangles from your chosen fabric.
2. Hem all edges as described earlier.
3. Sew or glue these pockets onto one or more side pieces before attaching them to your basket.
This will allow you to store utensils, napkins, or even small containers securely.

- Add Trims: You can sew or glue ribbons or decorative trims along the top edges of your lining for an extra touch. This can create a charming contrast against your chosen fabric.
- Use Insulated Fabric: If you want to keep your food warm or cold, consider using insulated fabric as part of your lining. This is particularly useful for transporting dishes that need temperature control.
- Personalize with Embroidery: If you're skilled in embroidery, consider adding initials or a small design on your liner for a personal touch.
Once everything is securely attached:
1. Check for any loose edges and secure them with additional glue if necessary.
2. Give everything one final press with an iron to smooth out any wrinkles and ensure everything is flat against the basket.
To keep your lined picnic basket looking fresh:
- Regularly check for any signs of wear and tear on both the wicker and lining.
- Clean spills immediately by wiping them with a damp cloth; if needed, remove and wash the lining according to its care instructions.
- Store your picnic basket in a cool, dry place when not in use to prevent mold growth on both wicker and fabric.
Lining a wicker picnic basket is a simple yet rewarding project that enhances both functionality and style. By following these steps, you can create a beautiful liner that protects your items while adding a personal touch to your picnic experience. Whether you're preparing for a romantic outing or a family gathering in nature, having an aesthetically pleasing and functional picnic basket will elevate your experience.

Cotton or linen fabrics are recommended due to their durability and ease of cleaning.
Yes, fabric glue is an excellent alternative if you prefer not to sew. Just ensure it's strong enough to hold up under use.
Remove the liner if possible and wash it separately according to fabric care instructions. Wipe down the wicker with a damp cloth.
Yes! An insulated liner can help maintain food temperatures during picnics.
You can personalize it by choosing fabrics that reflect your style or adding decorative elements like ribbons, embroidery, or appliqués.
[1] https://thesimplehomeplace.com/how-to-sew-a-basket-liner-for-a-rectangular-basket/
[2] https://thanhcongcraft.com/how-to-make-a-wicker-picnic-basket/
[3] https://www.youtube.com/watch?v=zB34lmIIopk
[4] https://www.frenchknot.com.au/blog.php?poid=518
[5] https://www.vickymyerscreations.co.uk/how-to-line-a-picnic-hamper-post-sponsored-by-volkswagen/
[6] https://www.confessionsofaserialdiyer.com/thrift-store-baskets-go-coastal/
[7] https://www.youtube.com/watch?v=bAW1m-ebjnM
[8] https://www.confessionsofaserialdiyer.com/upcycled-picnic-basket-with-a-no-sew-liner/
[9] https://www.prima.co.uk/craft/sewing/news/a27238/basket-liners/
[10] https://www.confessionsofaserialdiyer.com/no-sew-fabric-basket-liner/
[11] https://muldale.com/large-picnic-baskets
[12] https://www.koch.com.au/picnic-basket-buying-guide-faq
[13] https://www.pinterest.com/ideas/picnic-basket-liner/947991907815/
[14] https://bebraveandbloom.com/how-to-make-a-diy-basket-liner/
[15] https://www.vickymyerscreations.co.uk/how-to-line-a-picnic-hamper-post-sponsored-by-volkswagen/
[16] https://www.confessionsofaserialdiyer.com/upcycled-picnic-basket-with-a-no-sew-liner/
[17] https://www.youtube.com/watch?v=bAW1m-ebjnM
[18] https://www.istockphoto.com/de/bot-wall?returnUrl=%2Fde%2Fphotos%2Fwicker-picnic-basket
[19] https://thanhcongcraft.com/how-to-make-a-wicker-picnic-basket/
[20] https://www.istockphoto.com/de/bot-wall?returnUrl=%2Fde%2Fphotos%2Fpicnic-basket
[21] https://www.shutterstock.com/search/picnic-basket-line?image_type=photo&page=4
[22] https://www.youtube.com/watch?v=pJmp9Z4CZbA
[23] https://thesimplehomeplace.com/how-to-sew-a-basket-liner-for-a-rectangular-basket/
[24] https://www.youtube.com/watch?v=PEcoJNfCZ1w
[25] https://www.confessionsofaserialdiyer.com/thrift-store-baskets-go-coastal/
[26] https://www.thebasketcompany.com/oval-lidded-wicker-picnic-basket-red-check-lining-p1122