Views: 222 Author: Tomorrow Publish Time: 2024-12-02 Origin: Site


Content Menu
● Understanding Roselle Hibiscus
● Caring for Your Woven Basket
● The Cultural Significance of Basket Weaving
>> 1. What is the best time to harvest roselle hibiscus for basket weaving?
>> 2. Can I use other plants for basket weaving?
>> 3. How do I dye the fibers for my basket?
>> 4. Is basket weaving a difficult skill to learn?
>> 5. How can I ensure my woven basket lasts a long time?
Roselle hibiscus, scientifically known as *Hibiscus sabdariffa*, is not only celebrated for its vibrant red calyces and culinary uses but also for its fibrous stems, which can be transformed into beautiful woven baskets. This article will guide you through the process of turning roselle hibiscus into a woven basket, covering everything from harvesting the plant to the final weaving techniques.

Roselle hibiscus is a tropical plant native to Africa and widely cultivated in various regions for its edible parts. The plant grows tall, reaching heights of up to 6 feet, and produces striking red flowers. The calyces, which are the fleshy parts surrounding the flower, are commonly used to make herbal teas, jams, and jellies. However, the fibrous stems of the plant are equally valuable, providing a sustainable material for basket weaving.
To begin your basket-making journey, you first need to harvest the roselle hibiscus. Here's how to do it:
1. Timing: Harvest the stems when the plant is mature, typically in late summer or early fall. The stems should be firm and have a vibrant color.
2. Cutting: Use sharp garden shears to cut the stems at the base. Aim for stems that are at least 1 inch in diameter for optimal fiber yield.
3. Preparation: Remove the leaves and any small branches from the stems. You will be left with long, straight pieces of the plant that are ideal for weaving.
Once you have harvested the stems, the next step is to prepare the fibers for weaving:
1. Soaking: Soak the cut stems in water for several hours or overnight. This process softens the fibers, making them easier to work with.
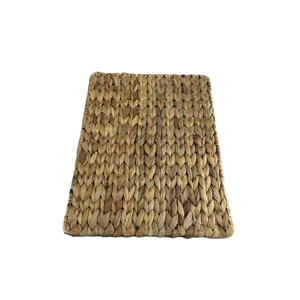
2. Stripping: After soaking, carefully strip the outer bark from the stems. You can do this by using your fingers or a knife. The inner fibers are what you will use for weaving.
3. Drying: Once stripped, hang the fibers to dry in a shaded area. This prevents them from becoming brittle and maintains their flexibility.
With your fibers prepared, you can now start weaving your basket. Here are some basic techniques to get you started:
1. Basic Weave: Begin by creating a base for your basket. Lay several fibers side by side to form a flat circle. Use additional fibers to weave in and out of the base, creating a sturdy foundation.
2. Coiling: For a more rounded basket, use the coiling technique. Start with a small circle and gradually add more coils, securing each layer with additional fibers.
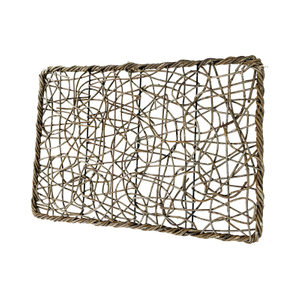
3. Twining: This technique involves twisting two or more strands together as you weave. It creates a textured pattern and adds strength to the basket.
4. Finish the Edges: Once you reach the desired height, finish the edges by tucking the ends of the fibers into the basket or creating a decorative border.

As you become more comfortable with basic techniques, you can explore advanced weaving patterns to enhance the aesthetic appeal of your baskets:
1. Chevron Pattern: This pattern involves alternating colors or fibers to create a zigzag effect. It adds visual interest and can be achieved by carefully planning your fiber placement.
2. Spiral Weave: This technique creates a spiral effect by gradually shifting the fibers as you weave. It can be particularly striking when using dyed fibers.
3. Lattice Weave: This involves creating a grid-like structure by weaving horizontal and vertical fibers together. It is a more complex technique but results in a sturdy and decorative basket.
4. Rim Decoration: Consider adding decorative elements to the rim of your basket. This could include beads, shells, or additional colored fibers to create a unique finish.
- Practice: If you are new to basket weaving, practice with smaller pieces before attempting a full-sized basket.
- Experiment: Don't be afraid to experiment with different patterns and techniques. Each basket can be unique based on your creativity.
- Use Natural Dyes: If you want to add color to your basket, consider using natural dyes made from plants or fruits. This not only enhances the beauty of your basket but also keeps it eco-friendly.
- Stay Organized: Keep your workspace organized to make the weaving process smoother. Having all your materials within reach will help you focus on your craft.
- Be Patient: Weaving can be time-consuming, especially for beginners. Take your time and enjoy the process. The more you practice, the better you will become.
Once your basket is complete, it's essential to care for it properly to ensure its longevity:
- Storage: Store your basket in a cool, dry place away from direct sunlight to prevent fading and damage.
- Cleaning: If your basket gets dirty, gently wipe it with a damp cloth. Avoid soaking it in water, as this can weaken the fibers.
- Re-shaping: If your basket loses its shape, you can lightly mist it with water and reshape it while it's damp. Allow it to dry in its new shape.
Basket weaving is not just a craft; it is an art form that has been practiced for centuries across various cultures. In many communities, woven baskets are integral to daily life, used for storage, transport, and even ceremonial purposes. The techniques and styles of weaving can vary significantly from one culture to another, reflecting the local materials available and the traditions of the people.
In regions where roselle hibiscus is grown, basket weaving can also serve as a means of economic empowerment. By creating and selling woven products, artisans can support their families and preserve their cultural heritage. This craft not only provides a source of income but also fosters community ties as knowledge and skills are passed down through generations.
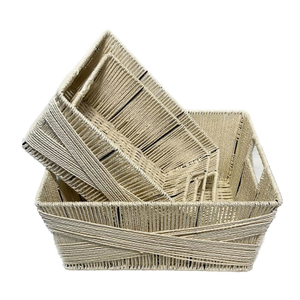
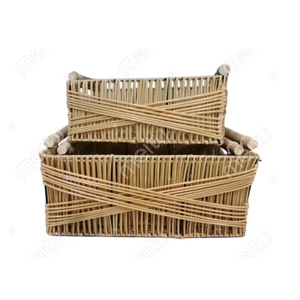
Turning roselle hibiscus into a woven basket is a rewarding and creative process that connects you with nature and traditional crafting techniques. By following the steps outlined in this article, you can create beautiful, functional baskets that showcase the unique qualities of this versatile plant. Whether you use your basket for storage, decoration, or as a gift, the effort you put into crafting it will surely be appreciated.

The best time to harvest roselle hibiscus is in late summer or early fall when the stems are mature, firm, and vibrant in color.
Yes, many plants can be used for basket weaving, including willow, rushes, and grasses. Each type of plant offers different textures and colors.
You can dye the fibers using natural dyes made from plants, fruits, or vegetables. Soak the fibers in the dye solution until you achieve the desired color.
Basket weaving can be challenging for beginners, but with practice and patience, anyone can learn the techniques. Start with simple projects and gradually move to more complex designs.
To ensure your woven basket lasts, store it in a cool, dry place, clean it gently, and avoid exposing it to direct sunlight for extended periods. Regular care will help maintain its shape and integrity.