Views: 222 Author: Tomorrow Publish Time: 2025-02-12 Origin: Site


Content Menu
● Understanding the Basics of Basket Weaving
● Essential Tools and Equipment
● Dyeing Techniques for Basket Weaving
● Basic Basket Weaving Techniques
● Step-by-Step Guide to Weaving a Colored Basket
● Tips and Tricks for Successful Basket Weaving
● Weaving a Diagonal Green Grass Basket
● FAQ
>> 1. What are the best materials for adding color to baskets?
>> 2. How do I prevent the colors from bleeding when dyeing basket weaving materials?
>> 3. Can I mix different weaving techniques in one basket?
>> 4. How do I maintain the shape of my basket while weaving?
>> 5. What can I do to make my basket weaving projects more durable?
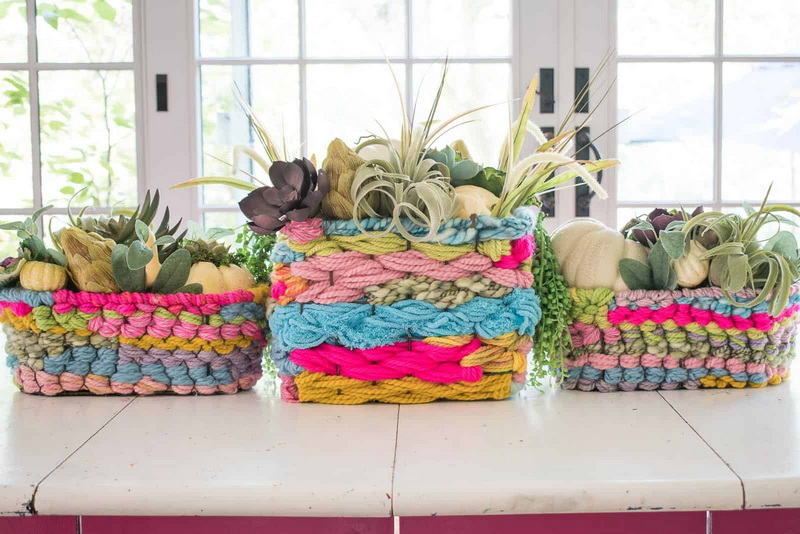
Basket weaving is an ancient craft that has evolved from a practical necessity into a cherished art form. The ability to create beautiful and functional objects from natural materials is deeply satisfying. Adding color to your basket weaving projects opens up a whole new world of creative possibilities, allowing you to personalize your creations and match them to your unique style and decor. This comprehensive guide will take you through the process of weaving a colored basket, from selecting materials to mastering various techniques. Whether you're a beginner or an experienced weaver, you'll find valuable tips and inspiration to create stunning, colorful baskets.
Before diving into the specifics of weaving a colored basket, it's essential to understand the fundamental techniques and materials involved in basket weaving.
What is Basket Weaving?
Basket weaving is the process of interlacing materials to create a three-dimensional object, typically a container[3]. Historically, baskets were used for carrying belongings, storing food, and various other practical purposes[3]. Today, basket weaving is also valued as a decorative craft.
Materials Used in Basket Weaving
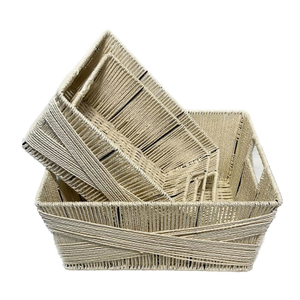
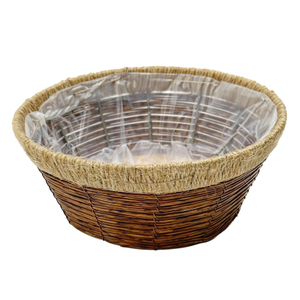
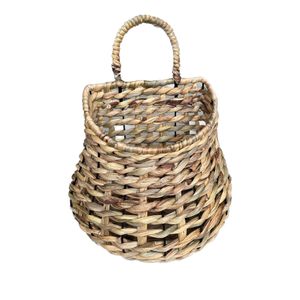
The materials you choose will significantly impact the final product's appearance, durability, and texture. Common materials include:
-Natural Fibers: These include reed, willow, bamboo, grasses, and various types of wood[3].
-Synthetic Materials: Plastic and paper can also be used, offering different aesthetic and functional qualities.
-Dyes and Paints: For adding color, you can use natural dyes, commercial dyes, or paints specifically designed for use on natural fibers.
Having the right tools will make the weaving process smoother and more enjoyable. Here are some essentials:
-Basket Weaving Tools: These include a bodkin, packing tool, and awl[1].
-Scissors or Knife: For cutting materials to the desired length[2].
-Measuring Tape: To ensure accurate dimensions.
-Clips or Clothespins: To hold the weaving in place[2].
-Gloves: To protect your hands, especially when working with dyes or rough materials.
-Water Basin: Some materials need to be soaked to become more pliable.
Proper preparation is key to achieving a professional-looking result. Here's how to prepare your materials for weaving:
1. Soaking: Soak natural fibers in water until they become flexible[7]. The soaking time depends on the material's thickness and type.
2. Drying: After dyeing, allow the materials to dry completely before weaving[7]. This prevents the colors from bleeding and ensures the basket holds its shape.
3. Cutting: Cut the weaving materials to the required lengths based on your basket design.
Adding color to your baskets can be achieved through various dyeing techniques. Here are some popular methods:
Natural Dyes:
-Source: Natural dyes are derived from plants, minerals, and insects[3].
-Process: Extract the dye by boiling the natural material in water. Then, soak the fibers in the dye bath until the desired color is achieved.
-Pros: Environmentally friendly and produces unique, subtle colors.
-Cons: Can be less consistent and require more preparation time.
Commercial Dyes:
-Source: Synthetic dyes are available in a wide range of colors and can be purchased from craft stores[7].
-Process: Follow the manufacturer's instructions for mixing and applying the dye. Typically, this involves dissolving the dye in hot water and immersing the fibers until the desired color is achieved.
-Pros: Consistent color, easy to use, and widely available.
-Cons: May contain chemicals and can be less environmentally friendly.
Painting:
-Source: Acrylic paints and fabric paints can be used to add color to your baskets[7].
-Process: Apply the paint directly to the fibers using a brush or sponge. You can create various effects, such as stripes, gradients, or intricate designs.
-Pros: Allows for detailed designs and a wide range of colors.
-Cons: Can make the fibers less flexible and may chip or fade over time.

Several fundamental techniques are used in basket weaving. Mastering these will allow you to create a wide variety of basket designs.
1. Plain Weave: Also known as a simple weave, this technique involves passing the weft (horizontal) strands over and under the warp (vertical) strands, alternating each row[3]. This creates a checkerboard pattern and is the most basic weaving technique.
2. Twill Weave: In a twill weave, the weft strands pass over and under two or more warp strands at a time, creating a diagonal pattern[6]. This technique adds texture and visual interest to the basket.
3. Twining: This technique involves twisting two weft strands around each other as they are woven around the warp strands[3]. Twining is often used to create a strong and decorative base or rim for the basket.
4. Coiling: Coiling involves wrapping a core material (such as straw or rope) with a weaving material and then stitching the coils together to form the basket[1]. This technique is often used to create sturdy and decorative baskets.
5. Plaiting: Plaiting involves interlacing the warp and weft strands in a diagonal pattern[10]. This technique is often used to create the base of the basket.
Here's a detailed guide to weaving a colored basket, incorporating different techniques and color patterns:
Materials You'll Need:
-Reed (various colors)
-Scissors
-Water basin
-Measuring tape
-Clips
-Bodkin
Step 1: Preparing the Base
1. Soak the Reed: Submerge the reed in water for about 30 minutes until pliable[7].
2. Create the Slats: Lay out the base slats. You'll typically need 8-12 slats, depending on the desired size of your basket.
3. Weave the Base:
-Interlace the slats in a plain weave pattern to create a square or circular base[3].
-Ensure the weave is tight and even.
Step 2: Setting Up the Uprights
1. Insert Uprights: Insert additional reed pieces (uprights) into the base, spacing them evenly around the perimeter. These will form the vertical structure of the basket.
2. Secure the Uprights: Fold the ends of the base slats up along the sides of the uprights to secure them in place. Use clips to hold everything together.
Step 3: Weaving the Sides
1. Choose Your Weaving Technique: Select a weaving technique for the sides, such as plain weave, twill weave, or twining[3].
2. Start Weaving:
-Begin weaving the colored reed around the uprights, following your chosen technique.
-For a plain weave, pass the reed over and under each upright, alternating each row.
-For a twill weave, pass the reed over and under two or more uprights at a time, creating a diagonal pattern.
-For twining, use two strands of reed, twisting them around each other as you weave around the uprights[10].
3. Create Color Patterns:
-Introduce different colors of reed to create stripes, bands, or other patterns.
-Overlap the ends of the old and new weavers for about four spokes, hiding both ends behind a spoke[7].
4. Maintain Tension: Keep the weaving tight and even to create a sturdy and uniform basket[3].
-Add some looseness between each set of stakes[5].
Step 4: Shaping the Basket
1. Mold the Sides: As you weave, gently mold the sides of the basket to create the desired shape. You can make the basket straight, flared, or curved, depending on your preference.
2. Ensure Symmetry: Regularly check the symmetry of the basket to ensure it is balanced and uniform.
Step 5: Finishing the Rim
1. Fold Down the Uprights: Once you reach the desired height, fold the uprights down over the last row of weaving.
2. Tuck in the Ends: Tuck the ends of the uprights into the weaving to secure them and create a finished edge[5].
3. Add a Rim: For a more decorative finish, you can add a separate rim to the basket. This can be made from a thicker piece of reed or another material, such as leather or wood.
Step 6: Embellishments (Optional)
1. Add Decorative Elements: Enhance your basket with additional embellishments, such as beads, shells, or embroidery.
2. Apply a Finish: To protect the basket and enhance its appearance, apply a clear finish, such as varnish or lacquer.
-Keep Materials Moist: Regularly moisten the reed to keep it pliable and prevent it from cracking[7].
-Maintain Even Tension: Consistent tension is key to creating a sturdy and uniform basket[3].
-Plan Your Design: Sketch out your design and color patterns before you start weaving to ensure a cohesive and visually appealing result.
-Take Breaks: Basket weaving can be physically demanding, so take frequent breaks to stretch your hands and avoid fatigue.
-Experiment with Techniques: Don't be afraid to try new weaving techniques and color combinations to create unique and innovative designs.
You can use long blades of green grass and start weaving them in a basic weaving pattern to weave a diagonal green grass basket[9].
1. Create a large weave to form the base of the basket[9].
2. Turn the weave to form a diamond shape to give you a diagonal weave pattern[9].
3. Fold the four sides flat to create the bottom edges[9].
4. Fold the corner blade over to create an edge and continue the weaving pattern[9].
5. Weave each blade all the way down the basket and continue the weaving pattern to create the sides[9].
6. As you weave pull the blades of grass tight to create a strong basket[9].
-Using Dry or Brittle Materials: Always soak natural fibers to make them pliable before weaving[7].
-Inconsistent Tension: Uneven tension can lead to a misshapen or unstable basket[3].
-Ignoring the Design: Failing to plan your design and color patterns can result in a disorganized and unattractive basket.
Weaving a colored basket is a rewarding and creative endeavor. By mastering the basic techniques, understanding the properties of different materials, and experimenting with color, you can create beautiful and functional objects that reflect your personal style. Whether you're making a simple storage basket or an elaborate decorative piece, the possibilities are endless. So gather your materials, unleash your creativity, and start weaving your own colorful masterpiece.

The best materials for adding color to baskets include natural dyes, commercial dyes, and acrylic paints[7]. Natural dyes offer subtle, unique colors and are environmentally friendly, while commercial dyes provide consistent color and ease of use. Acrylic paints allow for detailed designs but may affect the flexibility of the fibers.
To prevent colors from bleeding, ensure the materials are thoroughly rinsed after dyeing and before weaving[7]. Use a color fixative if necessary, and allow the materials to dry completely before starting your project.
Yes, you can mix different weaving techniques to add visual interest and texture to your basket[3]. For example, you might use a plain weave for the base, a twill weave for the sides, and twining for the rim[10].
To maintain the shape of your basket, ensure consistent tension throughout the weaving process[3]. Use clips to hold the sides in place and regularly check the symmetry of the basket as you work.
To increase the durability of your basket weaving projects, use high-quality materials and weave tightly[3]. Apply a clear finish, such as varnish or lacquer, to protect the basket from moisture and wear.
[1] https://www.gathered.how/arts-crafts/weaving/beginners-guide-to-basket-weaving
[2] https://www.domestika.org/en/courses/3613-weaving-techniques-for-colorful-basketry
[3] https://www.textileindie.com/beginners-guide-basket-weaving/
[4] https://www.honglingjin.co.uk/163752.html
[5] https://www.youtube.com/watch?v=F5fssON85g4
[6] https://www.matttommey.com/blog/archives/01-2024
[7] https://www.countryseat.com/faq-weaving-terms.html
[8] https://iphysresearch.github.io/blog/post/writting/writting-in-the-sciences/unit3/
[9] https://christinedebeer.ca/tutorials/weaving-a-diagonal-green-grass-basket
[10] https://www.burkemuseum.org/static/baskets/Teachersguideforbasketry.htm
[11] https://www.youtube.com/watch?v=0pF3cVsIKoc