Views: 222 Author: Tomorrow Publish Time: 2024-12-07 Origin: Site


Content Menu
● Historical Context of Basket Weaving
>>> Techniques for Base Weaving
>> Step 4: Finish the Top Edge
>> Step 5: Add Handles (Optional)
>>> Final Touches
● FAQs
>> 1. How long does it take to make a rattan basket?
>> 2. Can I use other materials besides rattan?
>> 3. What if my rattan dries out while I'm working?
>> 4. Do I need special tools for basket weaving?
>> 5. Is basket weaving suitable for beginners?
Weaving a rattan basket is a fulfilling craft that combines creativity, patience, and skill. This guide will walk you through the process step-by-step, ensuring that you have all the necessary tools and techniques to create your own beautiful rattan basket.
")
Basket weaving is one of humanity's oldest crafts, dating back thousands of years across various cultures worldwide. Ancient civilizations utilized baskets not only for storage but also for fishing, gathering food, and ceremonial purposes. In many indigenous cultures, basket weaving is more than just a practical skill; it's an art form deeply intertwined with cultural identity and heritage.
In regions like Africa and Asia, baskets often feature intricate designs that symbolize various cultural narratives or beliefs. For example:
- In Native American cultures, specific patterns may represent tribal affiliations or spiritual beliefs.
- In African communities, baskets may be used in rituals or celebrations and often reflect local flora and fauna through their designs.
Understanding this historical context can enhance your appreciation of this craft as you create your own pieces.
Before we begin, gather the following materials:
- Rattan Reed: The primary material for weaving. Rattan comes in various sizes and thicknesses, so choose according to your project.
- Water Tub: For soaking the rattan. A large tub or basin works best.
- Cloth Measuring Tape: To measure your materials accurately.
- Reed Cutters or Scissors: For cutting the rattan to your desired lengths.
- Pencil: To mark measurements on the rattan.
- Spoke Weight or Hammer: To hold down the stakes while weaving, ensuring they don't shift.
- Straight-Tipped Packer: To tighten the weave as you go along.
- Spray Bottle: To keep the rattan moist while working, preventing it from drying out.

Soak the rattan reed in water for at least 30 minutes. This step is crucial as it makes the rattan flexible and prevents it from cracking during weaving. After soaking, lay the rattan on a towel to dry slightly, making it easier to handle.
- Use warm water if possible; it helps soften the fibers more effectively.
- If you're working with thicker rattan, consider soaking it longer—up to an hour.
- Always keep extra rattan submerged in water while you work to maintain its flexibility.
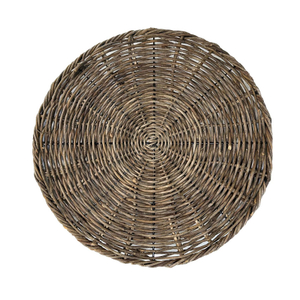
Start by creating the base of your basket. Take a few strands of rattan reed and weave them together in a circular or oval shape. This will serve as the foundation of your basket. You can use a molding form to help shape the base if needed.
1. Circle Method: Lay several pieces of rattan in a circle and weave additional pieces through them, alternating between over and under.
2. Oval Method: For an oval base, start with two long pieces of rattan laid parallel. Weave shorter pieces across them in an oval shape.
Continue weaving the rattan reed upwards to form the sides of the basket. Use different weaving techniques, such as the “over and under” pattern, to create a sturdy structure. Keep your weave tight to ensure durability.
- Twining: Use two strands of rattan twisted together as you weave up the sides for added strength.
- Randing: This technique involves weaving around a central point and is great for adding decorative patterns.
Once you reach your desired height, finish the top edge by folding the rattan reed over and weaving it around the last row. This creates a neat and finished look.
- Ensure that all ends are secured properly to prevent unraveling.
- You can also add decorative elements like beads or colored threads at this stage.
If you want to add handles, create gaps in the weaving where you want them to be. Insert thicker rattan or cane pieces through these gaps and secure them by weaving around them.
- Make sure handles are evenly spaced for balance.
- Consider reinforcing handles by weaving additional strands around them for extra support.
After completing your basket, trim any excess rattan with your reed cutters or scissors. Make sure to leave enough length for securing any loose ends.
- Tuck any loose ends into the weave or secure them with glue if necessary.
- You can also apply a natural finish or sealant if you plan on using your basket outdoors.

There are several techniques you can experiment with while weaving your basket:
- Plaiting: Overlapping strips of material in a basket weave pattern; great for creating intricate designs.
- Coiling: Wrapping a long material around a center point; useful for making bowls or round baskets.
- Twining: Using two or more materials twisted together; adds texture and strength.
- Randing: Weaving in a circular pattern around a central point; perfect for decorative borders.
- Over-under Weave: A basic technique involving weaving over and under; foundational for most basket designs.
Once you've mastered basic techniques, consider experimenting with different designs:
1. Color Patterns: Incorporate dyed rattan reeds into your weave for vibrant designs.
2. Shape Variations: Try making square or rectangular baskets instead of traditional round ones.
3. Decorative Elements: Add embellishments such as fabric scraps, beads, or even natural elements like flowers or leaves.
To ensure your woven basket lasts:
- Keep it away from direct sunlight to prevent fading and drying out.
- Clean gently with a damp cloth; avoid soaking it in water as this can weaken the structure over time.
- Store in a cool, dry place when not in use.
Weaving a rattan basket is not only an enjoyable craft but also a practical skill that can lead to beautiful handmade items for personal use or gifts. With practice, you can explore various designs and techniques to create unique baskets that showcase your creativity. Whether you're crafting a simple storage solution or an intricate decorative piece, each basket tells its own story through its design and craftsmanship.

The time it takes can vary depending on size and complexity but typically ranges from 2 to 5 hours for beginners.
Yes, other materials like willow, bamboo, or seagrass can also be used for basket weaving.
If your rattan starts to dry out, use a spray bottle to mist it with water to keep it flexible.
While specific tools are helpful, many can be substituted with common household items like scissors and clamps.
Absolutely! With some patience and practice, anyone can learn to weave baskets.