Views: 222 Author: Tomorrow Publish Time: 2025-01-07 Origin: Site


Content Menu
>> Step 1: Prepare Your Workspace
>> Step 5: Choose Your Painting Technique
>> Step 6: Add Decorative Elements (Optional)
● Creative Ideas for Repurposing Wicker Baskets
● FAQ
>> 1. Can I use any type of paint on wicker baskets?
>> 2. How long does it take for painted wicker baskets to dry?
>> 3. Is it necessary to use primer?
>> 4. Can I change the color of synthetic wicker baskets?
>> 5. What should I do if I don't like the new color?
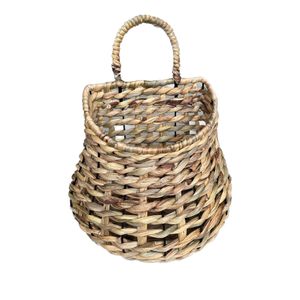
Wicker baskets are versatile and can add a rustic charm to any decor. However, over time, they may lose their luster or simply not match your current aesthetic. Changing the color of a wicker basket is a simple and rewarding DIY project that can breathe new life into these decorative items. This guide will walk you through the steps to effectively change the color of your wicker basket, along with tips, techniques, and materials needed for the job.
Before starting, gather the following materials:
- Wicker Basket: Choose a basket that you want to repaint.
- Sandpaper: For smoothing the surface.
- Primer: A bonding primer suitable for wicker.
- Paint: Acrylic, chalk paint, or spray paint in your desired color.
- Paintbrush or Spray Paint: Depending on your preference.
- Drop Cloth or Newspaper: To protect your workspace.
- Glazing Liquid (optional): For a translucent finish.
- Paper Towels: For wiping excess paint.
Set up a clean and well-ventilated area to work. Lay down a drop cloth or newspapers to protect surfaces from paint splatters. Ensure you have good lighting for visibility.
Before painting, clean the wicker basket thoroughly to remove dust and dirt. Use mild soap and water if necessary, then let it dry completely. Cleaning is crucial because any dirt or grease can prevent the paint from adhering properly.
Lightly sand the surface of the basket with sandpaper. This helps the primer and paint adhere better to the wicker material. Be gentle to avoid damaging the weave. Sanding also removes any old finishes that might interfere with the new paint.
Using a brush or spray primer, apply a thin coat over the entire basket. This step is crucial if you're using acrylic or spray paint to ensure even coverage and better adhesion. Allow it to dry completely according to the manufacturer's instructions. Priming not only enhances adherence but also helps in achieving a more vibrant color.
You can choose between several painting techniques depending on the desired finish:
1. Opaque Finish:
- Mix your chosen paint with water (if using chalk paint) for easier application.
- Apply with a brush or spray in even strokes.
- Let it dry before applying additional coats as needed.
2. Translucent Finish:
- Mix 75% paint with 25% glazing liquid for a lighter effect.
- Brush this mixture onto one side of the basket, ensuring it gets into all nooks and crannies.
- Wipe off excess paint with a paper towel to reveal some of the original wicker color underneath.
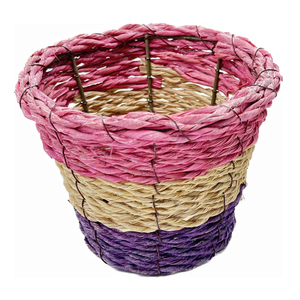
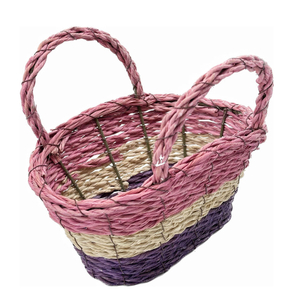
3. Ombre Effect:
- For an ombre effect, start with your lightest color at the top of the basket and gradually blend into darker shades towards the bottom.
- Use a sponge or brush to blend colors while they are still wet for a seamless transition.
4. Stenciling Designs:
- If you want to add patterns or designs, consider using stencils or painter's tape to create sharp lines.
- Use a contrasting color for added interest and dimension.
If you want to add patterns or designs, consider using stencils or painter's tape to create sharp lines. Use a contrasting color for added interest. You could also use natural elements like twine or fabric strips as accents around the rim of the basket after painting.
Once you are satisfied with the base color and any decorative elements, apply a final clear coat if desired. This can be a spray sealant that protects your work and adds shine. A clear coat will help protect against scratches and wear over time.
Allow your basket to dry completely for at least 24 hours before using it again. This ensures that all layers are fully cured and prevents smudging. Make sure to place it in an area free from dust and debris during this time.

- Test Your Paint: Always test your paint on a small area first to see how it adheres and looks once dry.
- Spray Paint Technique: If using spray paint, hold the can about 8 inches away from the surface for even coverage. Move in smooth motions rather than staying in one spot too long to avoid drips.
- Layering Colors: Consider layering different colors for depth; allow each layer to dry before applying another.
- Seasonal Themes: Change colors based on seasons! Soft pastels for spring, vibrant colors for summer, warm tones for fall, and cool hues for winter can keep your decor fresh year-round.
Changing colors isn't just about aesthetics; it's also an opportunity to repurpose wicker baskets entirely! Here are some creative ideas:
1. Planters: After painting, use them as decorative planters by placing potted plants inside them. Ensure you line them with plastic if they will hold soil directly.
2. Storage Solutions: Use colorful baskets as storage solutions in children's rooms or play areas; they can store toys while adding pops of color.
3. Gift Baskets: Transform painted baskets into beautiful gift baskets for special occasions by filling them with goodies.
4. Wall Decor: Create wall art by hanging several painted baskets in different sizes together; this adds texture and interest to your walls.
5. Table Centerpieces: Use painted baskets as centerpieces on dining tables filled with seasonal decorations like flowers or fruits.
Changing the color of a wicker basket is an easy DIY project that can enhance your home decor significantly. With just a few materials and simple steps, you can transform an old basket into a stylish piece that complements your aesthetic. Whether you prefer an opaque look or something more translucent, this guide provides all you need to know for a successful makeover.
By experimenting with different techniques and colors, you can create unique pieces that reflect your personality and style. Enjoy the process of creativity as you breathe new life into your wicker baskets!

Yes, you can use acrylic paints, chalk paints, or spray paints; just ensure they are suitable for outdoor use if necessary.
Typically, allow at least 24 hours for complete drying before using them again.
While not always necessary, using primer helps improve adhesion and provides a more even finish.
Yes, synthetic wicker can also be painted; however, ensure you use paints designed for plastic surfaces for best results.
If you're unhappy with the new color, you can repaint over it after sanding down the surface again or use a darker shade to cover it up.
[1] https://thanhcongcraft.com/how-to-paint-wicker-basket-how-to-change-the-color-of-a-wicker-basket/
[2] https://inmyownstyle.com/how-to-change-the-color-of-a-wicker-basket.html
[3] https://www.editage.cn/insights/ke-yan-xie-zuo-ying-yu-lun-wen-ti-mu-zhai-yao-yu-guan-jian-ci-jie-xi-2144
[4] https://lifeonsummerhill.com/how-to-paint-wicker-baskets/
[5] https://inmyownstyle.com/how-to-create-an-aged-driftwood-finish-on-baskets.html
[6] http://secdr.github.io/2015/12/12/ying-yu-lun-wen-de-xie-zhong-gao/
[7] https://www.loveourreallife.com/how-to-update-old-baskets-with-driftwood-stain-or-other-gray-stain/
[8] http://library.ttcdw.com/uploadfiles/201403/1395581407.pdf
[9] https://graduate.shisu.edu.cn/_upload/article/34/80/bd4949214d11ab764fb3259a644c/43473032-3cb2-43b9-9bf5-65d50d8519bd.pdf