Views: 222 Author: Tomorrow Publish Time: 2024-12-27 Origin: Site


Content Menu
● The Basics of Basket Weaving
>> Step 1: Choose Your Technique
>> Step 2: Prepare Your Materials
>> Step 5: Finish the Top Edge
● Tips for Successful Basket Weaving
● Exploring Different Techniques in Detail
● Incorporating Modern Materials
● FAQ
>> 1. What materials can I use for basket weaving?
>> 2. How long does it take to make a basket?
>> 3. Can I wash my handmade baskets?
>> 4. Is basket weaving difficult for beginners?
>> 5. Where can I find more resources on basket weaving?
Creating handmade baskets is not only a rewarding craft but also a practical way to add a personal touch to your home decor. Whether you want to organize your space, create unique gifts, or simply enjoy a relaxing hobby, basket weaving offers endless possibilities. This guide will walk you through various techniques, materials, and steps to make beautiful baskets right at home.
Basket weaving is an ancient craft that involves interlacing materials to create functional and decorative items. The primary techniques include:
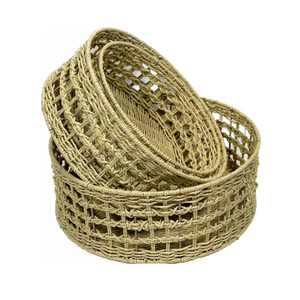
- Coiling: This technique involves wrapping a flexible material around a core and stitching the coils together. It's ideal for creating round baskets.
- Twining: Twining uses two or more strands woven around a set of spokes. This method allows for intricate patterns and is suitable for both round and oval baskets.
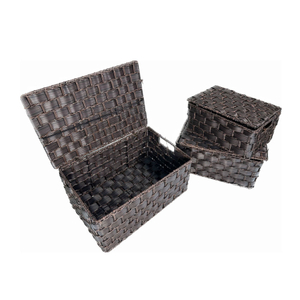
- Plaiting: This technique utilizes flat materials like palm leaves, woven in a checkerboard pattern. It's great for making flat or rectangular baskets.
- Wicker: Known for its complexity, wicker weaving starts with spokes and involves weaving materials in an over-under pattern.
Understanding these techniques will help you choose the right method based on the materials you have and the type of basket you want to create.
Before starting your basket-making journey, gather the following materials:
- Natural fibers (like reeds, grasses, or willow)
- Twine or rope
- Cardboard (for structural support)
- Scissors
- Glue (hot glue gun recommended)
- Fabric scraps (for decoration)
- Optional: dye or paint for coloring
Decide on the basket weaving technique that suits your skill level and desired outcome. For beginners, coiling or twining may be easier to start with.
If using natural fibers:
1. Soak them in water for several hours to make them pliable.
2. Cut them into manageable lengths based on your design.
For cardboard baskets:
1. Cut the cardboard into the desired shape (base and sides).
2. Reinforce with additional layers if necessary.
For coiling:
1. Form a small circle with your core material.
2. Begin wrapping the flexible material around it, securing with stitches as you go.
For twining:
1. Lay out your spokes (the vertical pieces).
2. Weave your twining material over and under the spokes, pulling tight to secure.
For cardboard:
1. Use hot glue to attach fabric or rope around the edges of your cardboard base.
Continue adding rows to build up the sides of your basket:
- For coiling, keep wrapping and stitching until you reach the desired height.
- For twining, alternate between over and under each spoke while adding new spokes as needed.
To complete your basket:
1. Tuck in any loose ends of material.
2. If using fabric, fold it over the top edge and glue it down for a clean finish.
3. Optionally, add a rim by folding the last row of spokes inward and securing them with glue.

Once your basket is complete, consider personalizing it further:
- Use fabric scraps to line the inside.
- Add embellishments like beads or shells.
- Paint or dye the exterior for added color.
- Practice patience: Weaving takes time, especially if you're new to it.
- Keep materials damp: This will help prevent breaking during weaving.
- Experiment with different materials: Don't hesitate to try various fibers or even recycled items like paper or plastic strips.
To enhance your basket-making skills, let's delve deeper into some popular weaving techniques that can elevate your creations:
Coiling is one of the oldest forms of basket weaving and allows for great creativity in shape and design. Here's how to do it effectively:
1. Start with a sturdy base made from coiled fibers.
2. Use a needle to stitch each coil together as you build upwards.
3. Vary the thickness of your coils for texture; thicker coils can create a more rustic look while thinner coils yield finer details.
4. Experiment with different colors by dyeing fibers beforehand or by using colored threads in your stitching process.
Twining can create stunning patterns and is often used in traditional basketry:
1. Begin by laying out your spokes evenly spaced apart.
2. Take two strands of flexible material; one goes over a spoke while the other goes under.
3. Alternate this pattern as you move around the basket, ensuring that each row is tightly woven.
4. Incorporate different colors or textures by switching materials mid-weave for added visual interest.
Plaiting offers a unique aesthetic and is particularly effective when using flat materials:
1. Cut strips of bamboo or palm leaves into equal lengths.
2. Start by laying down three strips parallel to each other; take one strip and weave it over and under the others.
3. Continue this process while adding more strips as needed until you reach your desired size.
4. Plaiting can also be combined with other techniques for hybrid designs that showcase both structure and flexibility.
While traditional materials like willow are still popular, modern basket makers often experiment with synthetic fibers such as raffia or even fabric strips from old clothing:
1. Using Raffia: Raffia is versatile; it can be dyed easily and provides a softer texture compared to rigid reeds.
2. Fabric Strips: Cut old t-shirts or cotton fabric into strips; these can be woven similarly to natural fibers but offer more color options.
3. Recycled Materials: Consider using plastic bags cut into strips; this not only gives new life to waste but also creates waterproof baskets perfect for outdoor use.
To enhance your learning experience, consider watching video tutorials that demonstrate these techniques visually. Here are some recommended resources:
Handmade baskets are not only functional but also serve as beautiful pieces of art that reflect your creativity. By following these steps and experimenting with different techniques and materials, you can create unique baskets that suit your style and needs. Whether you're looking to organize your home or give thoughtful gifts, basket weaving is a fulfilling craft that anyone can enjoy.

You can use natural fibers like reeds, grasses, and willow; synthetic materials like plastic strips; or even recycled items like paper or fabric scraps.
The time varies based on complexity and size; simple baskets can take 1–3 hours while more intricate designs may take several days.
Most handmade baskets can be spot cleaned; however, avoid soaking them in water as it may damage certain materials.
Basket weaving can be challenging at first but becomes easier with practice. Start with simple designs and gradually work up to more complex patterns.
Numerous online platforms offer tutorials, courses, and community forums dedicated to basket weaving—YouTube is an excellent starting point!
[1] https://vatimahome.com/blogs/news/techniques-for-weaving-wicker-baskets-a-step-by-step-guide-to-the-weaving-techniques-used-in-making-wicker-baskets-including-plaiting-coiling-and-twining
[2] https://www.textileindie.com/beginners-guide-basket-weaving/
[3] https://www.matttommey.com/blog/the-5-best-basket-weaving-techniques-using-natural-materials
[4] https://www.matttommey.com/basket-weaving-techniques
[5] https://mythornbury.co.uk/thornbury/basket-weaving-history
[6] https://petalplum.com.au/blog/make-your-own-basket-how-to-weave-with-raffia-fabric
[7] https://www.triedandtrueblog.com/super-easy-cardboard-basket-weaving/
[8] https://www.textileindie.com/beginners-guide-basket-weaving-materials/
[9] https://www.ginasbaskets.com/patterns
[10] https://debhart.co.uk/history-of-basket-weaving/