Views: 222 Author: Tomorrow Publish Time: 2025-03-19 Origin: Site


Content Menu
● Introduction to Wicker Baskets
>> Benefits of Hanging Wicker Baskets
● Preparing to Hang Your Wicker Basket
● Step-by-Step Guide to Hanging Wicker Baskets
>> Step 1: Gather Your Tools and Materials
>> Step 2: Determine the Right Spot
>> Step 3: Check Wall Suitability
● Tips for Styling Your Wicker Baskets
>> 1. What type of hardware is best for hanging wicker baskets?
>> 2. How do I ensure my wicker basket is level?
>> 3. Can I hang wicker baskets on any type of wall?
>> 4. What if I don't want to drill holes in the wall?
>> 5. How do I style multiple wicker baskets on the wall?
Mounting a wicker basket on a wall can be a stylish and practical way to add storage or decoration to any room. This guide will walk you through the steps to securely and beautifully hang your wicker baskets, ensuring they are both functional and visually appealing.
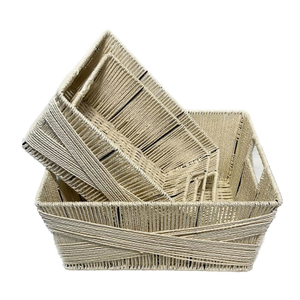
Wicker baskets are made from woven fibers, often from natural materials like rattan or bamboo. They are versatile, eco-friendly, and can fit into various interior designs, from rustic to modern. Whether you're using them for storage, decoration, or a combination of both, hanging them on the wall can elevate your space's aesthetic while keeping floors and surfaces clutter-free.
- Aesthetic Appeal: Wicker baskets add a natural, earthy touch to your decor.
- Practical Storage: They provide a convenient place to store items like books, linens, or kitchen utensils.
- Flexibility: Suitable for various rooms, including living rooms, kitchens, and bedrooms.
Before you start, ensure you have all the necessary tools and materials.
- Drill: For making holes in the wall.
- Screws: For securing the basket to the wall.
- Wall Anchors: Essential for heavier baskets or certain types of walls (e.g., drywall, plaster).
- Level: To ensure the basket hangs straight.
- Pencil: For marking the wall.
- Measuring Tape: To measure the space and ensure even spacing between baskets.
- Hanging Hardware: Depending on the basket type, you might need S-hooks, wire, or rope.
1. Purpose: Decide if the basket is for decoration or storage. Decorative baskets can be placed at eye level or above furniture, while functional baskets should be easily accessible.
2. Wall Type: Different walls require different hanging methods:
- Drywall and Plaster: Find a stud for extra support.
- Brick and Concrete: Use plastic wall plugs.

Ensure you have all the necessary tools and materials ready. This includes checking if your drill is fully charged and if you have the correct size of screws and wall anchors.
Choose a location based on the basket's purpose and ensure it complements the room's layout. Consider the height and proximity to other decorative elements.
Identify the wall type and plan accordingly:
- Drywall/Plaster: Locate a stud for heavier baskets. You can use a stud finder for this.
- Brick/Concrete: Use wall plugs to ensure the screws hold securely.
1. Hold the Basket: Place the basket against the wall to mark where the screws will go. Use a pencil to lightly mark these spots.
2. Mark the Wall: Ensure the marks are level by using a level tool.
3. Drill Pilot Holes: Carefully drill holes into the wall, making sure they are not too large for the screws.
1. Insert Anchors: If using wall anchors, insert them into the drilled holes. This provides extra support for the basket.
2. Hang the Basket: Align the basket with the marks and screw it into place. Make sure it is securely fastened.
3. Adjust as Needed: Ensure the basket is level and secure. If necessary, adjust the screws slightly.
For those who prefer not to drill holes, consider using:
- Command Hooks: Adhesive strips that can hold a surprising amount of weight. They are easy to install and remove without damaging the wall.
- Mounting Putty: A non-permanent solution ideal for renters or those who frequently redecorate.

- Balance: Start with the largest basket in the center and arrange smaller ones around it. This creates a visually appealing arrangement.
- Pattern: Create a cohesive look by organizing baskets by size, color, or pattern.
- Theme: Ensure the baskets fit with the room's theme or decor style. For example, natural-colored baskets suit a rustic theme, while painted baskets might fit better in a modern setting.
- Incorrect Leveling: Always use a level to ensure the basket hangs straight. An uneven basket can detract from the overall aesthetic.
- Insufficient Support: Use wall anchors for heavier baskets to prevent them from falling and causing damage.
Combine wicker baskets with other textures like wood, metal, or glass to create a layered look. This adds depth and visual interest to your space.
Place small plants or herbs inside the baskets to bring in a touch of nature. This not only adds color but also purifies the air and enhances the natural feel of the wicker.
Incorporate wicker baskets into a gallery wall featuring framed photos, artwork, or other decorative items. This creates a unique and eclectic display.
- Dusting: Regularly dust the baskets to keep them looking fresh and clean.
- Cleaning: For tougher stains, gently wipe the baskets with a damp cloth. Avoid using harsh chemicals that might damage the material.
- Protection: Consider applying a natural sealant to protect the wicker from moisture and wear.
Hanging wicker baskets on the wall is a simple yet effective way to enhance your home's decor while providing practical storage solutions. By following these steps and tips, you can create a beautiful and functional space that reflects your personal style.

The choice of hardware depends on the basket's size and weight. For lighter baskets, adhesive strips or picture hangers are suitable. For heavier baskets, screws with wall anchors are recommended.
Use a level tool to mark the wall before drilling holes. This ensures the basket hangs straight and evenly.
Most walls can support wicker baskets, but the method may vary. For drywall and plaster, find a stud for support. For brick or concrete, use wall plugs.
Consider using Command Hooks or mounting putty for a non-permanent solution that doesn't require drilling.
Start with the largest basket in the center and arrange smaller ones around it. You can also organize them by size, color, or pattern to create a visually appealing arrangement.
[1] https://saratogahomeonline.com/blogs/farmhouse-thoughts/organization-made-easy-how-to-hang-baskets-on-the-wall-for-storage-in-any-room
[2] https://thanhcongcraft.com/how-to-hang-wicker-baskets-on-wall-for-storage/
[3] https://blog.csdn.net/Angelina_Jolie/article/details/139147709
[4] https://arterahome.com/blogs/all/how-to-hang-wicker-basket-wall-art-to-create-a-stylish-space-for-beginners
[5] https://amishrules.com/how-to-hang-baskets-on-a-wall-for-storage/
[6] https://blog.csdn.net/u012549626/article/details/127719965
[7] https://www.youtube.com/watch?v=HQy8DzhKi0g
[8] https://www.hnlbasket.com/how-to-hang-wicker-baskets.html
[9] https://blog.csdn.net/weixin_40289064/article/details/79669930
[10] https://blog.meridianny.com/four-easy-steps-to-hang-a-basket-wall/