Views: 222 Author: Tomorrow Publish Time: 2024-12-08 Origin: Site


Content Menu
● What is a Rattan Proofing Basket?
● Why Season Your Rattan Proofing Basket?
● Step-by-Step Guide to Season Your Rattan Proofing Basket
>> Step 1: Prepare Your Basket
● Tips for Using Your Rattan Proofing Basket
● Maintenance of Your Rattan Proofing Basket
● Troubleshooting Common Issues
● FAQ
>> 1. Can I wash my rattan proofing basket?
>> 2. How often should I season my banneton?
>> 3. What type of flour should I use for dusting?
>> 4. Can I put my banneton in the oven?
>> 5. What should I do if my banneton gets moldy?
Rattan proofing baskets, also known as bannetons, are essential tools for any bread baker, especially those who enjoy making artisanal sourdough. These baskets help shape the dough during the proofing stage, allowing it to rise without spreading out. Properly seasoning your rattan proofing basket is crucial for ensuring that your dough does not stick and that you achieve the beautiful spiral patterns characteristic of artisan bread. This article will guide you through the steps to season your rattan proofing basket effectively, along with tips on maintenance, usage, and troubleshooting.

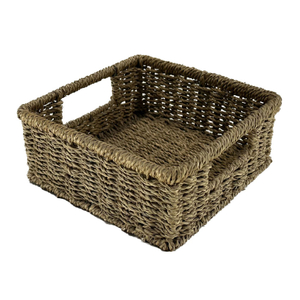
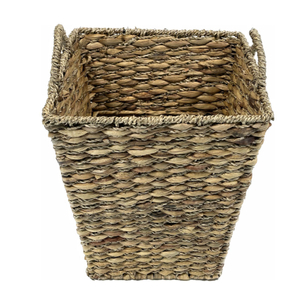
A rattan proofing basket is a woven container made from rattan, designed specifically for proofing bread dough. Its structure allows for excellent airflow, which is essential for the fermentation process. The unique design also leaves an imprint on the dough, creating the signature look of artisan loaves.
Seasoning your rattan proofing basket helps create a non-stick surface that prevents the dough from adhering to the basket during proofing. This process builds up a layer of flour and natural oils from the dough, similar to how one would season a cast iron skillet. Proper seasoning enhances the basket's performance and longevity.
- New rattan proofing basket
- Water (preferably in a spray bottle)
- Rice flour or whole wheat flour
- A clean towel or cloth
- A bowl for excess flour
1. Remove Labels: Ensure all labels are removed from your new basket.
2. Dampen the Basket: Lightly mist the inside of the basket with water using a spray bottle or wipe it with a damp cloth. The goal is to make it just damp, not soaking wet.
1. Dust Generously: Sprinkle a generous amount of rice flour or whole wheat flour into the damp basket. Make sure to cover all surfaces, including the sides and bottom.
2. Tap Out Excess: After dusting, gently tap the basket to remove any excess flour back into your bowl.
1. Dry Completely: Place the basket in a warm area with good air circulation and allow it to dry completely for at least one to two hours. This step is crucial as it prevents moisture buildup that can lead to mold.
Once your basket is dry, it is now seasoned and ready for use! You can now place your shaped dough inside for proofing.
- Always Dust Before Use: Each time you use your basket, dust it again with rice flour or whole wheat flour before placing your dough inside.
- Avoid Wheat Flour: Using rice flour is recommended because it does not contain gluten-forming proteins that can cause sticking.
- Consider Using a Liner: If you want to avoid any imprints on your dough or if you're working with very wet doughs, consider using a linen liner in your banneton.
Proper maintenance will extend the life of your rattan proofing basket:
1. Cleaning: After each use, simply brush off excess flour and allow it to dry thoroughly. If there's sticky residue, rinse it under cold water and use a stiff brush.
Cleaning the Basket
2. Storage: Store your dry banneton in a well-ventilated area to prevent mold growth. Avoid plastic bags as they trap moisture.
3. Avoid Soaps: Never use soap or detergents on your banneton as they can be absorbed by the rattan and affect future bakes.

- Dough Sticking: If your dough sticks to the basket despite seasoning, ensure you are using enough flour when dusting before each use.
- Mold Growth: If mold appears, it's best to replace the basket as mold can be difficult to remove from rattan.
Seasoning your rattan proofing basket is an essential step for successful bread baking. By following these simple steps—dampening, dusting with flour, allowing it to dry—you'll prepare your basket for many successful bakes ahead. With proper care and maintenance, your banneton will serve you well in creating beautiful artisan loaves.
No, it's best not to wash it with soap or submerge it in water; just rinse under cold water if necessary and allow it to dry.
You should season it each time you first use it after cleaning or if you notice sticking during proofing.
It's recommended to use rice flour because it helps prevent sticking better than wheat flour due to its lower gluten content.
No, bannetons are not designed for baking; they are only used for proofing dough.
If mold develops, replace the banneton as cleaning may not remove all spores due to its porous nature