Views: 222 Author: Tomorrow Publish Time: 2025-01-04 Origin: Site


Content Menu
● Understanding Basket Weaving
>> 1. Preparing Your Materials
>> Step 1: Gather Your Materials
>> Step 2: Soak Your Weaving Materials
● The Cultural Significance of Basket Weaving
● Advanced Techniques in Basket Weaving
● Historical Context of Basket Weaving
● Specific Projects Suitable For Beginners
● Troubleshooting Common Issues Faced by Weavers
● Incorporating Embellishments into Baskets
● Frequently Asked Questions (FAQ)
>> 1. What type of materials are best for beginners?
>> 2. How long does it take to make a basket?
>> 3. Can I use synthetic materials?
>> 4. What should I do if my reeds break while weaving?
>> 5. Is there a specific technique I should start with?
Basket weaving is an ancient craft that has evolved over centuries, allowing artisans to create beautiful and functional pieces. Whether you're looking to make a simple basket for storage or a decorative piece for your home, learning the basics of basket weaving can be both enjoyable and rewarding. This comprehensive guide will walk you through the essential techniques, materials, and steps to start your basket weaving journey.
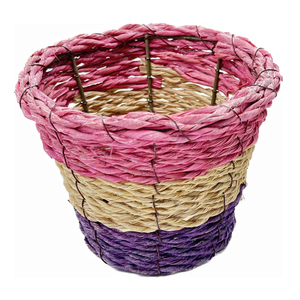
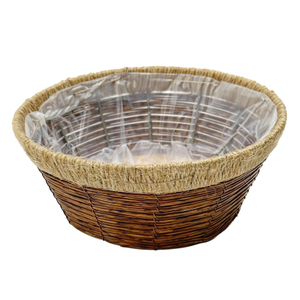
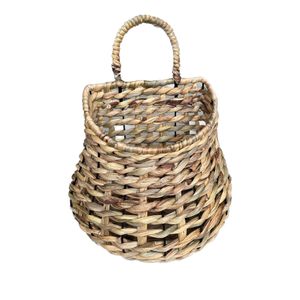
Basket weaving involves interlacing materials to create a structure. The most common materials used are reeds, willow, and other flexible plant fibers. The techniques can vary widely based on cultural traditions and the intended use of the basket.
Before starting your basket weaving project, gather the following materials:
- Weaving Materials: Common choices include:
- Round reed
- Willow branches
- Cane
- Pine needles
- Tools:
- Scissors or garden shears
- A knife for cutting stakes
- A bodkin or large needle for threading
- A soaking container (for materials like willow or reed)
- Workspace: A flat surface where you can comfortably work on your basket.
Most natural materials need to be soaked in water to become pliable. This process helps prevent breakage during weaving.
- Soaking: Submerge your reeds or willow in water for at least 30 minutes before starting.
The base of your basket is crucial as it sets the foundation for the entire structure. Here's how to create it:
- Stake Arrangement: For a simple round basket, select several stakes (the vertical supports) and arrange them in a circle.
- Twining Technique: Start by using two weavers (the horizontal strands) to weave around the stakes. Alternate between going over and under each stake.
Once your base is established, it's time to build the sides of your basket.
- Pricking Up: As you weave, gently lift the stakes upright using a knife to create an even height.
- Continuing the Weave: Use the same over-under technique as before, ensuring each row is tight and even.
Ensure that you have all necessary tools and materials ready at hand.
Soak your reeds or willow branches in water for about 30 minutes to make them flexible.
1. Arrange six thick pieces of willow or reed in a star shape.
2. Cross them at their midpoints to form an "X."
3. Begin twining with thinner weavers around these spokes, alternating positions as you go.
1. Once your base reaches the desired size, lift each stake upright.
2. Continue weaving around each stake using your weavers.
3. Keep the weave tight and compact to ensure stability.
1. When you reach your desired height, trim any excess stakes.
2. Fold down the tops of the stakes and tuck them into the last row of weaving for a neat finish.
3. Secure everything with twine if necessary.

As you become more comfortable with basic techniques, consider exploring various weaving patterns that can elevate your skills:
- Plain Weave: This foundational technique involves an over-one, under-one pattern that alternates from row to row[1].
- Twill Weave: This method creates diagonal patterns by alternating over multiple stakes[5].
- Three-Rod Wale: A popular structure that produces a sturdy basket with a herringbone effect[3].
- Twining: Used for both securing bases and building walls, this technique adds decorative elements[5].
- Random Weaving: This technique mimics natural forms found in nature, allowing for unique shapes and designs[7].
To enhance your understanding of these techniques, consider watching tutorial videos or looking at step-by-step images that demonstrate each stage of basket weaving:
- Not Soaking Enough: Ensure that your materials are adequately soaked; otherwise, they may crack during weaving.
- Loose Weaving: Always keep tension on your weavers to avoid gaps in your basket structure.
Once you've completed your basket, proper care will help maintain its appearance and longevity:
- Cleaning: Gently wipe down with a damp cloth; avoid soaking it in water as this can cause warping.
- Storage: Keep baskets in a cool, dry place away from direct sunlight to prevent fading and drying out.
Basket weaving has deep roots in many cultures around the world. For instance:
- In Native American cultures, baskets were essential for gathering food, carrying water, and ceremonial purposes[10]. Each tribe had distinct styles based on available materials and cultural significance.
- In Africa, woven baskets often reflect local artistry and serve practical purposes in daily life[10].
Understanding these cultural contexts can deepen your appreciation for this craft as you create your own pieces.
As you gain confidence in basic techniques, exploring advanced methods will enhance both functionality and aesthetics in your work:
Coiling involves stitching plant fibers around a core material such as rope or reed strips. This method allows for intricate designs while providing strength and durability[7].
To start coiling:
1. Begin with a core material; secure it at one end.
2. Wrap additional fibers around this core tightly.
3. Use needle and thread or thin wire to stitch through both layers as you coil outward.
This technique is particularly effective for creating bowls or decorative pieces that require more structure than traditional woven baskets can provide.
Plaiting involves interlacing strips of material at right angles to create flat surfaces[5]. This method is ideal for making mats or flat baskets intended for serving food or displaying items.
To implement plaiting:
1. Lay out two strips horizontally.
2. Take another strip vertically; weave it over one horizontal strip and under another.
3. Continue alternating until reaching desired dimensions; secure ends by tucking them under adjacent strips.
Plaiting not only adds texture but also allows creative color combinations when using dyed materials[3].
Basket weaving has been practiced since prehistoric times across various cultures globally:
- In ancient Egypt, baskets were used not only for storage but also as trade items due to their lightweight yet durable nature.
- In Europe during medieval times, woven baskets served essential functions within households—from carrying goods to being utilized as agricultural tools during harvest seasons[10].
Understanding these historical contexts enriches our appreciation of modern practices while connecting us with artisans from centuries past who relied heavily on this craft for survival and community identity.
Here are three beginner-friendly projects that incorporate basic techniques learned earlier:
This project uses basic twining skills:
1. Create a circular base using six spokes arranged evenly.
2. Use round reed as weavers; alternate over/under until reaching desired height.
3. Finish by tucking spokes into last row tightly; secure with twine if necessary.
This project helps solidify foundational skills while providing immediate results—a perfect confidence booster!
This mat serves both decorative purposes while practicing plaiting:
1. Cut several strips of colored reed into equal lengths.
2. Lay two strips horizontally; begin plaiting vertically as described above.
3. Continue until reaching desired size; secure ends neatly beneath adjacent strips.
This mat can adorn tabletops or serve as an artistic display piece within any room setting!
This project introduces coiling techniques effectively:
1. Choose a sturdy core material like rope; secure one end.
2. Begin wrapping additional fibers tightly around this core while stitching through both layers.
3. Shape into desired bowl form; finish by securing ends neatly underneath previous wraps.
Creating coiled bowls not only enhances dexterity but also adds functional artistry within home decor!

Even experienced weavers encounter challenges during their crafting journey—here are some common issues along with solutions:
- Material Breakage: If reeds snap easily while working:
- Ensure they are sufficiently soaked before starting; consider soaking longer if necessary.
- Use thicker materials if consistently facing breakage issues—this will provide added strength during manipulation[6].
- Uneven Tension: If some areas appear loose:
- Regularly check tension throughout weaving process; adjust accordingly by pulling tighter when needed.
- Consider using clamps temporarily on larger projects—this keeps everything secure until finished completely[4].
By addressing these common concerns early on in practice sessions leads towards smoother crafting experiences overall!
Adding embellishments transforms functional baskets into artistic expressions! Here are some ideas:
- Utilize beads woven directly into sidewalls during construction—this adds visual interest without compromising structural integrity.
- Attach feathers or ribbons after completion—these elements introduce color variations while personalizing each piece according individual preferences[7].
Experimentation remains key here—don't hesitate trying different combinations until finding what resonates most personally!
Basket weaving is not only a practical skill but also an art form that allows for creativity and expression. With practice, anyone can master this craft and create beautiful baskets for various uses. Whether you're making gifts, home decor items, or functional storage solutions, the possibilities are endless once you learn how to start a basket weave.

For beginners, round reed or willow is recommended due to their flexibility and ease of use.
The time it takes varies based on complexity; simple baskets can take a few hours while intricate designs may take several days.
Yes, synthetic materials can be used; however, traditional natural fibers are often preferred for their aesthetic qualities.
If reeds break, you can splice in new pieces by overlapping them with existing ones and continuing your weave.
Starting with basic twining or plain weave techniques is advisable as they provide a solid foundation for more complex patterns later on.
[1] https://www.textileindie.com/beginners-guide-basket-weaving/
[2] https://www.sfomuseum.org/exhibitions/woven-legacies-basketry-native-north-america
[3] https://craft.ideas2live4.com/2023/04/06/beautiful-basket-weaving-patterns/
[4] https://www.textileindie.com/basket-weaving-tools/
[5] https://www.matttommey.com/blog/the-5-best-basket-weaving-techniques-using-natural-materials
[6] https://www.youtube.com/watch?v=LSmHrX4-1Bk
[7] https://basketweavee.com/advanced-basket-weaving/
[8] https://hhperkins.com/collections/basket-supplies
[9] https://www.matttommey.com/basket-weaving-techniques
[10] https://blog.kachinahouse.com/basket-weavings-importance-in-native-american-culture/