Views: 222 Author: Tomorrow Publish Time: 2024-12-07 Origin: Site


Content Menu
● What is a Rattan Proofing Basket?
● Why Use a Rattan Proofing Basket?
● Preparing Your Rattan Proofing Basket
● Using Your Rattan Proofing Basket
● Cleaning Your Rattan Proofing Basket
● FAQ
>> 1. What type of flour should I use in my proofing basket?
>> 2. How do I prevent my dough from sticking to the basket?
>> 3. Can I use my rattan proofing basket without lining it?
>> 4. How often should I clean my proofing basket?
>> 5. What should I do if mold develops on my basket?
Rattan proofing baskets, also known as bannetons or brotforms, are essential tools for any serious bread baker. They are designed to hold the shape of the dough during the final rise before baking, allowing for better structure and a beautiful crust. In this guide, we will explore how to effectively use a rattan proofing basket, including preparation, usage, cleaning, and maintenance. This comprehensive article will also include helpful images and videos to enhance your understanding.

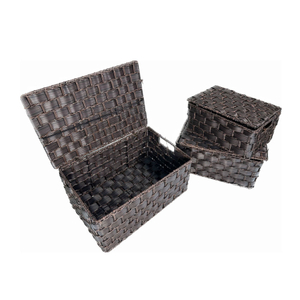
A rattan proofing basket is a small basket made from rattan, a type of palm that is flexible and durable. These baskets are specifically designed for proofing bread dough, providing support to maintain its shape while allowing air circulation. The unique texture of rattan also leaves beautiful patterns on the crust of the bread.
Using a rattan proofing basket offers several advantages:
- Shape Maintenance: The basket helps maintain the shape of the dough during proofing.
- Air Circulation: The porous nature of rattan allows the dough to breathe, which is essential for proper fermentation.
- Beautiful Crust Patterns: The texture of the basket imprints lovely spiral designs on the crust.
Before using your rattan proofing basket for the first time, it's essential to prepare it properly. Here's how to do it:
1. Clean the Basket: Remove any labels or tags from the basket.
2. Dampen the Interior: Lightly mist the inside of the basket with water using a spray bottle. This step helps flour adhere better.
3. Dust with Flour: Generously dust the inside of the basket with flour (rice flour is recommended for its non-stick properties). Ensure that you cover all surfaces, tapping out any excess flour afterward.
4. Let It Dry: Allow the basket to dry completely before using it.
Once your basket is prepared, you can start using it for proofing your dough:
1. Shape Your Dough: After kneading, shape your dough into a tight ball (boule) or an oval (bâtard) depending on your basket's shape.
2. Flour Again: Dust the shaped dough lightly with flour to prevent sticking.
3. Place in Basket: Carefully place your dough into the prepared basket seam-side up (for boules) or seam-side down (for bâtards).
4. Cover and Let Rise: Cover the basket with a cloth or plastic wrap and let it rise in a warm place until doubled in size.

After proofing, follow these steps to bake your bread:
1. Preheat Your Oven: Preheat your oven according to your recipe's instructions.
2. Turn Out the Dough: Gently turn out your dough onto a baking surface or parchment paper.
3. Score and Bake: Score the top of your loaf with a sharp blade and bake as directed.
Proper cleaning and maintenance will extend the life of your rattan proofing basket:
- After Each Use: Shake out excess flour and let it air dry completely before storing.
- Deep Cleaning: If necessary, wash with mild soap and warm water using a soft brush. Avoid soaking it in water.
- Prevent Mold Growth: Ensure that the basket is completely dry before storing it away to prevent mold growth.
To keep your rattan proofing basket in good condition:
- Store in a dry place away from humidity.
- Avoid stacking baskets while they are still damp.
- Occasionally check for mold and clean as needed.

Using a rattan proofing basket is an excellent way to improve your bread baking skills. By following these steps for preparation, usage, cleaning, and maintenance, you can ensure that your baking experience is successful and enjoyable. With practice, you'll be able to create beautifully shaped loaves with professional-looking crusts.
Using rice flour is recommended because it doesn't create gluten like wheat flour does, reducing sticking issues.
Ensure you dust both the interior of the basket and the dough with plenty of flour before placing it inside.
Yes, you can use it without a liner; just make sure to prepare it properly with flour.
Shake out excess flour after each use; deep cleaning can be done occasionally or when needed.
Wash it with mild soap and warm water, then dry thoroughly before storing it again.