Views: 222 Author: Tomorrow Publish Time: 2024-12-06 Origin: Site


Content Menu
>> Step 1: Selecting and Preparing Bamboo
>> Step 3: Creating the Base of the Basket
● FAQ
>> 1. What type of bamboo is best for basket making?
>> 2. Can I use dried bamboo for weaving?
>> 3. How long does it take to make a mini bamboo basket?
>> 4. Is there any special care needed for bamboo baskets?
>> 5. Can I decorate my bamboo basket?
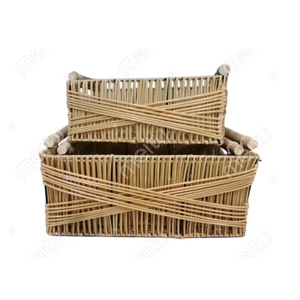
Creating a mini bamboo basket is a delightful and rewarding craft that connects you with nature and traditional craftsmanship. This guide will walk you through the entire process, from selecting the right bamboo to finishing touches. Whether you are a beginner or an experienced artisan, this step-by-step tutorial will help you create a beautiful and functional bamboo basket.

Before starting, gather the following materials:
- Fresh bamboo poles: Choose thin, flexible bamboo for easier weaving.
- Knife or machete: For cutting the bamboo.
- Twine or thin strips of bamboo: Used for binding the basket.
- Water and a large pot: For boiling bamboo to make it more pliable.
- Towel or clean cloth: For drying the bamboo.
- Sharp scissors: To trim any excess bamboo strips.
- Measuring tape: For accurate measurements of your strips and rings.
- Clamps or weights: Optional, but helpful for holding your work in place while weaving.
1. Choose Quality Bamboo: Select bamboo that is fresh, with a suitable thickness and flexibility. Look for straight poles without cracks or blemishes. The best time to harvest bamboo is during the dry season when it has less moisture content.
2. Cutting the Bamboo: Using your knife, cut the bamboo into strips approximately 1 meter long. You will need several strips for weaving. Make sure to cut at an angle to avoid splintering.
3. Peeling and Splitting: Peel off the outer layer of the bamboo strips to expose the inner fibers. This can be done carefully with a knife. If you prefer thinner strips, split the bamboo lengthwise using your knife.
Soak the bamboo strips in water for about 30 minutes to make them more pliable. This step is crucial as it prevents the bamboo from breaking during weaving. You can also boil the strips for about 10 minutes if you want them to be even softer, but be careful not to overdo it as this can weaken the fibers.
1. Forming Circular Rings: Take two ends of each soaked strip and tie them together using twine to form circular rings. The diameter of these rings will determine the size of your basket. For a mini basket, aim for rings with a diameter of about 10-15 cm.
2. Stacking Rings: Place these rings on top of each other, ensuring that their joints do not overlap. This will create a sturdy base. You can secure them temporarily with clamps or weights if needed.
3. Reinforcing the Base: To add strength to your base, consider adding additional circular rings or weaving a few horizontal strips across the bottom before moving on to the sides.
1. Weaving Technique: Use additional bamboo strips to weave in and out of the rings, creating the sides of your basket. You can choose different patterns such as diagonal or parallel weaving depending on your design preference.
2. Tight Weaving: Make sure to weave tightly to ensure that your basket holds its shape and is durable. As you weave, check that each strip is evenly spaced and aligned.
3. Adding Height: Continue weaving until you reach your desired height (typically around 10-15 cm for a mini basket). If you want to create a taller basket, ensure that you have enough strips prepared beforehand.
4. Creating Handles (Optional): If you wish to add handles to your basket, leave two longer strips on opposite sides while weaving up the sides of your basket. Once you reach the top, bend these strips outward and secure them in place with additional twine or by weaving them back into the basket.
1. Trimming Excess Strips: Once you reach your desired height, trim any excess bamboo strips using sharp scissors. Be careful not to cut too close to your woven sections; leave a small amount for securing.
2. Sealing and Protecting: Optionally, apply a layer of wax or paint to give your basket a shiny finish and protect it from moisture. Beeswax is an excellent natural option that adds durability without compromising flexibility.
3. Drying: Allow your finished basket to dry completely before using it. Place it in a well-ventilated area away from direct sunlight to prevent warping.

- Practice Makes Perfect: If you're new to basket weaving, don't be discouraged by initial attempts! Practice with scrap pieces of bamboo before starting on your final project.
- Experiment with Designs: Once you're comfortable with basic weaving techniques, try experimenting with different patterns or incorporating colored materials for added flair.
- Join a Workshop: Consider joining local craft workshops or online classes focused on basket weaving for hands-on experience and expert guidance.
Making a mini bamboo basket is not only a fun craft but also a way to appreciate traditional techniques that have been passed down through generations. With patience and practice, anyone can create beautiful baskets that serve both functional and decorative purposes.
This craft allows you to connect with nature while honing your skills in creativity and craftsmanship. Plus, handmade baskets make wonderful gifts or home decor items!

The best types of bamboo for basket making are those that are thin and flexible, such as *Phyllostachys* species like Moso or Guadua varieties.
While dried bamboo can be used, it is recommended to soak it in water first to make it more pliable and easier to work with.
The time required can vary, but typically it takes about 2-4 hours depending on your skill level and complexity of design.
To maintain your bamboo baskets, keep them dry and avoid prolonged exposure to water, which can weaken the material.
Absolutely! You can paint or stain your basket after completion or even incorporate colored strips during weaving for added design.