Views: 222 Author: Tomorrow Publish Time: 2025-02-10 Origin: Site


Content Menu
● Preparing the Weaving Material
● Step-by-Step Weaving Process
● Embellishments and Customizations
● FAQ
>> 1. What is the best material for weaving a basket on a metal frame?
>> 2. How do I keep the weaving material tight and even?
>> 3. Can I use different colors or patterns in my basket weave?
>> 4. How do I finish the edge of the basket for a clean look?
>> 5. What if my metal frame has sharp edges?
Weaving a basket on a metal frame is a rewarding and creative project that allows you to combine the durability of metal with the aesthetic appeal of woven materials. Whether you're aiming to create a functional storage solution or a decorative piece, understanding the techniques and materials involved is essential. This comprehensive guide will walk you through the process step by step, incorporating visual aids and addressing frequently asked questions to ensure you achieve a professional and beautiful result.
Before you begin, gather all the necessary materials and tools. The right preparation can significantly streamline the weaving process and improve the final product.
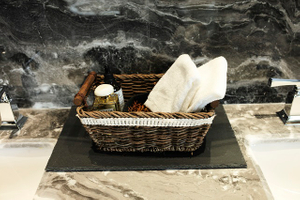
1. Metal Frame:
-Choose a metal frame that suits your desired basket shape and size. Common options include wire baskets, metal rings, or custom-welded frames[2].
-Ensure the frame is sturdy and free from rust or sharp edges. If necessary, clean and coat the frame with a rust-resistant primer and paint[8].
2. Weaving Material:
-Rattan: A classic choice for basket weaving due to its flexibility and durability[6]. Soak rattan in water for several hours to make it more pliable.
-Fabric Strips: Use cotton, linen, or synthetic fabrics cut into strips. Iron the fabric before cutting to ensure neat, even strips[3][5].
-Yarn or Twine: Ideal for a softer, more textured look[1]. Choose a material that is strong enough to withstand wear and tear.
-Water Hyacinth: Offers a natural, rustic aesthetic. Ensure it is properly dried before weaving to prevent mold[7].
-Veneer: Thin slices of wood that can be woven for an elegant look[4].
3. Tools:
-Scissors or Rotary Cutter: For cutting fabric or trimming weaving materials[3][5].
-Hot Glue Gun: To secure the ends of fabric strips or other materials[3][5].
-Pliers: For bending or adjusting the metal frame if needed.
-Measuring Tape: To ensure accurate cuts and consistent weaving[1].
-Clothespins or Clips: To hold the weaving material in place while working[1].
-Tapestry Needle: For weaving fine materials or creating intricate patterns[1].
-Safety Gloves: To protect your hands from sharp edges or hot glue.
1. Cleaning and Coating:
-Inspect the metal frame for any rust or imperfections. Clean the frame thoroughly with a wire brush or sandpaper to remove any rust[8].
-Apply a rust-resistant primer to the frame. Allow it to dry completely before applying paint[8].
-Choose a paint color that complements your weaving material. Apply several thin coats of paint, allowing each coat to dry before applying the next[8].
2. Adding Attachment Points:
-If your frame lacks sufficient points for weaving, you can add wire or twine to create additional anchors.
-Wrap wire around the frame at regular intervals, securing it tightly with pliers. These will serve as points to weave your material around.
1. Fabric Strips:
-Ironing: Iron the fabric to remove any creases. This ensures the strips are uniform and easy to work with[3].
-Cutting: Cut the fabric into strips of uniform width. A rotary cutter and ruler can help achieve precise cuts. The width of the strips will depend on the desired texture and the size of the basket[3][5].
-Joining: If a single strip is not long enough, overlap two strips by about an inch and secure with hot glue or by sewing them together[3].
2. Rattan:
-Soaking: Submerge the rattan in warm water for several hours, or overnight, to make it pliable. This prevents it from cracking during weaving[6].
-Cutting: Cut the rattan into appropriate lengths for weaving.
3. Yarn or Twine:
-Preparing: Wind the yarn or twine into balls or skeins to prevent tangling during the weaving process[1].
-Choosing: Select a yarn or twine that is strong and durable, suitable for the intended use of the basket.

1. Over-Under Weave:
-This is the most basic weaving technique. Start by attaching the end of your material to the frame with a dab of hot glue or by tying a knot[3].
-Weave the material over one wire or frame element and then under the next, continuing this pattern around the entire frame[3].
-On the next row, reverse the pattern: if you went over in the previous row, go under, and vice versa. This creates a tight, interlocking weave[3].
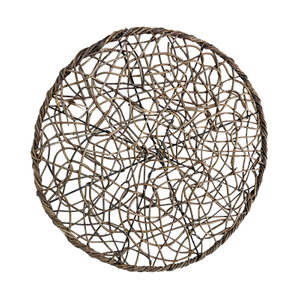
2. Twining Weave:
-Use two strands of weaving material simultaneously. Attach both strands to the frame.
-Twist the two strands around each other, then weave them around the frame elements. This creates a rope-like texture[1].
-Alternate the twist direction on each row for a more dynamic appearance.
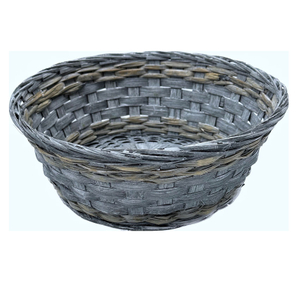
3. Wicker Weave:
-This involves weaving thicker, more rigid materials like rattan. Start by inserting the rattan vertically into the frame.
-Weave thinner strands horizontally, over and under the vertical pieces. This creates a traditional wicker basket look[1].
1. Starting the Weave:
-Secure the end of your chosen material to the metal frame. Use hot glue, a knot, or by wrapping it tightly around a frame element[3].
-Begin weaving around the frame, maintaining consistent tension to ensure a uniform appearance[1].
2. Maintaining Tension and Alignment:
-Keep the weaving material taut but not too tight to avoid distorting the frame.
-Use clothespins or clips to hold the woven material in place as you work, especially when starting a new row or joining strips[1].
-Periodically check the alignment of the weave to ensure it is straight and even[1].
3. Joining New Strips:
-When a strip of fabric or other material is about to run out, overlap the end with a new strip by about an inch[3].
-Secure the overlap with hot glue or by weaving the ends in to hide them[3].
-Ensure the join is smooth and doesn't create a bulge in the weave.
4. Finishing the Weave:
-When you reach the top of the frame, secure the final row of weaving material[1].
-Tuck the end of the material into the weave to hide it, or secure it with hot glue[1].
-Trim any excess material for a clean finish.
5. Adding a Rim:
-For a polished look, add a rim to the top edge of the basket[1].
-This can be done by folding the top row of fabric over and gluing it down, or by attaching a separate piece of material to create a border[1].
-A contrasting color or texture can add visual interest to the rim.
1. Adding Color:
-Incorporate different colors of fabric, yarn, or other materials to create patterns or designs[3].
-Alternate colors on different rows, or use a combination of colors within the same row for a more complex look[3].
2. Decorative Elements:
-Add beads, buttons, or other decorative elements to the weave for a unique touch.
-Embroider designs onto the fabric strips before weaving, or attach embellishments after the basket is complete.
3. Linings:
-For a more finished interior, add a fabric lining to the basket.
-Cut a piece of fabric to fit the inside of the basket, allowing extra material for folding over the top edge.
-Sew the lining together and attach it to the basket with fabric glue or by hand-stitching it in place.
Weaving a basket on a metal frame is a versatile and enjoyable craft that combines functionality with artistic expression. By carefully selecting your materials, preparing your frame, and mastering basic weaving techniques, you can create beautiful and durable baskets for a variety of uses. Whether you choose to follow a traditional pattern or experiment with your own designs, the possibilities are endless. With practice and creativity, you'll be crafting unique and personalized baskets that add charm and character to any space.

The best material depends on the desired look and function of the basket. Rattan is durable and classic[6], fabric strips add a soft, colorful touch[3][5], and yarn or twine provide texture[1]. Choose a material that is easy to work with and complements the style of your frame.
Maintain consistent tension while weaving, and use clothespins or clips to hold the material in place[1]. Periodically check the alignment of the weave to ensure it is straight. If the material becomes loose, gently tighten it as you go.
Yes, incorporating different colors or patterns can add visual interest and personalization[3]. Alternate colors on different rows, or use a combination of colors within the same row. You can also create patterns by varying the weaving technique or adding decorative elements.
Finish the edge by tucking the end of the weaving material into the weave, securing it with hot glue, or adding a rim[1]. A rim can be created by folding the top row of fabric over and gluing it down, or by attaching a separate piece of material to create a border.
If your metal frame has sharp edges, file them down with sandpaper or cover them with tape before you begin weaving. You can also apply a rubber or plastic coating to the edges for added safety. Always wear safety gloves to protect your hands during the weaving process.
[1] https://www.craftpassion.com/easy-basket-weaving/
[2] https://basketweavee.com/how-to-weave-a-basket-on-a-metal-frame/
[3] https://sugarbeecrafts.com/diy-fabric-woven-wire-basket
[4] https://www.youtube.com/watch?v=GvTEuLHizFg
[5] https://www.youtube.com/watch?v=s9TIQv37ieE
[6] https://www.pinterest.com/caneslinger/how-to-weave-rattan-on-metal-frames/
[7] https://www.youtube.com/watch?v=Lhti2maRoV0
[8] https://home24h.biz/how-to-produce/