Views: 222 Author: Tomorrow Publish Time: 2025-02-10 Origin: Site


Content Menu
>> Step 1: Making the Base (Slath)
>> Step 3: Creating the Sides (Waling)
>> Step 6: Adding a Handle (Optional)
● Adding Embellishments (Optional)
● FAQ
>> 1. What types of vines are best for basket weaving?
>> 2. How do I prepare the vines for weaving?
>> 3. What tools do I need for basket weaving?
>> 4. How do I create a strong base for the basket?
>> 5. How do I finish the basket and add a handle?
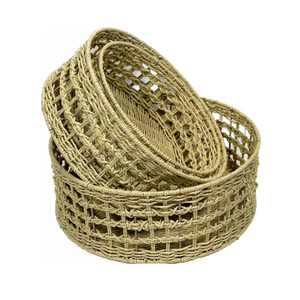
Weaving a basket out of vines is a rewarding craft that connects you with nature and tradition[6]. It's a skill that not only provides you with a functional item but also allows you to engage with the natural world in a creative and sustainable way. Basket weaving has been used for centuries across various cultures for storage, carrying goods, and even as decorative items[5]. Using vines adds a rustic and natural charm to your creations, making each basket unique. This guide provides a comprehensive, step-by-step approach to creating your own vine basket.
The first step in weaving a basket is gathering the right materials. Different vines offer different qualities, so choosing the right ones is crucial for the success of your project. Some popular choices include:
-Ivy: Ivy is a readily available and flexible vine, making it excellent for beginners[2]. It's easy to manipulate and can be found in many gardens or wooded areas[2].
-Blackberry Vines: These vines are sturdy and can add a robust structure to your basket[1]. Be cautious of the thorns and wear gloves when handling them[1].
-Honeysuckle: Known for its flexibility, honeysuckle vines are perfect for weaving intricate patterns[10]. They are easy to bend and hold their shape well[10].
-Bramble: Bramble vines are another good option, offering a good balance of flexibility and strength[3].
-Pruners or Sharp Knife: For cutting and trimming the vines[2].
-Gloves: To protect your hands from thorns and rough vines[1].
-Bucket or Tub: For soaking the vines to make them more pliable[3].
-Measuring Tape: To ensure your spokes are the correct length[2].
-Twist Ties: To temporarily hold vines in place[4].
Once you've gathered your vines, preparing them properly is essential. Freshly cut vines are easier to work with, but if they have dried out, soaking them in water will restore their flexibility[3].
1. Submerge the vines in a bucket or tub of water[3].
2. Allow them to soak for at least 2-3 hours, or overnight for drier vines[3].
3. The vines are ready when they are pliable and easy to bend without breaking[8].
Cleaning the vines ensures that your basket will be free of dirt and pests[5].
1. Rinse the vines thoroughly with water to remove any dirt or debris[5].
2. Use a cloth or brush to scrub off any stubborn dirt[5].
3. Allow the vines to air dry slightly before using them[5].
Boiling the vines can make them even more pliable, especially if they are thick or rigid[8].
1. Place the vines in a large pot and cover them with water[8].
2. Bring the water to a boil and let it simmer for 20-30 minutes[8].
3. Remove the vines and let them cool slightly before handling[8].

The base of the basket is crucial as it determines the overall structure and stability.
1. Cutting the Spokes:
-Cut six spokes of equal length[2]. The length will depend on the desired width of your basket base. For example, 10-inch spokes will create a smaller base[2].
2. Creating the Slath:
-Divide the spokes into two groups of three[2].
-Make a split in the center of three of the spokes[2].
-Create a slanting cut (slype) on one end of each of the remaining three spokes[2].
-Slide the slyped spokes through the split spokes to form the slath[2].
-This creates the center of the basket's base[2].
3. Securing the Slath:
-Select two thin weavers (such as ivy or periwinkle)[2].
-Insert their tips through the split spokes of the slath[2].
-Weave these vines around the slath in a clockwise direction using an over-under pattern (one weaver goes under a set of three spokes while the other goes over the same set)[2].
-Make two rounds to secure the center[2].
Expanding the base involves gradually separating the spokes to create a wider foundation.
1. Opening the Spokes:
-After two rounds, open out the slath spokes by gradually easing them apart as you continue to weave[2].
-Weave around the slath, going over and under one spoke at a time instead of three[2].
-Try to make the spokes equidistant for a uniform base[2].
2. Adding Weavers:
-When you reach the end of the first pair of weavers, add two new weavers[2].
-Secure the ends of both the old and new weavers by tucking them into the weave[2].
3. Continuing the Weave:
-Continue weaving until the base reaches your desired size, adding new weavers as needed[2].
-Use pruners to trim off the ends of the weavers and tuck the ends into the weaving[2].
-Trim the ends of the base spokes so they stick out about 1 inch past the weave[2].
Waling is a strong weave that secures the siding of the basket.
1. Selecting the Weavers:
-Choose three medium-weight vines and slype them on one end[2].
2. Inserting the Weavers:
-Insert the slyped end of one vine into the base directly left of an upright, so it's between the upright and the spoke[2].
-Move to the next upright to the right and repeat with the second vine[2].
-Move again to the upright directly to the right and repeat with the third vine, placing each of the three vines directly between an upright and a spoke[2].
3. Waling the Sides:
-Pass the leftmost weaver in front of the two uprights directly to the right, then behind the next upright, and then to the front again[2].
-Take the second weaver, which is now leftmost, and complete the same pattern[2].
-Repeat with the third weaver[2].
-Begin again with the first weaver and continue this pattern, working to the right until you've gone around the basket twice[2].
-Tuck in the weaver ends[2].
Once the base and waling are complete, you can start weaving the main body of the basket.
1. Selecting the Weavers:
-Choose vines that are flexible and long enough to wrap around the basket[3].
2. Weaving Technique:
-Start weaving from the base, going over and under the upright spokes[7].
-Ensure each row is tight and close to the previous one to create a sturdy structure[10].
-Continue weaving until you reach the desired height of the basket[2].
3. Adding New Vines:
-When a vine ends, tuck the end securely into the existing weave[2].
-Start a new vine by tucking its end in close to where the previous vine ended[2].
-Overlap the ends slightly to ensure a seamless join[2].
The border provides a finished look to the basket and secures the top edge[2].
1. Kinking the Uprights:
-Once you've woven the basket to your desired height, untie the uprights and gently kink them down[2].
2. Trac Border:
-Finish the basket with a simple trac border[2]. This involves tucking the ends of the uprights into the weave to create a neat, finished edge[2].
Adding a handle makes the basket more functional and easier to carry[10].
1. Selecting the Handle Vine:
-Choose a vine that is long enough to form the handle and have enough extra length to secure it to the basket[10].
2. Attaching the Handle:
-Bend the vine into the desired handle shape[10].
-Insert the ends of the vine down into the sides of the basket, ensuring they are secure[10].
-Wrap additional thin vines around the base of the handle where it connects to the basket for added stability[10].
-Use twine or thin wire wrapped in brown florist tape to further secure the ends if needed[10].

For a more artistic and less structured look, you can use the random weave technique[3].
1. Soak the Vines:
-Soak the bramble vines in a bucket until pliable[3].
2. Starting the Weave:
-Take a thicker, longer vine and thread it around the hoop or a gap in the hoop[3].
-Pull it through until the middle of the vine is in contact with the hoop[3].
-Bring the loose ends of the vine over the top of the bowl and tuck them in and around the hoop on the opposite side[3].
-Repeat this process until the vine runs out[3].
3. Adding Vines:
-Slowly add more vines in this way, tucking them around different places on the rim[3].
-When passing another vine, vary going over or under as you feel[3].
-Guide the vines to fill in any sparse areas[3].
4. Shaping the Basket:
-As you weave, mold the shape of the basket with your hands to achieve the desired form[1].
-Maintain a tight weave to ensure the basket takes on a narrow, rather than bowl-like, shape[1].
As the basket dries, it may lose its shape. Adjust it as needed to maintain the desired form[10].
1. Re-wet the Vines:
-If the vines become too stiff, lightly re-wet them with a spray bottle[10].
2. Molding the Basket:
-Gently push and pull the sides and base to reshape the basket[10].
-Use your hands to compact the weaving and tighten any loose areas[10].
3. Drying Process:
-Allow the basket to dry slowly in a well-ventilated area[10].
-Avoid direct sunlight, which can cause the vines to dry too quickly and become brittle[10].
Check for any loose ends and tuck them in securely to prevent unraveling[2].
1. Trimming the Ends:
-Use pruners or a sharp knife to trim any protruding ends[2].
2. Tucking the Ends:
-Tuck the trimmed ends into the weave, ensuring they are hidden and secure[2].
3. Using Glue (Optional):
-For extra security, you can use a small amount of craft glue to secure the ends[10].
Personalize your basket by adding embellishments such as beads, ribbons, or decorative vines[5].
1. Beads:
-Thread beads onto thin vines and weave them into the basket[5].
2. Ribbons:
-Tie ribbons around the handle or weave them through the sides[5].
3. Decorative Vines:
-Use colorful or textured vines to add visual interest[5].
Weaving a basket out of vines is a fulfilling and creative endeavor that connects you with nature. By following these detailed steps, you can create a beautiful and functional basket that showcases your craftsmanship. Whether you choose a structured weave or a random pattern, each basket will be unique, reflecting your personal touch and the natural beauty of the vines. Enjoy the process and the satisfaction of creating something beautiful with your own hands.

The best vines for basket weaving include ivy, blackberry vines, honeysuckle, and bramble[1][2]. Ivy is flexible and easy to find, making it great for beginners[2]. Blackberry vines are sturdy, adding a robust structure[1]. Honeysuckle is known for its flexibility and ability to hold intricate patterns[10]. Bramble vines offer a good balance of flexibility and strength[3].
To prepare vines for weaving, start by soaking them in water for at least 2-3 hours, or overnight for drier vines, until they become pliable[3]. Clean the vines by rinsing them thoroughly to remove dirt and debris[5]. For thicker, rigid vines, boiling them for 20-30 minutes can make them more pliable[8].
Essential tools for basket weaving include pruners or a sharp knife for cutting and trimming vines[2], gloves to protect your hands from thorns[1], a bucket or tub for soaking vines[3], measuring tape to ensure spokes are the correct length[2], and twist ties to temporarily hold vines in place[4].
To create a strong base, start with six spokes of equal length and form a slath by splitting three spokes and sliding the other three through the split[2]. Secure the slath by weaving thin vines around it in a clockwise direction, using an over-under pattern for two rounds[2]. Gradually open out the spokes to expand the base, weaving around each spoke individually[2].
To finish the basket, create a border by kinking the uprights down and tucking the ends into the weave[2]. For a handle, select a long vine, bend it into the desired shape, and insert the ends securely into the sides of the basket[10]. Wrap additional thin vines around the base of the handle for added stability[10].
[1] https://ninemonthsofsurvival.wordpress.com/2013/04/28/making-baskets-from-ivy-or-blackberry-vines/
[2] https://www.motherearthnews.com/diy/crafting/basket-making-zm0z22mazols/
[3] https://buymeacoffee.com/foragedfibres/random-weave-bowl-tutorial-bramble
[4] https://www.motherearthnews.com/diy/weave-a-basket-zmaz93asztak/
[5] https://www.youtube.com/watch?v=gKYft82Yobk
[6] https://basketweavee.com/how-to-weave-a-basket-out-of-vines/
[7] https://buymeacoffee.com/foragedfibres/ivy-frame-basket-tutorial
[8] https://makezine.com/article/maker-news/basket-weaving-101-how-to-weave-a-basket-with-honeysuckle/
[9] https://www.instructables.com/How-to-Turn-Discarded-Junk-and-Vines-Into-a-Woven-/
[10] https://homesteadlady.com/make-own-plant-pots/