Views: 222 Author: Tomorrow Publish Time: 2025-01-05 Origin: Site


Content Menu
>> Step 1: Preparing Your Materials
● Expanding on Techniques and Styles
● FAQ
>> 1. What type of yarn is best for weaving baskets?
>> 2. How long does it take to make a yarn basket?
>> 3. Can I use different colors of yarn?
>> 4. What if my basket starts sagging?
>> 5. Can I wash my yarn basket?
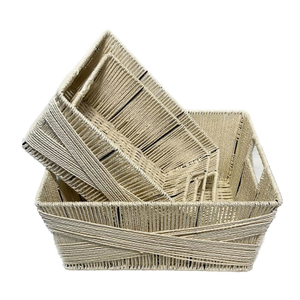
Creating a basket out of yarn is a delightful and practical craft project. Not only does it allow you to express your creativity, but it also results in a functional item that can be used for storage or decoration. This guide will walk you through the process, providing detailed steps, tips, and visuals to help you succeed in weaving your own yarn basket.
Before you begin, gather the following materials:
- Yarn: Any color or type you prefer. Consider using cotton or acrylic yarn for durability.
- Cotton clothesline or rope: This will serve as the base structure of your basket. Aim for a thickness of about 5mm.
- Large needle: A plastic or tapestry needle works best for threading the yarn.
- Scissors: To cut your yarn and rope as needed.
1. Cut Your Rope: Measure and cut a length of cotton clothesline. A good starting point is about 4 to 6 feet, depending on the size of the basket you want to create.
2. Cut Your Yarn: Cut several lengths of yarn, each about 3 to 4 feet long. This length is manageable and reduces tangling as you weave.
1. Create the Initial Wrap: Take one piece of yarn and wrap it around one end of the rope about an inch from the tip. This will secure the yarn in place.
2. Anchor the Yarn: Thread your needle with the yarn and insert it from underneath, pulling it through the wrapped section to create a secure anchor.
3. Continue Wrapping: Keep wrapping the yarn around the rope tightly, ensuring there are no gaps between each wrap. Aim for about 7 to 10 wraps before securing again with an anchor stitch.
1. Shape Your Base: As you wrap, begin to shape your base into a circle by coiling the rope around itself.
2. Secure Your Coils: After every few wraps (about every 4 to 6), insert your needle through the previous layer to secure it in place.
3. Expand as Needed: Continue this process until your base reaches your desired diameter. For a small basket, this might be around 5 inches across.
1. Raise Your Coils: Once your base is complete, start raising the coils vertically to form the sides of your basket.
2. Wrap and Secure: Continue wrapping yarn around both the rope and previously wrapped sections, securing with stitches every few wraps to maintain stability.
3. Height Adjustment: Decide how tall you want your basket to be and continue wrapping until you reach that height.
1. Complete Your Basket: When you've reached your desired height, finish off by cutting any excess rope and wrapping it tightly with yarn at the top.
2. Secure Ends: Use additional anchor stitches to secure any loose ends of yarn or rope so they don't unravel.
3. Final Adjustments: Trim any excess yarn and make sure all parts are securely fastened.

- Tension Control: Maintain consistent tension while wrapping; too loose will lead to sagging, while too tight can distort shapes.
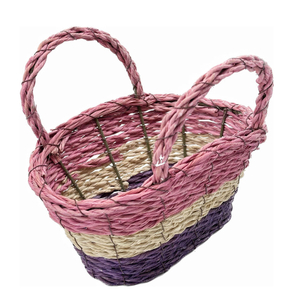
- Color Variations: Feel free to change colors as you go or use variegated yarn for a unique look.
- Add Personal Touches: Consider embellishing your basket with beads or fabric scraps woven into the design for added flair.
- Over-Tightening: While it's important to keep tension, over-tightening can lead to distortion in shape.
- Uneven Wrapping: Ensure that each wrap is even; uneven wraps can lead to an unbalanced basket.
- Ignoring Anchor Stitches: Failing to secure each layer properly can result in a loose structure that may fall apart over time.
For visual learners, here are some helpful video tutorials that demonstrate these techniques:
As you become more comfortable with basic coiling techniques, consider experimenting with different styles:
- Adding Handles: You can create handles by using thicker cord wrapped in yarn and attaching them securely on either side of your basket.
- Incorporating Beads or Other Materials: Weaving in beads or fabric scraps during the process can add texture and visual interest.
- Experimenting with Shapes: Instead of sticking strictly to round baskets, try creating oval or rectangular shapes by adjusting how you coil and wrap.
Once you've mastered basic coiling techniques, consider exploring more advanced methods:
- Change Colors Mid-Way: To create stripes or patterns, simply stop using one color and start with another without cutting off the previous one.
- Use Different Textures of Yarn: Mixing different textures (like fuzzy yarns with smooth ones) can create visually appealing contrasts.
- Layering Techniques: For larger baskets, consider layering multiple strands of rope together for added strength before wrapping them in yarn.
Creating a woven basket from yarn is not just about crafting; it's about enjoying the process and finding joy in making something with your hands. Each basket tells its own story through its colors, shapes, and patterns—so let your imagination run wild!
Weaving a basket out of yarn is not only an enjoyable craft but also results in a beautiful and useful item for your home. With just a few materials and some patience, you can create something truly special that reflects your personal style.

A variety of yarns can be used, but cotton or acrylic are recommended due to their strength and durability.
The time varies based on size and complexity but generally takes between 1–3 hours.
Absolutely! Mixing colors can add a unique touch to your basket design.
Ensure you're maintaining consistent tension while wrapping; if sagging occurs, reinforce with additional stitches.
While it's best to avoid soaking it in water, you can spot clean it gently if necessary.
[1] https://thecraftacademic.wordpress.com/2013/10/26/basket-weaving-a-beginners-tutorial/
[2] https://www.instructables.com/Weaving-a-Yarn-Basket/
[3] https://www.youtube.com/watch?v=XJAE5njZDgc
[4] https://www.marymaxim.com/blogs/tutorials/how-to-weave-a-basket-with-yarn-a-step-by-step-guide
[5] https://www.matttommey.com/basket-weaving-techniques
[6] https://happyhourprojects.com/woven-yarn-basket/
[7] https://www.youtube.com/watch?v=e3gyM7XTnV0
[8] https://soulslikewheels.substack.com/p/exploring-basket-weaving-a-beginners
[9] https://basketweavee.com/can-you-weave-a-basket-out-of-yarn/
[10] https://makesomethingmondays.com/craft-ideas/diy-yarn-basket/