Views: 222 Author: Tomorrow Publish Time: 2025-02-11 Origin: Site


Content Menu
● Introduction to Basket Weaving
>> A. Types of Branches to Use:
>> B. Peeling the Bark (Optional):
● Basic Basket Weaving Techniques
● Weaving a Simple Round Basket
● Frequently Asked Questions (FAQ)
>> 1. What are the best types of branches to use for basket weaving?
>> 2. How do I prepare the branches for weaving?
>> 3. How do I prevent the branches from breaking during weaving?
>> 4. Can I use different colors of branches in my basket?
>> 5. How do I finish the edge of the basket?
Basket weaving is an ancient craft that transforms natural materials into functional and beautiful objects[6]. Learning to weave a basket with branches connects you to a rich history and allows you to create unique, eco-friendly containers from readily available resources[6][4]. This comprehensive guide will take you through the process step-by-step, providing you with the knowledge and skills to embark on your basket-weaving journey.
Basket weaving is more than just a craft; it's a way to connect with nature and create something useful with your own hands[6][4]. Using branches adds a rustic and natural aesthetic to your baskets, making them perfect for storage, decoration, or even as unique gifts[6].
The first step in weaving a basket with branches is gathering the right materials[4]. You'll need branches, of course, but also a few essential tools to make the process easier[4].
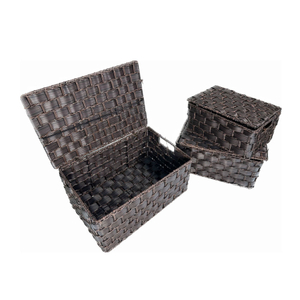
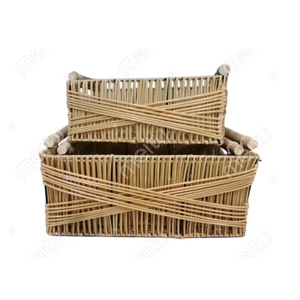
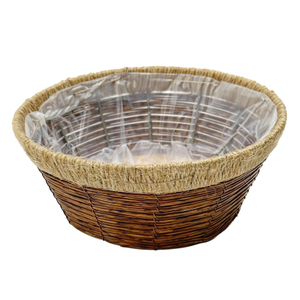
-Willow: Willow is a popular choice for basket weaving due to its flexibility and strength[4]. It's easy to work with and provides a beautiful, natural look[4][1].
-Dogwood: Red twig dogwood can add a pop of color and contrast to your basket[1].
-Mulberry: Mulberry sticks are also suitable for basket weaving[5].
-Other Flexible Branches: Experiment with other types of flexible branches available in your area[2].
-Knife or Pruning Shears: For cutting and trimming branches[2].
-Soaking Container: A tub or bucket for soaking the branches to make them pliable[4].
Proper preparation is key to a successful basket weaving project[4]. Soaking the branches makes them pliable and prevents breakage during the weaving process[4].
1. Submerge the branches: Place the branches in a soaking container filled with water[4].
2. Soaking time: The soaking time depends on the type and thickness of the branches. Generally, soak them for several hours or overnight until they are flexible[4].
-For a smoother look, you can peel the bark off the branches after soaking[4]. Use a knife or peeling tool to remove the bark carefully.
There are several basic basket weaving techniques that you can use to create your branch basket[4]. Here are a few common ones:
A. Stake-and-Strand:
-This technique involves creating a base with stakes (thick branches) and then weaving strands (thinner branches) around the stakes to form the sides of the basket[1].
B. Twining:
-Twining uses two or more weavers that twist around the spokes, producing a strong and textured weave[4].
C. Waling:
-Waling is a decorative technique where thicker strands are woven over several spokes at once, creating a prominent horizontal band[4].

Here's a step-by-step guide to weaving a simple round basket using the stake-and-strand method:
1. Select Stakes: Choose six thick pieces of willow or other flexible branches, about 12-15 inches long[1]. Ensure they are of roughly equal diameter to prevent wobbling[1].
2. Prepare the Stakes: Find the center of three of the thickest stakes and split them with your knife[1].
3. Insert Spokes: Push the three thinner spokes through the split stems to make an "X" shape[1]. Alternate the butts and tips of the spokes to balance the base[1].
4. Weaving the Base: Take two long, thin willow shoots (weavers) and thread the fine tips 1-2 inches through the slots[1].
5. Start Weaving: Bring the two weavers around the first three spokes, one on top and one below, then twist them and repeat on the next three spokes[1]. The weavers should alternate positions from top to bottom[1].
6. Splicing Weavers: As the weavers get shorter, add new ones by splicing them in. Meet butt ends with butt ends and tips with tips, continuing the weave[1]. Stagger the splices by weaving ahead a few spokes before adding the next weaver[1].
7. Trim Ends: After completing the base, trim any protruding ends[1].
1. Prepare Stakes: Insert additional stakes around the perimeter of the base, spacing them evenly[1].
2. Weaving the Sides: Use two weavers to twine around the stakes, working from the base upwards[1]. Keep the stakes evenly spaced as you weave[1].
3. Adding a Color Band (Optional): Weave in a band of red twig dogwood for contrast[1]. Frame the new color with more willow to integrate it seamlessly[1].
4. Finishing the Sides: Once the basket reaches the desired height, finish off the top edge by tucking the ends of the weavers into the weaving[2].
Here's how to make a simple twig basket[2]:
1. Select Twigs: Gather a number of twigs of about equal length[2].
2. Arrange Twigs: Lay three or four twigs side by side, alternating the thick ends with the tapering tips[2]. Lay an equal number of stems across the first bunch, intersecting at right angles in the center[2].
1. Choose a Weaver: Select your first "weaver" branch and flex it until it's pliable[2].
2. Start Weaving: Bend the weaver about one-third of its length and loop it around one of the four bundles of ribs[2]. The two halves of the weaver will cross as you move towards the next bundle[2].
3. Continue Weaving: Weave around the center in a clockwise direction, alternating the two halves of your vine[2]. One end will cross over the bundle of ribs while the other passes under, and vice versa for the next bundle[2].
4. Divide Rib Bundles: When you're left with only the long end of the weaver, divide the rib bundles into separate branches and pull them out into an evenly spaced radial arrangement[2].
5. Thread the Weaver: Use up the long end of your weaver by threading it under and over those individual ribs[2].
6. Anchor the End: Jab the free end of the twig through the woven lattice towards the center of the basket to anchor it[2]. Trim any loose ends later[2].
1. Flex the Ribs: Flex the ribs up to start forming the sides of the basket[2].
2. Continue Weaving: Continue to weave the branches along, alternating over and under as you go[2]. You can interchange layers of different kinds of twigs and vines to produce a multicolored and banded effect[2].
1. Secure the Last Weaver: When the container reaches the desired depth, force the free end of your last weaver through as many layers of the work as possible, ending on the inside of the twig network[2].
2. Anchor Weaver Ends: Do the same with all the other weaver ends, anchoring each one on the inner side of the meshwork[2].
3. Trim Extra Ends: Using a knife or pruning shears, trim off any extra ends, including the points of the ribs[2].
4. Fold Rib Tips (Optional): Prune the protruding ribs to about four inches and fold each tip back down into the weaving for a neat, finished look[2].
-Keep the branches moist: If the branches start to dry out during the weaving process, spritz them with water to keep them pliable[4].
-Tighten the weave: As you weave, make sure to keep the weave tight to create a sturdy basket[1].
-Experiment with different patterns: Once you've mastered the basic techniques, try experimenting with different weaving patterns and designs[4].
-Take your time: Basket weaving is a relaxing and rewarding craft, so take your time and enjoy the process[2].
-Uneven Weaving: If your weaving is uneven, try to adjust the tension of the weavers as you go[4]. You may also need to adjust the spacing of the stakes.
-Loose Spokes: If the spokes are loose, try tightening the weave around them[4]. You can also add additional stakes for support.
-Broken Materials: If a branch breaks, simply splice in a new one[1].
Weaving a basket with branches is a fulfilling way to connect with nature and create beautiful, functional art[6]. By following these steps and practicing the techniques, you'll be able to craft unique baskets that reflect your creativity and resourcefulness[4].

The best types of branches for basket weaving are those that are flexible and strong[4]. Willow is a popular choice, but you can also use dogwood, mulberry, and other pliable branches[1][5].
To prepare the branches, you need to soak them in water until they become pliable[4]. The soaking time will vary depending on the type and thickness of the branches. Soaking them overnight is generally recommended[4].
To prevent the branches from breaking, make sure they are properly soaked and remain moist throughout the weaving process[4]. Avoid using dry or brittle branches.
Yes, you can definitely use different colors of branches to create a more decorative effect[1]. Red twig dogwood is a great option for adding a pop of color[1].
To finish the edge of the basket, tuck the ends of the weavers into the weaving on the inside of the basket[2]. Trim any excess material for a clean look[2].
[1] https://www.motherearthnews.com/diy/forager-basket-weaving-tutorial-zm0z19jjzbut/
[2] https://www.motherearthnews.com/diy/twig-baskets-zmaz80mjzraw/
[3] https://www.youtube.com/watch?v=iaPbg3C3lLE
[4] https://basketweavee.com/basket-weaving-steps/
[5] https://www.youtube.com/watch?v=FVuOhOBRkFc
[6] https://basketweavee.com/how-to-weave-a-basket-with-branches/
[7] https://www.jonsbushcraft.com/basicbasket.htm
[8] https://www.youtube.com/watch?v=py_Q612GhAQ