Views: 222 Author: Tomorrow Publish Time: 2025-02-12 Origin: Site


Content Menu
>> Materials:
>> Tools:
● Step-by-Step Guide: Creating a Wire Harvesting Basket
>> Step 1: Creating a Unique Item From Discarded Fencing Material
>> Step 2: Materials and Tools
>> Step 4: Creating the Wire Spokes
>> Step 7: Adding Additional Spokes
>> Step 9: Weaving the Rim of the Harvest Basket
● Frequently Asked Questions (FAQ)
>> 1. What Gauge of Copper Wire Is Best for Basket Weaving?
>> 2. How Do I Prevent the Wire from Kinking While Weaving?
>> 3. Can I Incorporate Other Materials into My Copper Wire Basket?
>> 4. What Tools Are Essential for Copper Wire Basket Weaving?
>> 5. How Do I Finish the Rim of My Copper Wire Basket for a Professional Look?
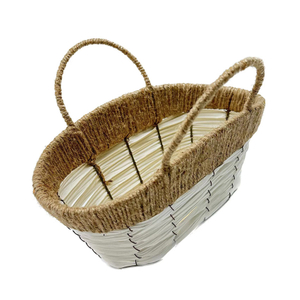
Weaving a copper wire basket is a fascinating blend of traditional basketry and contemporary metalwork[6]. This craft involves intricately interlacing copper wires to create functional and decorative pieces. Copper wire baskets can serve various purposes, from harvesting to adding a unique touch to home décor[4]. This comprehensive guide will walk you through the techniques and instructions for creating your own copper wire basket, complete with helpful visuals and video resources.
Before you begin, gather the necessary materials and tools. Having everything on hand will streamline the weaving process and ensure a smoother experience.
-Copper Wire: Choose different gauges of copper wire for the base and weaving. For instance, you might use 20-gauge wire for the base and 28-gauge wire for weaving[1].
-Barbed Wire (optional): Discarded fencing material can add a rustic touch. Ensure you prepare the wire by removing the barbs[4].
-Natural Materials (optional): Vines, barks, and copper leaves can be incorporated for a unique, sculptural basket[2].
-Straw Garland (optional): For coiling and securing with wire in certain designs[7].
-Wire Cutters: For cutting the copper wire into desired lengths[4].
-Needle-Nose Pliers: To create loops and manipulate the wire[4].
-Pliers: For straightening the wire and securing the barbs[4].
-Basket Weaving Jig (optional): This tool can help maintain consistent shape and structure[3].
-Knife: Useful for splitting straw and creating curls in the wire[7].
-File: To smooth any protruding wire ends for a clean finish[4].
-Glue: To attach the straw[7].
The first step in weaving a copper wire basket involves preparing the wire. This includes straightening, cutting, and creating loops as needed.
If you are using discarded fencing wire, it will likely have bends and kinks. Use pliers to straighten the wire as much as possible. Complete straightening is not necessary; the irregularities add to the basket's rustic charm[4].
If using barbed wire, remove the barbs using pliers. Grasp both ends of the barb, bend them towards each other to loosen the coil, and slide the barb off the larger strand of wire[4].
Cut the wire into appropriate lengths depending on your basket design. For the spokes, you might cut 16 pieces approximately 10 inches long[4]. Use wire cutters for clean and precise cuts.
Use needle-nose pliers to create loops at one end of the wire pieces. These loops should be large enough to hold another segment of wire but not fully closed initially[4].

Several weaving techniques can be employed to create a copper wire basket. Here are a few popular methods:
This technique involves using base wires and weaving wires to create a basket-like structure.
1. Attaching the Weaving Wire: Secure the weaving wire to the first base wire by wrapping it around two or three times[1].
2. Positioning the Base Wires: Place the second base wire on top of the first. The proximity of these wires affects the weave's appearance. Closer wires result in a tighter weave, while wider spacing reveals more of the basket weave pattern[1].
3. Coiling and Crossing: Wrap the weaving wire around the top wire in a full coil. On the second coil, cross over by going between and under the bottom wire. Repeat this process, alternating between the top and bottom wires[1].
4. Maintaining Tension: Ensure each coil is tight before moving to the next section. This maintains the basket's structural integrity and prevents a messy appearance[1].
The random weave technique is excellent for creating unique shapes using various materials, including copper wire and grapevine[2].
1. Incorporating Materials: Weave copper wire directly with natural materials like barks and vines[2].
2. Creating Texture: Alternate the materials to add color and texture to the basket[2].
3. Securing the Weave: Ensure each piece is tightly woven to maintain the shape and structure of the basket[2].
This method combines traditional basketry with contemporary metalwork, intricately weaving wire to form the basket[6].
1. Base Structure: Create a base structure using thicker gauge wire.
2. Weaving the Wire: Wrap thinner gauge wire around the base structure, creating a woven pattern.
3. Adding Complexity: Incorporate beads, stones, or other decorative elements into the weave for added visual appeal[5].
This section provides a detailed, step-by-step guide for creating a wire harvesting basket using barbed wire[4].
Repurposing discarded fencing material into a harvest basket is an environmentally friendly and creative project[4].
Gather the necessary materials and tools, including barbed wire, pliers, wire cutters, and needle-nose pliers[4].
Separate the double strand of barbed wire. Use pliers to straighten the wire and remove the barbs[4]. This prepares the wire for weaving.
Cut 16 pieces of wire approximately 10 inches long. Create a loop on one end of each wire piece using needle-nose pliers. Do not fully close the wire loop yet[4].
Measure approximately 10 inches from the end of the longest wire and make a sharp bend. Create a second bend in the opposite direction to form a loop about 1.5 inches in diameter. Loosely coil the wire clockwise around the center[4].
Thread each of the 16 looped wire spokes onto the longer wire, ensuring they radiate in all directions within the inner circle. The 10-inch straight end of the long wire becomes the 17th spoke. Weave the longer wire around the spokes, alternating over and under each spoke[4].
As the weaving progresses, the distance between spokes increases. Cut an additional 16 spokes approximately 7.5 inches long and bend one end to create a loop. Insert these smaller spokes onto the third coil, maintaining the alternating pattern of the existing spokes[4].
Continue weaving, splicing in additional longer wires as needed. Maintain uniformity in spacing as much as possible, but embrace the irregularities that give the basket a unique, homemade look[4].
Once you reach the seventh coil, bend the spokes backward and continue weaving to create a rounded rim. Decrease the spacing of the coils for added strength. At around the tenth coil, finish the final round, making a loop at the end and clamping it around the nearest spoke[4].
Bend the ends of the spokes over the outermost coil, using pliers to preserve the space between the coils. Use a file to smooth any protruding wire ends[4].
-Maintain Tension: Consistent tension is crucial for a sturdy and well-shaped basket[1].
-Uniformity: Strive for uniform spacing and coil alignment, but don't be discouraged by slight irregularities[4].
-Experiment with Materials: Incorporate different materials like beads, stones, and natural elements to add unique textures and visual interest[2][5].
-Use a Jig: A basket weaving jig can help maintain consistent shape and structure, especially for beginners[3].
-Watch Tutorials: Video tutorials can provide visual guidance and inspiration for various weaving techniques[1][5].
Weaving a copper wire basket is a rewarding and creative endeavor. By following these techniques and instructions, you can create beautiful and functional baskets that showcase your craftsmanship. Whether you choose to create a rustic harvesting basket or an elegant decorative piece, the possibilities are endless. Embrace the process, experiment with different materials and techniques, and enjoy the art of copper wire weaving.

The best gauge of copper wire depends on the specific part of the basket you are weaving. Typically, a thicker gauge wire (e.g., 20-gauge) is used for the base to provide structural support, while a thinner gauge wire (e.g., 28-gauge) is used for the weaving itself[1]. This combination allows for a sturdy yet intricate design.
To prevent the wire from kinking, it is essential to straighten it before you begin weaving. Use pliers to gently remove any bends or kinks. Additionally, maintaining consistent tension while weaving helps to keep the wire smooth and prevents it from becoming tangled[4].
Yes, you can definitely incorporate other materials into your copper wire basket to add texture, color, and visual interest. Natural materials such as vines, barks, and copper leaves work well with copper wire[2]. You can also use beads, stones, or other decorative elements to enhance the basket's aesthetic appeal[5].
The essential tools for copper wire basket weaving include wire cutters, needle-nose pliers, and regular pliers[4]. Wire cutters are necessary for cutting the wire into desired lengths, while pliers are used for straightening the wire and manipulating it into the correct shapes. Needle-nose pliers are particularly useful for creating loops and intricate designs. A basket weaving jig can also be helpful for maintaining consistent shape and structure[3].
To finish the rim of your copper wire basket for a professional look, bend the spokes backward and continue weaving to create a rounded edge[4]. Decrease the spacing of the coils to add strength to the rim. Once you reach the final round, make a loop at the end and clamp it around the nearest spoke. Use a file to smooth any protruding wire ends for a clean and polished finish[4].
[1] https://www.youtube.com/watch?v=GZntmKOJ5KQ
[2] https://www.matttommey.com/basket-weaving-techniques/archives/05-2016
[3] https://basketweavee.com/basket-weaving-jig/
[4] https://www.instructables.com/Wire-Harvesting-Basket/
[5] https://www.youtube.com/watch?v=yxbDMCJDKt0
[6] https://basketweavee.com/wire-wrap-basket-weaves/
[7] https://christinedebeer.ca/tutorials/For%20my%20design%20I%20am%20using%20the%20flat%20wire%20that%20I%20unravel%20from%20a%20copper%20pot%20scrubber
[8] https://www.pinterest.com/pin/find-video-guides-and-articles-covering-basket-weaving-techniques-and-instructions-direct-from-ashevilles-master-basket-we--339177415701956918/
[9] https://www.matttommey.com/basket-weaving-techniques