Views: 222 Author: Tomorrow Publish Time: 2025-02-23 Origin: Site


Content Menu
● Mastering Basic Weaving Techniques
● Troubleshooting Common Issues
● Caring for Your Willow Basket
● Exploring Willow Basket Traditions
● FAQ
>> 1. How long does it take to weave a willow basket?
>> 2. Can I grow my own willow for basket weaving?
>> 3. What's the difference between green, brown, and buff willow?
>> 4. How do I protect my willow basket for outdoor use?
>> 5. Where can I find more information on basket weaving?
Willow basket weaving is a timeless craft that combines functionality with artistry. Learning to weave a round bottom willow basket is an excellent starting point for beginners and a rewarding project for experienced weavers alike. This comprehensive guide will walk you through the process of creating your own beautiful and sturdy round bottom willow basket.
Before you begin, gather the following materials and tools:
- Willow rods (various lengths and thicknesses)
- Pruning shears or sharp scissors
- Measuring tape
- Bucket of water for soaking willow
- Rapping iron or wooden mallet
- Bodkin or weaving needle
- Towel for drying hands
Proper preparation of your willow is crucial for successful basket weaving. Follow these steps:
1. Sort your willow rods by length and thickness.
2. Soak the willow rods in cold water. The soaking time depends on the type of willow:
- Green willow: No soaking required
- Brown willow: Soak for one day per foot of rod length
- Buff willow: Soak for 1.5-2 hours
3. After soaking, wrap the willow in a damp cloth to mellow overnight.
It's essential to understand the different types of willow used in basket weaving:
- Green willow: Freshly cut and most flexible, ideal for beginners.
- Brown willow: Dried with bark on, offering a rustic appearance.
- Buff willow: Bark removed, providing a smooth, pale finish.
Each type has its unique characteristics and preparation requirements, affecting the final look and durability of your basket.
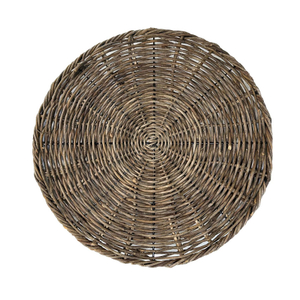
The round bottom of your basket starts with creating a sturdy base:
1. Select six thick willow rods about 12-15 inches long for the base spokes.
2. Find the center of three spokes and split them with your knife.
3. Push the other three spokes through the splits to form an "X" shape.
4. Take two long, thin willow shoots as your weavers.
5. Begin weaving by bringing the weavers around the first three spokes, one on top and one below.
6. Twist the weavers and repeat on the next three spokes.
7. Continue this twisting and twining pattern, weaving tightly to maintain the basket's shape.

Once your base is complete, it's time to form the sides of your basket:
1. Bend the base spokes upward to create the basket's shape.
2. Continue weaving with two weavers, twining them tightly around each stake.
3. Space the stakes evenly as you weave between them.
4. After a few rounds (courses), trim off the ends of your base spokes for easier handling.
As you work on the sides, it's crucial to master these basic weaving techniques:
- Randing: The simplest weave, where a single weaver goes over and under each stake.
- Waling: A stronger weave using multiple weavers, creating a rope-like pattern.
- Slewing: A technique used to change the angle of the basket's sides.
Practice these techniques to achieve a professional-looking finish and to add structural integrity to your basket.
To enhance your basket's appearance, consider incorporating these design elements:
1. Weave in a band of colored willow, such as red dogwood, for contrast.
2. Add more willow to frame the new color.
3. Experiment with different weaving patterns like herringbone or chevron.
For those looking to take their basket weaving to the next level, consider these advanced techniques:
- Plaiting: Creating a flat weave pattern for decorative panels.
- Twining: Using two or more weavers twisted around the stakes.
- Fitching: Incorporating short pieces of willow for textural interest.
These techniques can add unique visual elements to your basket and showcase your growing skills.
The rim is crucial for the basket's strength and appearance:
1. Select several long, flexible willow rods for the rim.
2. Weave these rods around the top of the basket, tucking ends in securely.
3. Use a rapping iron to tamp down the weave, ensuring a tight fit.
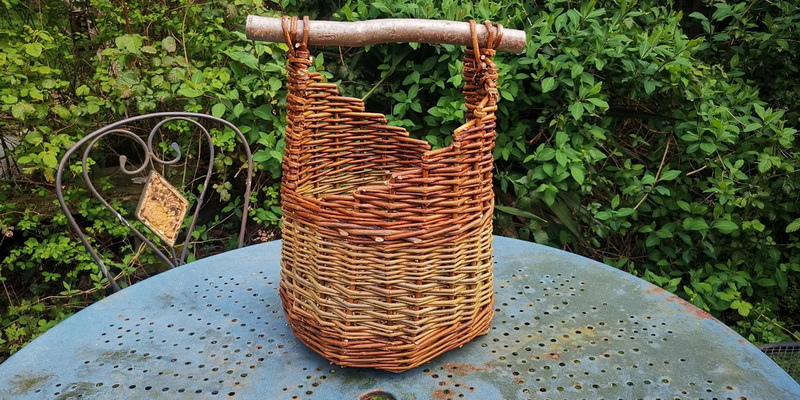
A well-crafted handle is essential for a functional basket:
1. Choose two strong willow rods for the handle.
2. Insert them deep into the basket's sides, opposite each other.
3. Bend the rods to form an arch and secure them to the opposite side.
4. Wrap the handle with thinner willow for added strength and comfort.
- Keep your willow damp while working to maintain flexibility.
- Practice consistent tension in your weaving for a uniform appearance.
- Take breaks to rest your hands and assess your progress.
- Don't be discouraged if your first attempt isn't perfect – basket weaving takes practice!
Even experienced weavers encounter challenges. Here are solutions to common problems:
- Uneven base: Ensure your initial spokes are evenly spaced and your weaving tension is consistent.
- Bulging sides: Check your stake spacing and adjust as you weave upwards.
- Loose weave: Use your bodkin to tighten gaps and maintain consistent tension.
To ensure your basket lasts for years:
1. Allow it to dry completely after weaving.
2. Store in a cool, dry place when not in use.
3. For outdoor use, consider applying a breathable wood preserve.
Willow basket weaving has a rich history across many cultures. From Native American burden baskets to European market baskets, each tradition has unique styles and techniques. Researching these traditions can inspire your own designs and deepen your appreciation for the craft.
Weaving a round bottom willow basket is a rewarding process that connects you to an ancient craft. With patience and practice, you'll create a functional and beautiful piece of art. Remember, each basket is unique, reflecting the individual touch of its creator. As you progress, you'll develop your own style and techniques, making each basket a personal masterpiece.
The art of willow basket weaving offers endless possibilities for creativity and skill development. Whether you're crafting baskets for practical use or as decorative pieces, the satisfaction of creating something beautiful with your own hands is unparalleled. As you continue to practice and refine your techniques, you'll find that each basket becomes a testament to your growing expertise and artistic vision.

For beginners, a simple round bottom basket might take 4-6 hours. With practice, experienced weavers can complete a basket in 2-3 hours.
Yes, growing willow is relatively easy. It requires space and time, but can be a rewarding way to source your materials. There are hundreds of willow varieties to choose from.
Green willow is freshly harvested and flexible. Brown willow is dried with bark on. Buff willow has had its bark removed. Each type requires different preparation for weaving.
While willow baskets are naturally durable, you can apply a breathable wood preserve to prolong their life outdoors. Alternatively, bring the basket inside during harsh weather.
There are many resources available, including books, online tutorials, and local workshops. Websites like basketweaving.com offer FAQs and additional information for beginners.
[1] https://www.motherearthnews.com/diy/forager-basket-weaving-tutorial-zm0z19jjzbut/
[2] https://willowbychristina.co.uk/willow-info/
[3] https://blog.csdn.net/Angelina_Jolie/article/details/139147709
[4] https://www.foggyblossomfarm.com/stories/beginners-guide-to-willow-basketry
[5] https://www.foragedfibres.co.uk/faq
[6] https://blog.csdn.net/u012549626/article/details/127719965
[7] https://www.youtube.com/playlist?list=PLg4cShzgldzhhOrLhh2m5XvUyt0kjMo8H
[8] https://basketweaving.com/shopsite_sc/store/html/basket-weaving-frequently-asked-questions.html
[9] https://www.sohu.com/a/676796467_121124322