Views: 222 Author: Tomorow Publish Time: 2025-04-01 Origin: Site


Content Menu
● Introduction to Basket Weaving
>> Essential Tools and Materials
● Step-by-Step Guide to Weaving a Square Wicker Basket
● Techniques for Enhancing Your Basket
● Customization and Decoration
● FAQ
>> 1. What materials are best for weaving a square wicker basket?
>> 2. How do I secure the base of my basket?
>> 3. What is the twining technique in basket weaving?
>> 4. How do I maintain even tension while weaving?
>> 5. What tools are essential for basket weaving?
Weaving a square wicker basket is a rewarding craft that combines traditional techniques with creative expression. This guide will walk you through the process, highlighting essential tools, materials, and techniques. Whether you're a beginner or an experienced artisan, you'll find valuable insights and practical tips to enhance your basket-weaving skills.
Basket weaving is an ancient craft with a rich history, practiced across numerous cultures for both utilitarian and artistic purposes. From storing food and tools to creating elaborate ceremonial objects, baskets have played a crucial role in human civilization. The techniques used can vary significantly depending on the materials available and the intended use of the basket, but common methods include plaiting, coiling, twining, and randing. For a square wicker basket, plaiting and twining are particularly useful, offering both structural integrity and aesthetic appeal. The versatility of basket weaving allows for endless customization, making it a truly engaging and fulfilling craft.
The success of your basket-weaving project heavily relies on the quality of your tools and materials. Selecting the right components not only simplifies the process but also ensures the durability and aesthetic appeal of the final product.
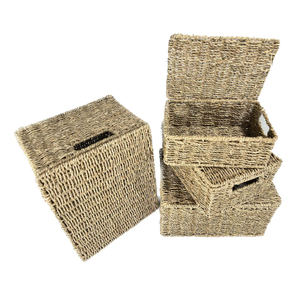
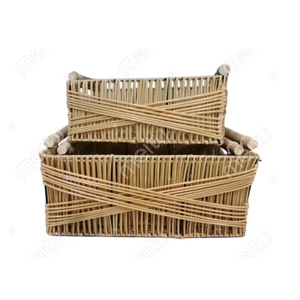
- Materials: Willow branches, rattan, or bamboo are popular choices for wicker baskets. These materials are flexible and durable, making them ideal for weaving. Different types of willow, such as white willow and brown willow, offer varying degrees of flexibility and color, allowing for a range of design options. Rattan, known for its strength and pliability, is another excellent choice, particularly for more intricate designs. Bamboo, with its natural resilience and smooth texture, is ideal for creating sturdy and visually appealing baskets. Consider sourcing your materials from sustainable suppliers to ensure responsible crafting.
- Tools: A sharp knife, secateurs, and a basketry vice (if available) are essential tools for preparing and shaping your materials. A sharp knife is crucial for cleanly cutting and trimming the ends of the weavers, ensuring a neat and professional finish. Secateurs, or pruning shears, are invaluable for harvesting and preparing willow branches or rattan, allowing you to easily cut through thicker stems. A basketry vice, while not essential, can greatly simplify the weaving process by securely holding the basket in place, freeing up your hands to focus on the weaving itself. Additionally, a pair of pliers or tweezers can be useful for tucking in the ends of the weavers.

The base of your basket is the foundation upon which the entire structure rests. A well-prepared base ensures stability and symmetry, setting the stage for a successful weaving project.
1. Lay Out the Base Strips: Begin by arranging several strips of your chosen material in a criss-cross pattern on a flat surface. The number of strips will depend on the desired size of your basket. Typically, five to seven strips in each direction will provide a solid base for a small to medium-sized basket. Ensure they are evenly spaced and parallel to each other. Accurate alignment at this stage is crucial for a balanced and aesthetically pleasing final product.
2. Secure the Base: Use a wicker bundle or a small amount of wire to hold the strips in place. The wicker bundle, made from thin, flexible strands of the same material as your base strips, offers a natural and aesthetically pleasing way to secure the base. Alternatively, a small amount of wire can provide a more robust hold, particularly if you are working with thicker or less flexible materials. This will form the foundation of your basket, ensuring that the base strips remain securely in place as you begin the weaving process.
Weaving is the heart of the basket-making process, transforming a collection of individual strips into a cohesive and functional structure.
1. Begin the Weave: Take a flexible branch (weaver) and start weaving it over and under the base strips. The weaver should be thin and pliable, allowing it to easily bend and conform to the shape of the base. Begin in the middle and work your way outward, alternating the over-under pattern with each strip. This technique creates a strong and interlocking weave that provides stability and durability to the basket.
2. Maintain Even Tension: Ensuring that your weave is tight and evenly spaced is crucial for the structural integrity and aesthetic appeal of your basket. Uneven tension can lead to warping or distortion, compromising the basket's stability. Periodically check the spacing and tension of your weave, making adjustments as needed to maintain a consistent and uniform pattern. This will give your basket stability and a professional finish, ensuring that it can withstand regular use.
Building the sides of your basket involves transitioning from the flat base to the vertical walls. This stage requires careful attention to ensure that the sides are straight, even, and securely attached to the base.
1. Fold Up the Base Strips: Once you have completed the base weave, carefully fold the ends of the base strips upwards. These will form the vertical supports for your basket, providing the framework for the sides. Ensure that the strips are evenly spaced and aligned, as this will directly impact the shape and symmetry of your basket. You may need to dampen the strips slightly to make them more pliable and prevent them from cracking during the folding process.
2. Continue Weaving: Start weaving new strips around these vertical supports, maintaining the over-under pattern established in the base. This continuous weave will gradually build up the sides of your basket, creating a strong and cohesive structure. As you weave, ensure that the sides remain straight and perpendicular to the base. Periodically check the alignment and make adjustments as needed to maintain the desired shape.
Finishing the basket involves securing the top edges, trimming any excess material, and adding any decorative elements. This stage is crucial for creating a polished and professional final product.
1. Trim Excess Material: When you reach the desired height, carefully trim any excess material from the top of the basket. Use a sharp knife or secateurs to ensure a clean and even cut. The height of the basket will depend on your personal preference and the intended use of the basket. Consider leaving a small amount of extra material to allow for a decorative edge or border.
2. Tuck in Ends: Tuck the ends of the weavers back into the basket to create a neat finish. This not only enhances the aesthetic appeal of the basket but also prevents the ends from unraveling or snagging. Use a pair of pliers or tweezers to carefully tuck the ends into the weave, ensuring that they are securely hidden from view. This will create a smooth and professional edge, adding the final touch to your completed basket.

Twining involves using two or more flexible materials to weave around a central structure. This technique creates a sturdy and visually appealing basket, often used for adding strength or decorative elements.
Plaiting is ideal for creating intricate patterns and designs. It involves overlapping strips of material in a basket weave pattern, offering endless possibilities for customization.
- Use Fresh Materials: Fresh willow or rattan is easier to work with as it is more flexible, reducing the risk of cracking or breaking during the weaving process.
- Keep Materials Damp: Damp materials are less likely to crack during weaving. Soaking your materials in water for a few hours before beginning the project will help to keep them pliable.
- Practice Regularly: The more you practice, the better you will become at maintaining even tension and creating a sturdy basket. Start with simple projects and gradually progress to more complex designs.
Basket weaving offers ample opportunities for customization and decoration, allowing you to create unique and personalized pieces.
- Coloring: Use natural dyes or stains to add color to your materials before weaving.
- Beads and Embellishments: Incorporate beads, shells, or other embellishments into your weave to add texture and visual interest.
- Handles and Straps: Attach handles or straps to your basket for added functionality and convenience.
Weaving a square wicker basket is a fun and rewarding project that can add a touch of handmade charm to any room. By following these steps and experimenting with different techniques, you can create beautiful and functional baskets that reflect your creativity and skill. The satisfaction of crafting something with your own hands is unparalleled, and the skills you acquire can be applied to a wide range of other crafts. So gather your materials, sharpen your tools, and embark on this fulfilling journey into the world of basket weaving.

The best materials for weaving a square wicker basket include willow branches, rattan, and bamboo. These materials are flexible, durable, and easy to shape. They offer a range of textures and colors, allowing for diverse design options.
You can secure the base of your basket using a wicker bundle or a small amount of wire to hold the strips in place. The wicker bundle provides a natural and aesthetically pleasing solution, while wire offers a more robust hold.
The twining technique involves using two or more flexible materials to weave around a central structure, creating a sturdy and visually appealing basket. It's often used to add strength or decorative elements.
To maintain even tension, ensure that each weave is tight and evenly spaced. Periodically check the spacing and tension of your weave, making adjustments as needed to maintain a consistent and uniform pattern.
Essential tools for basket weaving include a sharp knife, secateurs, and a basketry vice (if available). These tools facilitate the preparation, shaping, and weaving of the materials, ensuring a professional and polished final product.
[1] https://www.youtube.com/watch?v=sgAyWM77tas
[2] https://www.istockphoto.com/videos/wicker-basket
[3] https://vatimahome.com/blogs/news/techniques-for-weaving-wicker-baskets-a-step-by-step-guide-to-the-weaving-techniques-used-in-making-wicker-baskets-including-plaiting-coiling-and-twining
[4] https://blog.csdn.net/weixin_41144183/article/details/140861020
[5] https://www.youtube.com/watch?v=FKyGLwp7hm4
[6] https://www.istockphoto.com/videos/square-wicker-basket
[7] https://eyahomeliving.co.za/blogs/news/what-are-the-4-techniques-of-basket-weaving-a-guide-from-eya-home-living-south-africa
[8] https://www.sohu.com/a/623607_100684
[9] https://www.prairiewoodbasketry.com/index.php/2016/02/17/how-to-square-the-base-of-a-basket/
[10] https://www.textileindie.com/beginners-guide-basket-weaving/
[11] https://www.youtube.com/watch?v=VvvjDlMCA4s