Views: 222 Author: Tomorrow Publish Time: 2025-01-07 Origin: Site


Content Menu
● Understanding Wicker and Its Staining Potential
● Materials Needed for Staining Wicker Baskets
● Step-by-Step Guide to Staining Wicker Baskets
>> Step 2: Cleaning the Basket
● Techniques for Different Effects
● Customizing Your Wicker Basket
>> Incorporating Decorative Elements
● Maintenance Tips for Stained Wicker Baskets
● Frequently Asked Questions (FAQ)
>> 1. Can all wicker baskets be stained?
>> 2. How long does it take for stained wicker baskets to dry?
>> 3. What type of stain should I use on wicker?
>> 4. Can I paint over stained wicker?
>> 5. How do I maintain my stained wicker baskets?
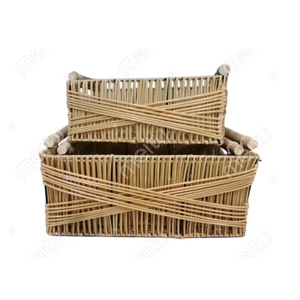
Wicker baskets are not only functional but also add a touch of charm to any space. However, over time, they may lose their luster or not match your decor. One popular solution is to stain wicker baskets, which can enhance their appearance and extend their lifespan. This article will explore the process of staining wicker baskets, the materials needed, techniques, and tips for achieving the best results.
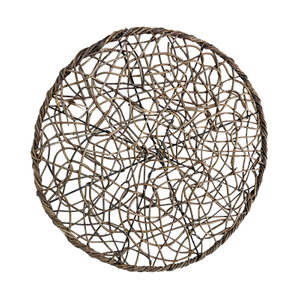
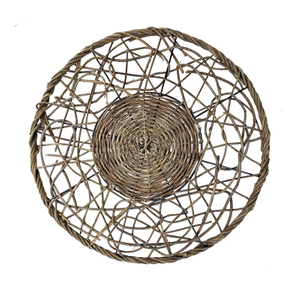
Wicker is a weaving process that can involve various materials, including rattan, willow, and reed. The ability to stain a wicker basket largely depends on the type of material used. Natural materials absorb stains better than synthetic ones. Before starting the staining process, it's crucial to ensure that your basket is made from a suitable material.
1. Rattan: A popular choice for wicker furniture and baskets, rattan is durable and absorbs stains well.
2. Willow: Known for its flexibility and strength, willow can also take on stains effectively.
3. Reed: Often used in smaller baskets, reed is lightweight and can be stained but may require more care during the process.
4. Synthetic Wicker: Made from plastic or resin, synthetic wicker cannot be stained in the same way as natural materials.
1. Stain: Choose an oil-based stain, gel stain, or a stain specifically designed for wicker.
2. Brushes: A foam brush or chip brush for applying the stain.
3. Rags: For wiping off excess stain.
4. Drop Cloth: To protect your work surface.
5. Gloves: To keep your hands clean.
6. Sealer: A clear coat to protect the stained surface.
7. Sandpaper: Fine-grit sandpaper may be needed if you want to prepare the surface or distress the basket.
- Choose a Well-Ventilated Area: Work outside or in a garage with good airflow to avoid inhaling fumes from the stain.
- Lay Down a Drop Cloth: Protect your workspace with a drop cloth or old newspaper to catch any drips.
Before you start staining, it's essential to clean your wicker basket thoroughly:
- Dust Off: Use a soft cloth or duster to remove any dust and debris from the basket.
- Wash with Soap and Water: If the basket is particularly dirty, wash it with mild soap and water. Rinse well and let it dry completely.
- Test the Stain: Before applying it to the entire basket, test the stain on an inconspicuous area to see how it reacts with the material.
1. Use a Brush: Dip your brush into the stain and apply it in small sections. Use an up-and-down motion followed by side-to-side strokes to ensure even coverage.
2. Avoid Overloading: Do not overload your brush; this can lead to drips and uneven application.
3. Wipe Off Excess: Immediately wipe off any excess stain with a rag to prevent pooling and ensure an even finish.
- Allow the basket to dry completely according to the stain manufacturer's instructions. This may take several hours or even days depending on humidity levels.
- Once dry, apply a clear sealer using a clean brush. This step is crucial for protecting your newly stained basket from wear and tear.

- Layering Colors: For a more complex look, consider layering different stains. Apply one color, let it dry, then apply another.
- Distressing: If you want a rustic look, lightly sand areas after staining to create highlights.
Staining isn't just about changing color; it's also about customizing your wicker baskets to fit your style:
You can create patterns using painter's tape before applying your stain:
- Stripes or Geometric Shapes: Use painter's tape to mask off areas where you don't want stain applied.
- Ombre Effects: Blend two colors together by applying one color at the top of the basket and gradually blending into another color at the bottom.
Consider adding decorative elements after staining:
- Fabric Liners: Line your baskets with fabric that complements your new color scheme.
- Embellishments: Attach ribbons, beads, or other embellishments that enhance your design.
1. Skipping the Test Patch: Always test your stain first; different materials absorb stains differently.
2. Overloading Your Brush: This can lead to drips and uneven coverage.
3. Neglecting Sealing: Failing to seal can result in quick wear of your stained surface.
4. Ignoring Drying Times: Rushing through drying times can lead to smudges or uneven finishes.
After investing time into staining your wicker baskets, proper maintenance will ensure they stay beautiful:
1. Regular Dusting: Use a soft cloth or duster regularly to keep dust at bay.
2. Spot Cleaning: For spills or stains, use a damp cloth immediately; avoid soaking the wicker as it can warp.
3. Avoid Direct Sunlight: Prolonged exposure can fade colors over time; consider placing baskets in shaded areas.
Staining wicker baskets is an effective way to refresh their appearance and customize them to fit your decor style. By following these steps and tips, you can achieve beautiful results that enhance your home's aesthetic while preserving the functionality of these versatile items.
With creativity and attention to detail, you can transform plain wicker into stunning pieces that reflect your personal style.

Only baskets made from natural materials like rattan or reed can be effectively stained. Synthetic materials may not absorb stains properly.
Drying time varies based on humidity and temperature but typically takes several hours to a few days.
Oil-based stains or gel stains are recommended as they penetrate well into natural fibers.
Yes, but it's best to lightly sand the surface before painting for better adhesion.
Regular dusting and occasional cleaning with a damp cloth will help maintain their appearance; avoid harsh chemicals that could damage the finish.
[1] https://www.textileindie.com/basket-stains-and-sealer/
[2] https://www.youtube.com/watch?v=_zsp0rxqEIs
[3] https://www.bladesmithsforum.com/index.php
[4] http://www.nativeee.com/index.php/news/278.html
[5] https://salvagedinspirations.com/how-to-stain-a-wicker-basket/
[6] https://blog.wordvice.cn/common-transition-terms-used-in-academic-papers/
[7] https://www.loveourreallife.com/how-to-update-old-baskets-with-driftwood-stain-or-other-gray-stain/
[8] https://m.medsci.cn/show_article.do?id=36092614f
[9] https://www.notjustahousewife.net/stain-basket/
[10] https://homemadebycarmona.com/how-to-stain-basket/