Views: 222 Author: Tomorrow Publish Time: 2025-03-13 Origin: Site


Content Menu
>> Why Make a Handmade Fruit Basket?
● Types of Handmade Fruit Baskets
● How to Make a Simple Woven Handmade Fruit Basket
>> Materials:
● How to Make a Paper Handmade Fruit Basket
>> Materials:
● How to Make a Macrame Handmade Fruit Basket
>> Materials:
● How to Make a Fabric Handmade Fruit Basket
>> Materials:
● How to Make an Upcycled Handmade Fruit Basket
● Tips for Arranging Fruit in Your Handmade Basket
● Advanced Techniques for Handmade Fruit Baskets
● FAQ
>> 1. What are the best fruits to include in a handmade fruit basket?
>> 2. How can I keep the fruits in my handmade fruit basket fresh?
>> 3. Can I use recycled materials to make a handmade fruit basket?
>> 4. How do I choose the right size for my handmade fruit basket?
>> 5. What are some creative ways to decorate a handmade fruit basket?
A handmade fruit basket is more than just a container for your favorite fruits; it's a thoughtful and personalized gift, a decorative centerpiece, and a creative project all rolled into one. Whether you're aiming to impress someone with a unique present, add a touch of rustic charm to your kitchen, or simply enjoy a rewarding DIY activity, crafting your own fruit basket is an excellent choice. This comprehensive guide will walk you through various methods to create stunning handmade fruit baskets using different materials and techniques. From simple woven baskets to elaborate macrame designs, you'll find inspiration and step-by-step instructions to suit your skill level and preferences.
- Personalization: Unlike store-bought baskets, a handmade fruit basket can be customized to reflect the recipient's taste or the décor of your home.
- Cost-Effective: Creating your own basket can be much cheaper than purchasing a pre-made one, especially if you repurpose materials you already have.
- Unique Gift: A handmade fruit basket shows that you put thought and effort into the gift, making it more meaningful.
- Environmentally Friendly: Using recycled materials reduces waste and promotes sustainability.
- Creative Outlet: Crafting a handmade fruit basket is a fun and engaging activity that allows you to express your creativity.
There are numerous ways to create a handmade fruit basket, each with its own set of materials and techniques. Here are some popular types:
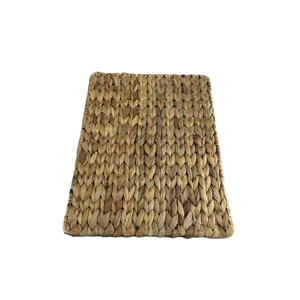
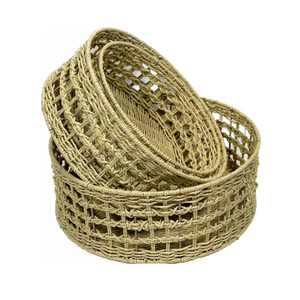
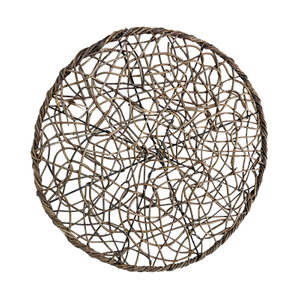
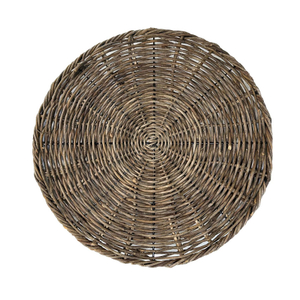
1. Woven Baskets: These baskets are traditionally made from natural materials like wicker, bamboo, or reed.
2. Paper Baskets: A simple and fun option, paper baskets can be made from construction paper, cardboard, or even recycled newspapers.
3. Macrame Baskets: Using the art of macrame, you can create intricate and stylish baskets with cotton cords or twine.
4. Fabric Baskets: These baskets involve sewing fabric together to create a sturdy and decorative container.
5. Upcycled Baskets: Transform old containers like bowls, buckets, or even tires into unique fruit baskets.
The materials required will vary depending on the type of handmade fruit basket you choose to make. Here's a general list of common supplies:
- Basket Base: This could be a pre-made basket, cardboard, paper, fabric, or any sturdy container.
- Weaving Material: For woven baskets, you'll need wicker, bamboo, reed, or sturdy paper strips.
- Macrame Cord: Cotton cord, twine, or jute for macrame baskets.
- Fabric: Cotton, linen, or any durable fabric for fabric baskets.
- Scissors or Craft Knife: For cutting materials.
- Glue or Adhesive: To hold the basket together.
- Ruler or Measuring Tape: For accurate measurements.
- Pencil: For marking guidelines.
- Decorations: Ribbons, bows, paint, or other embellishments to personalize your basket.
- Plastic Wrap: To keep the fruits fresh.
Woven baskets are a classic choice for fruit storage and display. Here's how to make a simple woven basket:
- Wicker, bamboo, or reed strips
- Basket base (wooden or cardboard)
- Scissors
- Glue
- Clothespins (to hold the strips in place while the glue dries)
1. Prepare the Base: If you're not using a pre-made basket base, cut a circle or square out of sturdy cardboard or thin wood.
2. Attach the Vertical Strips: Glue the vertical strips around the perimeter of the base, spacing them evenly. Use clothespins to hold them in place until the glue dries.
Ensure that the vertical strips are long enough to create the desired height of the basket.
3. Weave the Horizontal Strips: Start weaving the horizontal strips in and out of the vertical strips, beginning at the base.
Weave tightly to create a sturdy structure. Overlap the ends of the strips and glue them in place.
4. Continue Weaving: Continue weaving until you reach the desired height of the basket.
5. Secure the Top Edge: Fold the vertical strips over the top horizontal strip and glue them in place to create a finished edge.
6. Decorate: Add ribbons, bows, or paint to personalize your basket.
Paper baskets are a fun and easy project, perfect for beginners or kids. Here's how to make one:
- Construction paper or cardstock
- Scissors
- Glue
- Ruler
- Pencil
- Decorations (optional)
1. Prepare the Strips: Cut the paper into strips of equal width (about 1 inch wide). You'll need strips for the base and strips for the weaving.
2. Create the Base: Arrange several strips parallel to each other and glue them together to form a flat base.
3. Weave the Base: Weave additional strips perpendicular to the base strips, alternating over and under. Glue the ends to secure them.
4. Create the Walls: Fold the edges of the base upwards to form the walls of the basket. Glue the corners together to create a box shape.
5. Weave the Walls: Weave more paper strips around the outside of the walls, alternating over and under the vertical strips. Glue the ends to secure them.
6. Secure the Top Edge: Fold the top edges of the vertical strips over and glue them in place to create a finished edge.
7. Decorate: Add drawings, stickers, or other decorations to personalize your basket.

Macrame baskets add a touch of bohemian style to your fruit storage. Here's how to make one:
- Macrame cord (cotton, jute, or twine)
- Wooden or metal ring (for the top of the basket)
- Scissors
- Measuring tape
- S-hooks (optional, for hanging)
- Lark's Head Knot: Fold the cord in half and place the loop over the ring. Pull the ends of the cord through the loop and tighten.
- Square Knot: Divide the cords into groups of four. Take the right cord over the two middle cords and under the left cord. Then, take the left cord under the two middle cords and over the right cord. Repeat, alternating sides.
- Half Square Knot Spiral: This is the same as a square knot, but you only repeat the knot on one side, creating a spiral effect.
1. Attach Cords to the Ring: Cut multiple cords to the desired length (usually several feet long, depending on the size of the basket). Attach the cords to the ring using lark's head knots.
Ensure you have an even number of cords for symmetrical knotting.
2. Create the Upper Section: Use square knots or half square knot spirals to create a decorative pattern around the ring.
Experiment with different knot combinations to achieve your desired design.
3. Form the Basket Shape: Divide the cords into sections and begin creating a net-like structure using square knots. Gradually widen the spaces between the knots to form the basket shape.
4. Create the Base: Gather the cords at the bottom of the basket and tie them together securely. You can also create a flat base by knotting the cords in a circular pattern.
5. Finishing Touches: Trim the ends of the cords to create a fringe or tuck them back into the knots for a cleaner look.
6. Hang or Display: Use S-hooks to hang the basket or place it on a flat surface.
Fabric baskets are durable and can be customized with various patterns and colors. Here's how to make one:
- Fabric (cotton, linen, or canvas)
- Scissors
- Sewing machine or needle and thread
- Ruler
- Pencil
- Interfacing (for added stability)
- Decorations (optional)
1. Cut the Fabric: Cut two circles or squares of fabric for the outer layer and two for the lining. Cut the interfacing to the same size.
2. Prepare the Layers: Iron the interfacing onto the wrong side of the outer fabric pieces.
3. Sew the Outer Layer: Place the two outer fabric pieces right sides together and sew around the edge, leaving a small opening for turning.
4. Turn and Press: Turn the fabric right side out through the opening and press the edges.
5. Sew the Lining: Place the two lining fabric pieces right sides together and sew around the edge, leaving a small opening.
6. Insert the Lining: Place the lining inside the outer layer, wrong sides together. Align the edges and pin in place.
7. Sew the Top Edge: Fold the top edge of both layers inwards and sew around the top of the basket to create a finished edge.
8. Close the Openings: Sew the openings in the outer layer and lining closed.
9. Add Handles (Optional): Cut two strips of fabric for the handles. Fold the edges inwards and sew along the length of the strips. Attach the handles to the sides of the basket.
10. Decorate: Add buttons, ribbons, or embroidery to personalize your basket.

Upcycling is a great way to create unique and eco-friendly fruit baskets. Here are a few ideas:
- Materials: Old tire, paint, rope or twine, sealant
- Instructions: Clean the tire thoroughly and paint it in your desired color. Let it dry. Wrap rope or twine around the center of the tire to create a base for the fruit. Seal the entire structure to protect it from moisture.
- Materials: Old bowl, paint or decoupage materials, sealant
- Instructions: Clean the bowl and decorate it with paint, decoupage, or other materials. Seal the inside of the bowl to make it food-safe.
- Materials: Old bucket, paint, fabric scraps, glue
- Instructions: Clean the bucket and paint it. Cut fabric scraps into strips and glue them around the bucket for a decorative effect.
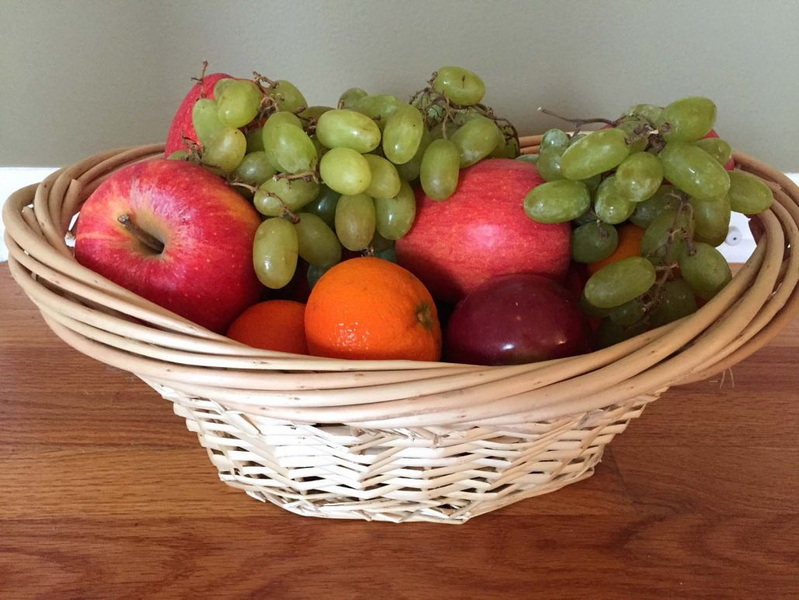
- Choose a Variety of Fruits: Select fruits of different colors, shapes, and sizes to create an appealing arrangement.
- Use Sturdy Fruits as a Base: Place heavier fruits like apples and oranges at the bottom of the basket to provide a stable base.
- Add Softer Fruits on Top: Place softer fruits like berries and grapes on top to prevent them from being crushed.
- Consider Color Balance: Arrange the fruits to create a visually balanced and appealing color scheme.
- Add Greenery: Include leaves or sprigs of herbs to add a touch of freshness and visual interest.
- Wrap for Freshness: Use plastic wrap to keep the fruits fresh and prevent them from drying out.
- Use Food-Safe Materials: Ensure that all materials that come into contact with the fruit are food-safe.
- Consider the Recipient's Preferences: If you're making the basket as a gift, consider the recipient's favorite fruits and colors.
- Get Creative with Decorations: Use your imagination to add unique and personalized decorations to your basket.
- Protect Delicate Fruits: Use soft padding like tissue paper or cloth to protect delicate fruits during transport.
- Add a Personal Touch: Include a handwritten note or card to make the gift even more special.
For those looking to take their handmade fruit basket to the next level, here are some advanced techniques to explore:
Layered weaving involves creating multiple layers of weaving to add depth and texture to your basket. This technique is particularly effective for woven baskets, where you can alternate between different materials or colors.
Experiment with different macrame patterns to create unique and intricate designs. You can use various knots and cord arrangements to achieve a variety of looks, from simple to complex.
For fabric baskets, consider adding embellishments like appliques, embroidery, or quilting to give your basket a personalized touch. These details can add visual interest and make your basket truly one-of-a-kind.
Use upcycled materials like old belts, rope, or fabric strips to create unique handles for your basket. This not only adds a touch of creativity but also reduces waste.
Combine different materials and techniques to create a mixed media basket. For example, you could weave a basket and then add fabric or macrame details. This approach allows you to experiment with various textures and styles.
Creating a handmade fruit basket is a rewarding and creative endeavor. Whether you choose to weave a traditional basket, craft a paper container, macrame a stylish holder, sew a fabric bin, or upcycle an old item, the possibilities are endless. By following the step-by-step instructions and tips in this guide, you can create a personalized and thoughtful gift or a unique addition to your home décor. Enjoy the process of crafting your own handmade fruit basket and the pleasure of sharing it with others.

The best fruits to include are those that are sturdy and visually appealing. Apples, oranges, grapes, and kiwis are excellent choices. Avoid soft fruits like berries, which can get crushed easily.
Wrap the basket with plastic wrap to keep the fruits from drying out. Store the basket in a cool, dry place, away from direct sunlight.
Yes, upcycling old materials like tires, bowls, and buckets is a great way to create unique and eco-friendly fruit baskets. Clean and decorate the materials before use.
Consider the amount of fruit you want to include and the purpose of the basket. A smaller basket is suitable for a single person, while a larger basket is better for a family or as a gift.
Add ribbons, bows, paint, stickers, or fabric scraps to personalize your basket. Consider the recipient's taste or the theme of the occasion when choosing decorations.
[1] https://www.youtube.com/watch?v=PH9G7zz0A4o
[2] https://www.youtube.com/watch?v=L5yi3T_bQd4
[3] https://www.sohu.com/a/475692289_121124034
[4] https://www.melaniecooks.com/homemade-fruit-baskets/10441/
[5] https://www.youtube.com/watch?v=1OZjIKOnaXA
[6] https://www.bbc.co.uk/learningenglish/chinese/features/take-away-english/ep-200928
[7] https://diy.bostik.com/en-AU/ideas-that-stick/fruit-basket
[8] https://www.youtube.com/watch?v=kOTknsV8bfw
[9] https://www.sohu.com/a/202438909_498098
[10] https://www.youtube.com/watch?v=MoNP_6DjTYA