Views: 222 Author: Tomorrow Publish Time: 2025-02-18 Origin: Site


Content Menu
● Understanding Wicker Baskets
● FAQ
>> 1. What materials can I use for basket handles?
>> 2. How do I ensure my handles are secure?
>> 3. Can I paint my wicker basket after adding handles?
>> 4. What is the best way to measure handle length?
>> 5. Are there any special care instructions for wicker baskets?
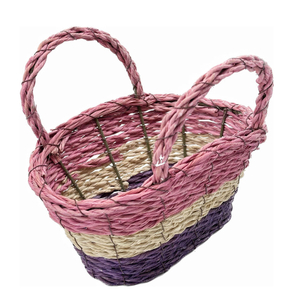
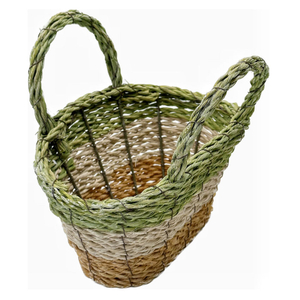
Wicker baskets are not only functional but also add a touch of charm to any home decor. Adding handles to a wicker basket can enhance its usability and aesthetic appeal. This guide will walk you through various methods to add handles to your wicker baskets, complete with step-by-step instructions, images, and videos to help you along the way.
Wicker baskets are typically made from flexible plant materials such as willow, rattan, or reed. These materials are woven together to create a sturdy structure that can be used for storage, decoration, or even as gifts. When adding handles, it is essential to consider the basket's design and purpose.
Wicker baskets come in various shapes and sizes, making them versatile for different uses—from organizing household items to serving as decorative pieces in your living space. The addition of handles not only increases their functionality but also enhances their visual appeal.
Adding handles to your wicker basket provides several benefits:
- Increased Mobility: Handles make it easier to carry baskets filled with items, whether you're transporting laundry, groceries, or craft supplies.
- Enhanced Aesthetics: Handles can be a design feature that complements or contrasts with the basket's color and texture.
- Customization: You can personalize the basket by choosing materials and styles that reflect your taste and home decor.
Before starting your project, gather the following materials:
- Wicker basket: Choose one that suits your style.
- Handle material: Options include leather strips, jute cord, or metal hoops.
- Adhesive: Hot glue or craft glue works well.
- Scissors: For cutting handle material.
- Drill or hole punch: If using leather or thick materials.
- Ruler: To measure handle lengths accurately.
- Decorative elements (optional): Paint, fabric, or embellishments for personalizing your basket.
Step 1: Prepare the Leather Strips
Cut two leather strips approximately 1 inch wide and the desired length for your handles. The length will depend on how high you want the handles to sit above the basket.
Step 2: Punch Holes
Use a leather hole punch to create holes at both ends of each strip. Ensure they are evenly spaced from the edges.
Step 3: Attach Handles
Align the leather strips with the sides of the basket. Insert one end of each strip through the basket weave and secure it by folding it back and using snaps or glue to hold it in place. Repeat on the opposite side.
Leather strips provide a rustic yet elegant look that can enhance any wicker basket's appearance. They are durable and can support significant weight when properly attached.
Step 1: Cut Reed Strands
Cut two strands of reed about 80 inches long. Soak them in water for flexibility.
Step 2: Twist the Strands
Fold the strands over each other and twist them tightly to form a thicker handle. Aim for a smooth finish by twisting in one direction.
Step 3: Attach to Basket
Insert each end of the twisted handle into the basket's sides about half an inch from the top. Secure with glue or by weaving them into existing wicker patterns.
Twisted reed handles offer a natural look that complements rustic decor styles perfectly. They are lightweight yet strong enough for everyday use.

Step 1: Prepare Jute Cord
Cut two pieces of jute cord approximately 10 inches long for each handle.
Step 2: Form Handles
Wrap one piece around another to create a sturdy handle shape. Glue one end to the top edge of the basket.
Step 3: Secure and Finish
Continue wrapping until you reach the desired thickness. Glue down any loose ends and repeat on the opposite side.
Jute cord is an eco-friendly option that adds texture and warmth to your wicker basket. Its natural fibers blend well with various decor styles, from bohemian to farmhouse chic.
Step 1: Choose Metal Hoops
Select metal hoops that fit your basket size. Ensure they are sturdy enough to support weight.
Step 2: Attach Hoops
Drill holes into the sides of your basket where you want to attach the hoops. Insert one end of each hoop through a hole and secure it with glue or screws.
Metal hoop handles introduce a modern touch to traditional wicker baskets. They are particularly effective in contemporary settings where sleek lines are favored.
Step 1: Prepare Cane Strands
Cut several strands of cane about 36 inches long. Soak them in water for pliability.
Step 2: Braid Strands Together
Braid three strands together tightly until you reach your desired length for the handle.
Step 3: Attach Braid to Basket
Secure each end of the braided handle by inserting them into the basket weave and gluing them in place.
Braided cane handles provide an intricate detail that elevates any wicker basket's design. This method allows for creativity in patterning while ensuring strength and durability.
1. Choose Complementary Colors: When selecting materials for your handles, consider colors that complement or contrast with your wicker basket's natural tones.
2. Experiment with Textures: Mixing different textures—like smooth leather with rough jute—can create visual interest and depth in your design.
3. Consider Weight Capacity: Ensure that whatever material you choose can support the weight you plan on carrying in your basket.
4. Personalize Your Design: Don't hesitate to add embellishments such as beads, tassels, or painted designs on your handles for added flair.
5. Practice Patience: Take your time during assembly; rushing can lead to mistakes that may compromise the integrity of your handles.
For visual learners, here are some helpful video tutorials demonstrating how to add handles to wicker baskets:
Adding handles to wicker baskets not only enhances their functionality but also allows for creative expression. Whether you choose leather, jute, metal, or braided cane, each method offers unique aesthetics and durability. Experiment with different materials and techniques to find what best suits your style and needs.
By following this guide, you can transform any ordinary wicker basket into a personalized piece that complements your home decor while serving practical purposes. With creativity and patience, you'll find joy in crafting beautiful functional art pieces that can be cherished for years to come.

You can use leather strips, jute cord, metal hoops, reed strands, or braided cane for making handles.
Make sure to use strong adhesive like hot glue and consider reinforcing with additional weaving or stitching if necessary.
Yes, painting can enhance aesthetics; just ensure that any paint used is compatible with wicker materials.
Measure from where you want the handle attached on the basket up to how high you want it above the rim for comfort during use.
Avoid exposing wicker baskets to excessive moisture or direct sunlight as this can weaken their structure over time.
[1] https://basketweaving.com/shopsite_sc/store/html/basket-weaving-handle-techniques.html
[2] https://www.youtube.com/watch?v=9MTepzU4P0E
[3] https://blueskyathome.com/make-an-anthropologie-inspired-diy-woven-basket/
[4] https://craftivitydesigns.com/leather-handles-baskets/
[5] https://www.youtube.com/watch?v=yeozMV8nz4A
[6] https://acraftymix.com/repurposed-wicker-woven-oil-basket/
[7] https://www.youtube.com/watch?v=cKxkBO9HQD4
[8] https://www.youtube.com/watch?v=fZgZk4tPFh0
[9] https://thriftysubversion.com/2023/08/10/diy-repair-wicker-basket/
[10] https://www.youtube.com/watch?v=XJzq24F0nwM