Views: 222 Author: Tomorrow Publish Time: 2025-03-19 Origin: Site


Content Menu
● Introduction to Basket Weaving
● Troubleshooting Common Issues
● FAQs
>> 1. What Materials Are Best for Making Square Wicker Baskets?
>> 2. How Do I Ensure My Basket Maintains Its Shape?
>> 3. Can I Use Different Shapes for My Basket Base?
>> 4. How Do I Add Color to My Basket?
>> 5. What Tools Are Essential for Basket Weaving?
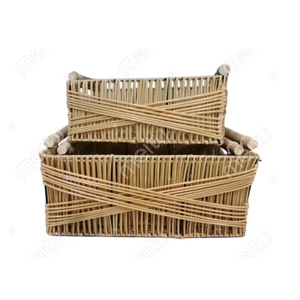
Making square wicker baskets is a fun and rewarding DIY project that can add a touch of handmade charm to any room. This guide will walk you through the process step by step, including materials needed, tools required, and detailed instructions on how to weave your own square wicker basket.
Basket weaving is an ancient craft that involves weaving or plaiting flexible materials, such as reeds, grasses, or branches, to create containers. The techniques used in basket weaving can vary significantly depending on the desired shape, size, and style of the basket. For square baskets, a sturdy base and frame are essential to maintain the shape and provide stability.
To make a square wicker basket, you will need the following materials:
- Reed or Cane: These are the most common materials used for basket weaving. You can choose from flat, flat-oval, round, or half-round reeds, depending on the desired texture and look of your basket.
- Basket Weaving Tools: Essential tools include a reed cutter, round-nose pliers, a bone awl, and a reed gauge.
- Slotted Square Base: This provides a solid foundation for your basket. Oak bases are recommended for durability.
- Shaker Tape or Twine: Used for securing the reeds or canes to the base and for finishing the rim.
- Measuring Tape and Pencil: For marking and measuring your reeds.
- Work Surface: A flat, stable surface to work on.
1. Reed Cutter: For cutting reeds to the desired length.
2. Round-Nose Pliers: Useful for bending and shaping reeds without cracking.
3. Bone Awl: For piercing holes in the reeds or base.
4. Reed Gauge: Helps in identifying the size of the reeds.
5. Clamps: For holding the base and reeds in place while weaving.
1. Cut the Slotted Square Base: Use a saw to trim the base to the desired size if necessary.
2. Mark the Spoke Holes: If your base doesn't have pre-drilled holes, use a pencil to mark where you want to place your spokes.
1. Cut the Spokes: Cut four reeds slightly longer than the height of your basket.
2. Attach Spokes to Base: Use Shaker tape or twine to secure the spokes to the corners of the base.
1. Cut Weaving Reeds: Cut a number of reeds to the same length, slightly longer than the width of your basket.
2. Start Weaving: Begin weaving by placing a reed over and under the spokes, moving around the basket in a continuous pattern.
1. Maintain Tension: Keep the reeds tight to avoid gaps.
2. Add Rows: Continue adding rows until you reach the desired height.
1. Cut Excess Reeds: Trim excess reeds at the top.
2. Secure with Twine: Use twine to secure the top row of reeds.
3. Add a Rim: Use a tapestry needle and twine to create a decorative rim.

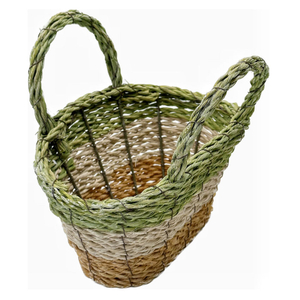
- Use Natural Materials: Experiment with different natural materials like kudzu vine or mimosa bark for unique textures.
- Dye Your Reeds: Use basket weaving dyes to add color to your basket.
- Add Handles: Attach handles made from Shaker tape or leather for easier carrying.
1. Inconsistent Tension: Ensure that the reeds are woven with consistent tension to maintain the basket's shape.
2. Incorrect Base Size: Choose a base that is appropriate for the size of basket you want to make.
For those looking to take their basket weaving skills to the next level, here are some advanced techniques:
- Pattern Weaving: Experiment with different weaving patterns, such as twill or chevron, to add visual interest to your basket.
- Incorporating Decorative Elements: Add decorative elements like shells, beads, or ribbons to give your basket a personalized touch.
- Using Different Materials: Try using other materials like bamboo, rattan, or even recycled plastic for a modern twist.
- Reeds Breaking: If reeds break during weaving, use a small amount of glue to secure them temporarily until you can replace them.
- Basket Losing Shape: If the basket starts to lose its shape, check that the reeds are evenly spaced and that the tension is consistent.
Making a square wicker basket is a rewarding project that requires patience and practice. With the right materials and tools, you can create beautiful and functional baskets for storage or decoration. Experiment with different materials and techniques to make each basket unique.

The best materials for making square wicker baskets include reeds, canes, and Shaker tape. These materials provide durability and flexibility, allowing you to create sturdy yet aesthetically pleasing baskets.
To ensure your basket maintains its shape, it's crucial to keep the reeds tightly woven and evenly spaced. Using a sturdy base and maintaining consistent tension while weaving will help prevent the basket from sagging or losing its square shape.
While a square base is ideal for a square basket, you can experiment with round or oval bases for different shapes. However, for a square basket, a square base provides the best structural support.
You can add color to your basket by dyeing the reeds before weaving. There are various dyes available specifically for basket weaving, allowing you to achieve a wide range of colors and effects.
Essential tools for basket weaving include a reed cutter, round-nose pliers, a bone awl, and a reed gauge. These tools help in cutting, shaping, and securing the reeds during the weaving process.
[1] https://www.craftpassion.com/easy-basket-weaving/
[2] https://www.earthguild.com/products/basketry/baskhub.htm
[3] https://blog.csdn.net/u012549626/article/details/127719965
[4] https://www.matttommey.com/how-to-make-baskets.html
[5] https://www.basketweaving.com/basket-weaving-tools-dyes-and-bases/basket-weaving-tools-dyes-bases-best-sellers/
[6] https://www.sohu.com/a/230379066_290050
[7] https://www.youtube.com/watch?v=tpEb3ekcRm0
[8] https://basketweaving.com/shopsite_sc/store/html/basket-weaving-bases-tools.html