Views: 222 Author: Tomorrow Publish Time: 2024-12-01 Origin: Site


Content Menu
>> Step 2: Cut Your Coiling Material
>> Step 5: Finish the Top Edge
>> Step 6: Add Decorative Elements
>> Step 7: Secure and Finalize
>> 1. What materials are best for making woven coil baskets?
>> 2. How long does it take to make a woven coil basket?
>> 3. Can I wash my woven coil basket?
>> 4. How can I make my woven coil basket more durable?
>> 5. Are there any advanced techniques for experienced crafters?
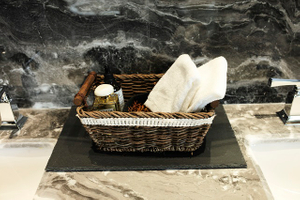
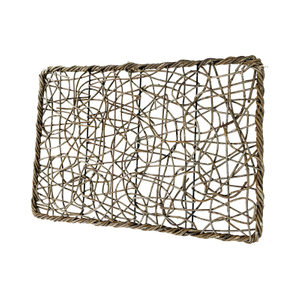
Woven coil baskets are not only functional but also serve as beautiful decorative pieces that can enhance any space. This craft has been practiced for centuries across various cultures, and it remains a popular activity for both beginners and experienced crafters. In this article, we will explore the step-by-step process of making a woven coil basket, the materials needed, and tips to help you create stunning designs.

Before you start crafting your woven coil basket, gather the following materials:
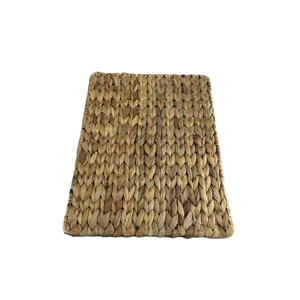
- Coiling Material: You can use a variety of materials such as cotton rope, yarn, fabric strips, or raffia. Choose colors and textures that appeal to you.
- Base Material: A sturdy base is essential for your basket. You can use cardboard, a wooden circle, or even a small plate as a foundation.
- Needle and Thread: A large-eyed needle is ideal for threading your coiling material. Use a strong thread that matches your coiling material.
- Scissors: For cutting your materials to the desired length.
- Hot Glue Gun (optional): This can be used to secure the base or to attach embellishments.
- Decorative Elements (optional): Beads, buttons, or other embellishments can add a personal touch to your basket.
Start by preparing your base. If you are using cardboard or wood, cut it into a circle or any shape you prefer. The size of the base will determine the size of your basket. For beginners, a base with a diameter of about 6-8 inches is a good starting point. You can also use a sturdy plate or a round piece of wood as a base, which will provide a solid foundation for your basket.
Cut your coiling material into strips. If you are using fabric, aim for strips that are about 1 inch wide and 10-12 inches long. For rope or yarn, you can cut longer lengths, as they will be easier to work with. The length of the strips will depend on how large you want your basket to be. It's a good idea to have a variety of colors and patterns to create a visually appealing design.
1. Attach the First Strip: Take one strip of your coiling material and place it against the edge of your base. Use your needle and thread to sew it in place. Make sure to secure it well, as this will be the foundation of your basket.
2. Continue Adding Strips: As you add more strips, coil them around the base. Use a sewing technique that allows you to stitch through the previous layer while keeping the coils tight. This will create a sturdy structure. You can also use a whip stitch or a zigzag stitch to secure the coils together.
3. Change Directions: To create interesting patterns, you can change the direction of your coils. For example, you can alternate between clockwise and counterclockwise as you build up the sides of the basket. This technique not only adds visual interest but also strengthens the basket.
As you continue to add coiling material, gradually build up the sides of your basket. Keep the coils close together to ensure that the basket is sturdy. You can also experiment with different colors and textures to create unique designs. For instance, you might choose to create stripes by alternating colors every few rows or incorporate a spiral pattern for a more dynamic look.
Once you reach your desired height, it's time to finish the top edge of your basket. You can either fold the last row of coils over to create a finished edge or simply cut the coiling material and secure it with a few stitches. If you want a more polished look, consider adding a decorative trim around the top edge using a contrasting color or material.
If you want to personalize your basket, now is the time to add decorative elements. You can sew beads into the coils, attach buttons, or even glue on fabric flowers. This step is entirely optional but can add a beautiful touch to your finished product. Consider using natural elements like dried flowers or twigs for a rustic look, or go for bright, colorful embellishments for a more modern feel.
Once you are satisfied with your basket, make sure all the ends are secured. If you used a hot glue gun, apply glue to any loose ends to prevent them from unraveling. Allow the glue to dry completely before using your basket. You can also spray your basket with a fabric protector if you used fabric materials, which will help it last longer and resist stains.

- Practice Patience: Coiling can be a time-consuming process, especially for beginners. Take your time and enjoy the crafting experience. Don't rush through the steps; the more care you take, the better your basket will turn out.
- Experiment with Materials: Don't be afraid to try different materials. Each type will give your basket a unique look and feel. For example, using jute rope will give a more rustic appearance, while cotton yarn can create a softer, more colorful basket.
- Use a Thimble: If you find that your fingers are getting sore from pushing the needle through the coiling material, consider using a thimble for added protection. This can make the process more comfortable and allow you to work more efficiently.
- Watch Tutorials: There are many video tutorials available online that can provide visual guidance and inspiration for your basket-making journey. Watching others can help you understand techniques better and spark new ideas for your own projects.
- Join a Craft Group: If you enjoy social crafting, consider joining a local craft group or online community. Sharing your progress and learning from others can enhance your skills and make the process more enjoyable.
Making a woven coil basket is a rewarding and enjoyable craft that allows for creativity and personalization. Whether you are looking to create a functional storage solution or a decorative piece, this craft can be adapted to suit your needs. With practice, you can develop your skills and create beautiful baskets that reflect your style. Remember, the key to a successful woven coil basket is patience, creativity, and a willingness to experiment with different materials and techniques.

The best materials for making woven coil baskets include cotton rope, yarn, fabric strips, and raffia. Each material offers a different texture and appearance, so choose based on your desired look and feel.
The time it takes to make a woven coil basket can vary depending on the size and complexity of the design. A simple basket can take a few hours, while more intricate designs may take several days to complete.
If you used fabric or yarn, you can spot clean your basket with a damp cloth. For more thorough cleaning, check the care instructions for your materials. Some baskets may be machine washable, while others may require hand washing.
To make your woven coil basket more durable, ensure that you use strong materials and secure all ends properly. Additionally, consider applying a fabric protector spray if you used fabric, which can help resist stains and wear.
Yes! Experienced crafters can explore advanced techniques such as incorporating different weaving patterns, using multiple colors in a single row, or adding intricate embellishments like embroidery or beading to enhance the design of their baskets.