Views: 222 Author: Tomorrow Publish Time: 2025-03-22 Origin: Site


Content Menu
● Introduction to Painting Wicker Baskets
● Preparing Your Wicker Basket for Painting
>> Step 2: Repair Damaged Areas (Optional)
>> Spray Paint
>> Chalk Paint
● Painting Your Black Wicker Basket
>> Distressing for a Vintage Look
● Additional Ideas for Decorating Your Basket
>> 1. What is the best type of paint to use on wicker baskets?
>> 2. How do I ensure even coverage when spray painting a wicker basket?
>> 3. Can I use regular acrylic paint on wicker without primer?
>> 4. How long does it take for spray paint to dry on a wicker basket?
>> 5. Can I paint a wicker basket with oil-based paints?
Painting a black wicker basket can be a fun and creative way to give new life to an old piece of furniture. Whether you're looking to match your home decor or simply want to add a personal touch, this guide will walk you through the process step by step. Below, you'll find detailed instructions, tips, and tricks to help you achieve a beautiful finish.
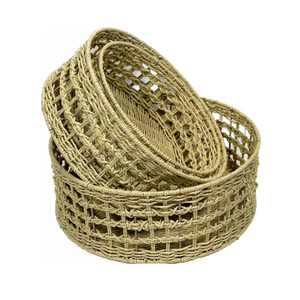
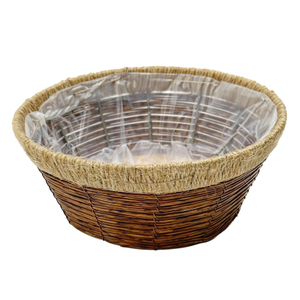
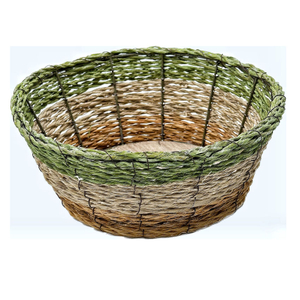
Wicker baskets are versatile and can be used for storage, decoration, or even as a planter. However, over time, they may lose their appeal due to fading or discoloration. Painting is an excellent way to revive these baskets and make them fit into any interior design theme.
- Renewal: Painting helps restore the original beauty of the basket.
- Customization: You can choose colors that match your home decor.
- Protection: Paint can protect the wicker from further wear and tear.
Before you start painting, it's crucial to prepare your basket properly. This involves cleaning and possibly repairing any damaged areas.
1. Dust Removal: Use a dry paintbrush or a soft-bristled brush to remove any dust or debris from the basket.
2. Washing: If the basket is particularly dirty, mix mild soap with water, gently scrub the basket, and rinse it thoroughly. Let it dry completely before proceeding.
If your basket has any broken or loose strands, you may need to repair them using a strong adhesive or by re-weaving the strands. This step is crucial to ensure that your paint adheres evenly and doesn't flake off easily.
The type of paint you choose can significantly affect the outcome of your project. Here are a few options:
- Advantages: Easy to apply, quick drying, and provides a smooth finish.
- Disadvantages: May not adhere well to certain materials without primer.
- Advantages: Adheres well to wicker without primer, easy to distress for a vintage look.
- Disadvantages: May require multiple coats for full coverage.
- Advantages: Can be used for detailed designs, dries quickly.
- Disadvantages: May require a primer or multiple coats.

Now that you have prepared your basket and chosen your paint, it's time to start painting.
1. Apply a Base Coat: Start by spraying the inside of the basket. Hold the can about 8 inches away and use even strokes.
2. Allow to Dry: Let the first coat dry for about 5 minutes before applying additional coats. You may need two to three coats for full coverage.
3. Paint the Outside: Once the inside is dry, turn the basket over and paint the outside. Use long, even strokes to ensure an even finish.
1. Apply a Base Coat: Use a brush to apply chalk paint evenly across the basket. You may not need a primer with chalk paint.
2. Allow to Dry: Let the first coat dry completely before applying additional coats.
1. Apply a Base Coat: Use a brush to paint the basket. You may need a primer for better adhesion.
2. Add Details: Acrylic paint is great for adding detailed designs or patterns.
Once your base coat is dry, you can add additional details or effects to make your basket truly unique.
1. Tape Off Area: Use painter's tape to mark off the area you want to dye.
2. Apply Paint: Spray or brush paint over the taped area to create a dip dyed effect.
You can add labels or decals to give your basket a personalized touch. This is especially useful if you plan to use the basket for storage and want to label its contents.
If you're using chalk paint, you can easily distress the basket to give it a vintage or rustic look. Use a sanding block or fine-grit sandpaper to gently rub away some of the paint, revealing the underlying wicker.
- Work in a Well-Ventilated Area: Especially when using spray paint.
- Use Drop Cloths: Protect your work surface from paint spills.
- Test Paint: Apply a small amount of paint to an inconspicuous area first.
- Use a Primer: If using acrylic paint, consider applying a primer for better adhesion.
- Avoid Overpainting: Too many coats can lead to a thick, uneven finish.
1. Not Preparing the Surface: Failing to clean or repair the basket can lead to poor paint adhesion.
2. Applying Too Much Paint: This can result in drips and uneven coverage.
3. Not Allowing Coats to Dry: Rushing the process can lead to a messy finish.
- Add Ribbons or Twine: Use colorful ribbons or twine to add a decorative touch to the handle or around the basket.
- Use Stencils: Apply stencils to paint intricate designs or patterns.
- Add Natural Elements: Incorporate natural elements like seashells, pinecones, or dried flowers for a unique look.
Painting a black wicker basket is a simple DIY project that can add a touch of elegance to any room. By following these steps and tips, you can transform your old basket into a beautiful piece of home decor. Whether you choose spray paint, chalk paint, or acrylics, the key to success lies in preparation and patience.

The best type of paint depends on the desired finish and the material of the basket. Spray paint is quick and easy, while chalk paint adheres well without primer. Acrylic paint is great for detailed designs.
To ensure even coverage, spray paint from all angles, using long, even strokes. Apply light coats and let each coat dry before adding the next.
It's generally recommended to use a primer with acrylic paint to ensure good adhesion. However, some acrylic paints are specifically designed for use on wicker without primer.
Spray paint typically dries within 5 to 10 minutes, depending on the brand and environmental conditions. However, it may take longer for the paint to fully cure.
While it's technically possible to use oil-based paints, they are not recommended for wicker due to their slow drying time and potential for uneven adhesion. Water-based paints like acrylic or chalk paint are generally better options.
[1] https://lifeonsummerhill.com/how-to-paint-wicker-baskets/
[2] https://www.youtube.com/watch?v=JTopND9NUKw
[3] https://www.sohu.com/a/202438909_498098
[4] https://smallstuffcounts.com/painting-wicker-baskets/
[5] https://www.youtube.com/watch?v=uXA9shx2uY8
[6] https://www.sohu.com/a/759993819_121669610
[7] https://www.theboldabode.com/how-to-spray-paint-wicker-baskets-2.html
[8] https://www.cambridgeinternational.org/Images/520575-june-2022-examiner-report.pdf
[9] https://www.youtube.com/watch?v=47BGJwhFiaM
[10] https://myuncommonsliceofsuburbia.com/update-wicker-baskets-with-paint-to-look-like-natural-rattan/
[11] https://sheholdsdearly.com/faux-wood-painting-technique-wicker-basket/