Views: 222 Author: Tomorrow Publish Time: 2025-02-10 Origin: Site


Content Menu
>> Selecting the Right Wooden Base
>> Assembling a Two-Piece Wooden Base
>> Basic Weave
>> Twining
>> Coiling
● Embellishments and Finishing Touches
>> Adding Color
● Tips and Tricks for Successful Basket Weaving
● FAQ
>> 1. What are the benefits of using a wooden base for basket weaving?
>> 2. Can I use different types of wood for the base?
>> 3. How do I prevent the weaving material from slipping off the wooden base?
>> 4. What if my wooden base doesn't have pre-drilled holes?
>> 5. How do I finish the top edge of the basket for a clean look?
Weaving baskets with wooden bases opens up a world of crafting possibilities, blending traditional techniques with the added stability and aesthetic appeal of wood[1][8]. Whether you're an experienced basket weaver or just starting, incorporating a wooden base into your project can result in a sturdy and visually striking finished product[8]. This comprehensive guide will walk you through the materials needed, the weaving process, and various tips and tricks to help you create beautiful and functional baskets.
Before you start weaving, gather all the necessary materials. Having everything on hand will make the process smoother and more enjoyable. Here's a detailed list of what you'll need:
-Wooden Base: Available in different shapes (circular, square, oval) and sizes, often with pre-drilled holes or slots to facilitate weaving[1][3][4][5].
-Weaving Material: Options include reed, yarn, fabric strips, sea grass cord, or any other material that can be woven[7][11].
-Soaking Container: A tub or sink to soak the weaving materials, making them more pliable[1].
-Wood Glue: For securing the wooden pieces together (if using a two-piece base)[1].
-Wire Nails: ¾” wire nails to secure the base[1].
-Hammer: To drive in the wire nails[11].
-Mitre Cutter: To shorten flower sticks to the desired length[11].
-Flower Sticks: Optional, for weaving around[11].
-Crochet Hook: To create stitches[7][3].
-Yarn Needle: Optional, but helpful for weaving in ends[7].
-Scissors: For cutting the weaving material.
-Measuring Tape: To measure the base and weaving material[1].
-Pencil: For marking measurements on the stakes[1].
-Clamps: To hold the wooden base pieces together while the glue dries.
-Safety Glasses: To protect your eyes when hammering nails.
-Work Gloves: To protect your hands during the weaving process.
The first step in weaving a basket with a wooden base is preparing the base itself. This involves selecting the right type of base and, if necessary, assembling it.
-Shape: Choose a shape that fits your intended basket design. Circular bases are great for round baskets, while square or oval bases work well for baskets with more structured shapes[3][1].
-Size: The size of the base will determine the overall size of your basket. Consider what you plan to use the basket for when selecting the size[1].
-Holes or Slots: Some wooden bases come with pre-drilled holes or slots around the perimeter. These are designed to make it easier to insert and weave the stakes or weaving material[4][5][11].
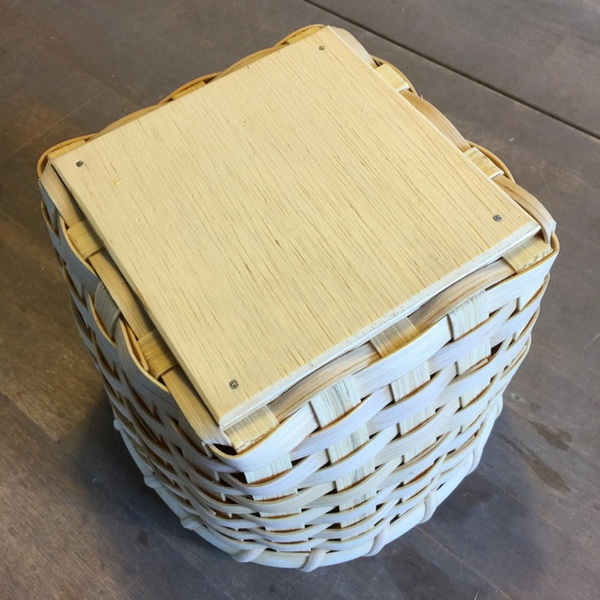
-Single or Two-Piece: Some wooden bases consist of two pieces of plywood that need to be glued together with the weaving material sandwiched in between[1].
If your wooden base consists of two pieces, follow these steps to assemble it:
1. Identify the Sides: Determine the right and wrong sides of the plywood. The “wrong” sides usually have discolorations or damages[1]. The “right” sides are the ones you want to show on the top and bottom of the base[1].
2. Prepare the Weaving Material: Soak the horizontal and vertical stakes in warm water for several minutes to make them pliable[1].
3. Mark the Center: Mark the center and correct dimensions for the base on the smooth side of the stake[1].
4. Weave the Base: Weave the base according to your specific pattern[1].
5. Square Up the Base: Ensure the base meets the exact measurements of the plywood base[1].
6. Apply Wood Glue: Apply wood glue to the wrong sides of the plywood, keeping about an inch away from the edges to prevent leakage[1].
7. Align the Pieces: Place one of the base pieces underneath the woven stakes and adjust the stakes to meet the edges of the plywood[1].
8. Add the Second Piece: Place the second base piece on top of the woven stakes, sandwiching the weaving material between the two wooden pieces[1].
9. Square the Pieces: Ensure all three pieces (bottom plywood, woven base, and top plywood) are flush with each other[1].
10. Secure with Nails: Use ¾” wire nails to secure the base by nailing each corner[1].
11. Pound the Nails: Flip the base over and pound each nail towards the corners to mimic the look of a staple[1].
12. Weave the Locking Row: Weave the locking row to complete the base[1].

Stakes are the vertical supports that extend from the base and form the framework of the basket. Here's how to prepare them:
1. Soaking: Soak the stakes in warm water for at least 30 minutes to make them pliable and prevent them from breaking during the weaving process[1].
2. Trimming: Trim the stakes to the desired length, considering the height of the basket you want to create.
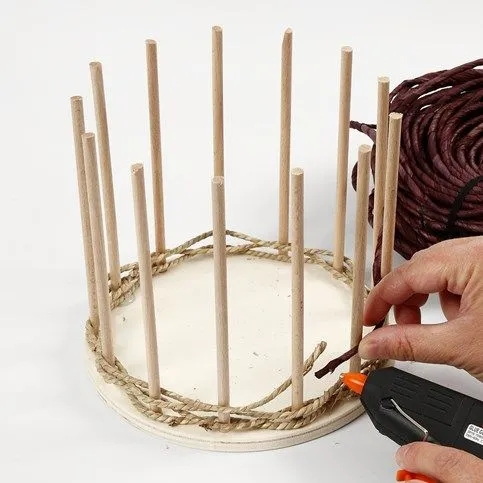
3. Inserting: Insert the stakes into the holes or slots in the wooden base. If the base doesn't have pre-made holes, you may need to drill them yourself, ensuring they are evenly spaced[11].
With the base and stakes prepared, you can start weaving. There are several weaving techniques you can use, depending on the look and structure you want to achieve.
The basic weave, also known as the over-under weave, is the simplest and most common weaving technique.
1. Starting: Begin by attaching your weaving material to one of the stakes. This can be done by wrapping the material around the stake and securing it with a knot or a dab of glue[11].
2. Weaving: Weave the material over one stake and under the next, continuing around the basket. Maintain consistent tension to ensure a uniform weave[12].
3. Joining: When you reach the end of a length of weaving material, overlap it with the beginning of a new length, hiding the join behind a stake[11].
4. Finishing: To finish the weave, tuck the end of the material behind the last row of weaving and trim any excess[1].
Twining involves using two strands of weaving material that are twisted around each other as they are woven around the stakes[5][10][12].
1. Starting: Attach two strands of weaving material to one of the stakes[11].
2. Weaving: Twist the two strands around each other, passing them alternately in front of and behind each stake[5][10][12].
3. Tension: Keep the tension consistent to create a tight and even weave[12].
4. Finishing: Finish by tucking the ends of the strands behind the last row and trimming[1].
Coiling involves wrapping a core material with a weaving material, creating a spiral effect[9].
1. Starting: Attach the core material to the base[11].
2. Coiling: Wrap the weaving material tightly around the core, securing it to the previous row with each wrap[9].
3. Shaping: Shape the basket as you coil, creating the desired form[9].
4. Finishing: Finish by tapering the core material and securing the end of the weaving material[1].
Stop-start rows involve weaving in sections, creating a textured effect[4][5].
1. Starting: Begin weaving at one point and continue for a short distance.
2. Stopping: Stop the weave and start again at another point, leaving a gap.
3. Continuing: Continue weaving in this manner, creating a pattern of starts and stops.
4. Finishing: Secure all ends and trim[1].
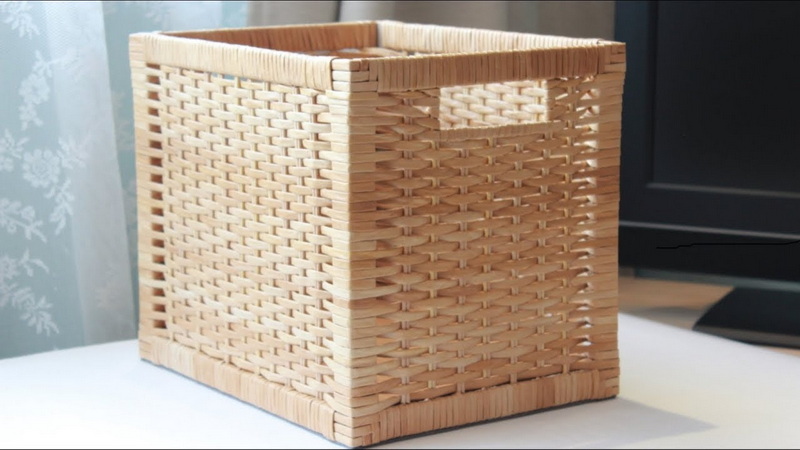
Once the weaving is complete, you can add embellishments and finishing touches to enhance the basket's appearance and durability.
-Dyeing: Dye the weaving material before starting to add color[4].
-Colored Weavers: Use different colored weavers to create patterns[4].
-Painting: Paint the finished basket for a unique look.
-Beads: Add beads to the weaving for a decorative touch.
-Ribbons: Weave ribbons into the basket for added flair[7].
-Leather Accents: Incorporate leather handles or accents for a sophisticated look.
-Rim: Add a rim to the top edge of the basket for a polished look[5]. This can be made from wood, reed, or other materials.
-Handles: Attach handles to make the basket easier to carry.
-Sealing: Apply a sealant to protect the basket from moisture and wear.
-Felt Base: Trim a circle from heavy felt fabric and place it on the bottom of the basket to help hide any spaces[3].
-Maintain Tension: Consistent tension is key to creating a uniform and sturdy basket[12].
-Keep Materials Wet: Keep the weaving materials damp to prevent them from becoming brittle[1].
-Use the Right Tools: Invest in quality tools to make the weaving process easier and more efficient.
-Follow a Pattern: If you're a beginner, follow a pattern to guide you through the weaving process[1][4].
-Take Breaks: Basket weaving can be tiring, so take breaks to avoid strain.
-Experiment: Don't be afraid to experiment with different materials and techniques to create unique baskets.
-Proper Storage: Store your weaving materials in a cool, dry place to prevent mold and mildew.
-Repairing Mistakes: If you make a mistake, don't be afraid to undo your work and try again.
-Practice: The more you weave, the better you'll become.
Include videos of the different weaving techniques and basket making process.
Weaving a basket with a wooden base is a rewarding craft that combines traditional techniques with the durability and aesthetic appeal of wood. By following the steps outlined in this guide, you can create beautiful and functional baskets that will be treasured for years to come. Remember to gather the right materials, prepare the base and stakes properly, and experiment with different weaving techniques and embellishments to create unique designs. With practice and patience, you'll be weaving stunning baskets in no time.
A wooden base provides extra stability and support to the basket, making it more durable and able to hold heavier items[1]. It also gives the basket a more polished and professional look[8].
Yes, you can use different types of wood, such as plywood, hardwood, or even reclaimed wood. The choice depends on the desired look and the intended use of the basket[1].
To prevent slipping, make sure to start with a tight and secure knot when attaching the weaving material to the base[11]. Also, maintain consistent tension throughout the weaving process[12].
If your base doesn't have pre-drilled holes, you can drill them yourself using a drill press[3]. Make sure to space the holes evenly around the perimeter of the base[11].
You can finish the top edge of the basket by adding a rim made from wood, reed, or other materials[5]. Secure the rim with glue or by weaving it into the top row of the basket.
[1] https://joannascollections.com/blog/weaving-with-a-wooden-bottom-base-tutorial
[2] https://joannascollections.com/blog/weaving-with-a-wooden-bottom-base-tutorial/
[3] https://www.youtube.com/watch?v=KqFcFvUQxh0
[4] https://basketmakerscatalog.com/mfiles/shellysbasket.php
[5] https://basketmakerssupply.com/en-intl/products/wooden-base-video-instructions-how-to-make-shelly-s-basket-starting-with-a-wooden-base
[6] https://www.woodmagazine.com/basketmaking-in-10-easy-steps-0
[7] https://stitchesnscraps.com/circular-weaving-on-a-wood-basket-base/
[8] https://basketweavee.com/how-to-weave-a-basket-with-a-wooden-base/
[9] https://www.youtube.com/watch?v=8ePCvDX-05w
[10] https://www.brightexpectationsbaskets.com/blogs/tutorials/tutorial-twining-a-wood-base
[11] https://www.cchobby.com/basket-weaving-around-a-wooden-base-and-flower-sticks
[12] https://www.matttommey.com/how_to_weave_a_basket.html