Views: 222 Author: Tomorrow Publish Time: 2025-02-11 Origin: Site


Content Menu
>> Step 2: Cut and Prepare Fabric Strips
>> Step 3: Set Up the Sewing Machine
>> Step 4: Begin Sewing the Coiled Base
● Traditional Woven Cat Basket
>> Step 1: Prepare the Materials
● Knitted or Crochet Cat Basket
>> Step 1: Choose Your Yarn and Hook
● FAQ
>> 1. What is the best material for making a cat basket?
>> 2. How do I ensure the basket is safe for my cat?
>> 3. Can I wash the cat basket?
>> 4. How big should the cat basket be?
>> 5. How do I get my cat to use the basket?
Weaving a cat basket can be a rewarding experience, offering a cozy haven for your feline friend and a beautiful addition to your home[3]. Cats love having their own space, and a handmade basket can be the perfect retreat for them. This comprehensive guide will walk you through various methods of creating a cat basket, from coiled rope designs to traditional weaving techniques. Whether you're a seasoned crafter or a beginner, there's a project here for you.
Before you start, gather all the necessary materials. The specific items will vary depending on the type of basket you want to create, but here's a general list:
Rope Basket:
-100 ft package of 1/4″ wide Cotton Sash Cord[1]
-Scrap fabric (6″ to width of fabric)[1]
-Sewing machine[1]
-Reverse Pattern Foot with Clear Sole #34D[1]
-Free-Hand System knee lifter[1]
-All-purpose thread[1]
-Rotary cutter, cutting mat, and clear acrylic ruler[1]
-Ironing board, steam iron[1]
-Fabric scissors and thread snips[1]
-Clear tape[1]
Woven Basket:
-Natural materials such as cattail, pandanus, or flax[9]
-Flat and pliable materials (or plastic)[9]
-Clothes pins[4]
-Scissors or a knife for cutting[7]
-Measuring tape[9]
-Water (for soaking natural materials)
-Knitted or Crochet Basket:
-Bulky yarn[8]
-Crochet hook or knitting needles[8]
-Scissors
-Stitch markers (optional)
One popular method for creating a sturdy and attractive cat basket involves coiling rope and securing it with fabric and stitches[1]. This technique is particularly appealing because it allows for creative customization with colorful scrap fabrics[1].
The cotton sash cord rope is key to making this basket sturdy enough to keep its shape but soft enough to be flexible[1]. The rope has a loosely twisted synthetic core that gives it strength and a braided cotton cord outer layer that is flexible and easy to sew through[1]. Find the end of the rope and wrap a piece of clear tape about 12″ from the end[1]. Cut the rope through the taped section; the cut-off portion will be used to test sewing machine stitches[1]. Unwind the rest of the bundle of rope and let it relax to remove kinks before sewing[1].
Press and cut the fabric scraps into 1″ wide strips[1]. The scraps can be anywhere from 6″ long to the width of fabric; a variety of lengths makes for a more interesting basket[1]. There are many ways to be creative with picking scraps for the basket, such as focusing on scraps in one color family, selecting just a few colors, or using scraps of all colors[1].
Use a large sewing machine needle size 90/14 or 100/16 sharp or jeans needle[1]. Insert foot #34D and engage Dual Feed (if the machine is equipped with this feature, otherwise use #34C or #34)[1]. Wind at least two bobbins. Use the FHS to keep hands free while sewing the basket and set the machine to stop sewing with the needle down if the machine includes this feature[1]. Select the standard zigzag stitch, fold the small piece of rope in half, and sew the rope pieces together. Line up the place where the pieces of rope meet with the center red mark on the front of foot #34D[1]. The zigzag should be wide enough to easily sew through both sides of the rope. Try setting the zigzag stitch width at about 4.4mm and the stitch length at 2.0mm to begin[1].
Start with the taped end of the rope that was cut to test the machine stitches. Begin to tightly coil the rope from the end to about 1 1/2″ across and use a clip to hold the small coil in place[1]. Use the FHS knee lift to place the small coil of rope under the presser foot and zigzag stitch across the center of the coil, from one end to the other, and then backstitch[1]. Next, start to sew where the outside piece of rope is meeting the coil, and begin to move around this line[1]. Pivot around the tight curves with the needle down and use the FHS knee lift, letting your hands move the coil under the presser foot[1]. Continue sewing the coil, pivoting carefully around the curve and keeping the point on the coil where the outside rope is meeting the edge of the coil lining up with the center red mark on the foot[1].
As you continue coiling and sewing the rope, incorporate the fabric strips[1]. Wrap the strips around the rope as you sew, ensuring they are evenly distributed[1]. This adds color and texture to the basket[1].
As the basket grows, shape it by gently guiding the rope[1]. Avoid pulling the free end tight or putting tension on the rope end when sewing the flat coiled base, as this will cause the rope to stretch and the coil to bubble and curve up[1]. Check the shape, making decisions about how to wrap fabric and where as you go. Once the basket can stand up by itself, continue sewing the remaining rows straight up, being careful not to apply any more pressure to the free end of the rope[1].
When getting close to the end of the rope, plan to wrap the end with a long fabric strip[1]. Start sewing this strip several inches before reaching the end, making sure it is long enough to go past the end of the rope[1]. Continue wrapping the fabric strip past the end of the rope and pull the twisted end of the fabric strip down inside the basket at an angle[1]. When the machine stitches to the end of the rope, turn and zigzag stitch over the twisted fabric about 1″, then backstitch and cut the extra fabric away close to the stitching. Stitch one more time over the twisted fabric end to secure it[1].
Give the sides of the basket a steam press over the end of the ironing board[1]. Snip any thread ends or bits of fabric sticking out of the basket[1].

For a more traditional approach, weaving a cat basket from natural materials can be both functional and aesthetically pleasing[3].
If using natural materials like cattail or flax, soak them in water until they become pliable[9]. This prevents them from cracking during the weaving process[9].
Start by creating a base for the basket. This can be done by weaving the materials in a circular or oval pattern[4]. Ensure the base is sturdy and large enough to accommodate your cat[4].
Begin weaving the sides of the basket, working upwards from the base[4]. Maintain a consistent tension to create a uniform and sturdy structure[4]. Use clothes pins to hold the corners in place[4]. When you come to a corner, make a turn underneath, keeping the right side of the reed up, and weave past it a little bit so it'll start holding it into shape[4]. Cross the corners over very tightly to make little feet on the bottom of the basket[4].
As you weave, shape the basket to your desired form[4]. This might involve gently bending the sides inward to create a cozy, enclosed space[4]. Continue working the basket around, shaping up the sides and bending it slightly forward, making sure everything's packed in tight[4].
Once the basket reaches the desired height, finish the edges by folding and securing the ends of the weaving material[4]. This creates a clean and durable rim[4].
If you prefer knitting or crochet, you can create a soft and comfortable cat basket using bulky yarn[8].
Select a bulky yarn that is soft and washable[8]. Choose a crochet hook or knitting needles that are appropriate for the yarn weight[8].
Start by crocheting or knitting a flat circle or oval for the base of the basket[8]. The size of the base will determine the overall size of the basket[8].
Begin working in rounds to build up the sides of the basket[8]. Use a stitch pattern that creates a sturdy and dense fabric to provide support[8].
As you work, shape the basket by increasing or decreasing stitches as needed[8]. This will help create a curved or angled shape for the sides[8].
Once the basket reaches the desired height, finish the edges with a simple border stitch[8]. This will create a clean and polished look[8].

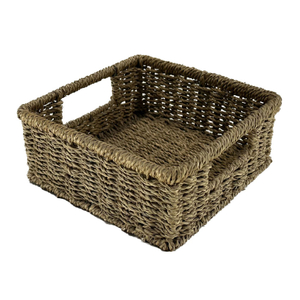
This basket is made using the coiled rope method, incorporating colorful fabric scraps for a vibrant design[1].
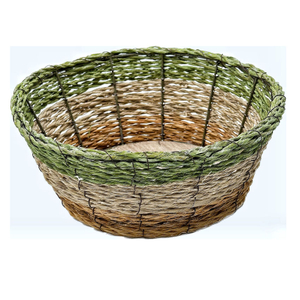
A traditional woven basket made from natural flax, providing a cozy and rustic retreat for your cat[9].
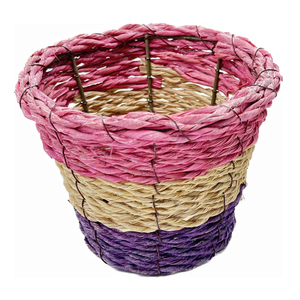
A soft and plush knitted basket made from bulky yarn, perfect for cats who love to snuggle[8].
-Choose the Right Materials: Select materials that are safe, durable, and comfortable for your cat.
-Maintain Consistent Tension: Whether you're weaving, coiling, or knitting, maintaining consistent tension is key to creating a sturdy and well-shaped basket.
-Get Creative with Embellishments: Add personal touches to your cat basket with colorful fabrics, beads, or other embellishments.
-Ensure Stability: Make sure the base of the basket is stable and won't easily tip over.
-Consider Your Cat's Preferences: Think about your cat's size, sleeping habits, and preferences when designing the basket.
Creating a cat basket is a fun and rewarding project that can provide your feline friend with a comfortable and secure space[3]. Whether you choose to coil rope, weave natural materials, or knit yarn, the possibilities are endless[1][3][8]. By following these methods and tips, you can create a unique and personalized cat basket that your cat will love[1][3][8][9].

The best material depends on the type of basket you want to create. For a sturdy coiled rope basket, cotton sash cord is ideal[1]. For a traditional woven basket, natural materials like cattail or flax work well[9]. If you prefer knitting or crochet, use a soft and washable bulky yarn[8].
Use non-toxic materials and avoid small parts that could be a choking hazard. Make sure the basket is stable and won't easily tip over. Check the basket regularly for any damage or wear and tear[1][3][8][9].
Yes, if you use washable materials. For a coiled rope basket, you can spot clean it or gently hand wash it[1]. Woven baskets can be wiped down with a damp cloth[3]. Knitted or crocheted baskets can usually be machine washed on a gentle cycle[8].
The size of the basket depends on your cat's size and sleeping habits. A good rule of thumb is to make the basket at least as long as your cat when they are fully stretched out. Ensure there is enough room for them to turn around comfortably[1][3][8][9].
Place the basket in a quiet and comfortable location where your cat likes to spend time. Add a soft blanket or cushion to make it more inviting. You can also try placing some of your cat's favorite toys or treats in the basket to encourage them to explore it[1][3][8][9].
[1] https://weallsew.com/coiled-rope-cat-basket/
[2] https://www.youtube.com/watch?v=ZVkw0CHRBkM
[3] https://basketweavee.com/how-to-weave-a-cat-basket/
[4] https://www.youtube.com/watch?v=kbBef8MRuKo
[5] https://www.youtube.com/watch?v=dXHlw9ZRYWQ
[6] https://www.youtube.com/watch?v=Qs-WpIriOtw
[7] https://www.facebook.com/weavingconnections.888/videos/step-two-of-weaving-with-cats-claw/193568369248536/?locale=zh_CN
[8] https://www.youtube.com/watch?v=mnx0Nsc1jcs
[9] https://www.youtube.com/watch?v=YCMkXiAikFg