Views: 222 Author: Tomorrow Publish Time: 2024-12-24 Origin: Site


Content Menu
>> Step 1: Preparing Your Rope
>> Step 4: Adding Handles (Optional)
● Additional Techniques for Enhancing Your Basket
>> Adding Color
>> Incorporating Different Textures
>> Using Stencils and Patterns
>> Experimenting with Size Variations
● Creative Uses Beyond Storage
● FAQ
>> 1. What type of rope is best for making baskets?
>> 2. Can I use synthetic ropes instead?
>> 3. How long does it take to make a rope basket?
>> 4. What can I use my rope basket for?
>> 5. Can I wash my rope basket?
Creating a rope basket is a rewarding and enjoyable craft that allows you to create functional and decorative items for your home. This guide will take you through the entire process, from gathering materials to finishing touches. Whether you are a beginner or have some experience, this tutorial will provide detailed steps to help you successfully weave your own rope basket.
To ensure longevity:
- Store baskets in dry places away from excessive moisture.
- Occasionally clean dust off using a soft cloth; avoid soaking them in water.
- If using dyed ropes, keep them out of direct sunlight to prevent fading over time.
Before you start, gather the following materials:
- Rope: Cotton sash cord or clothesline rope (approximately 33 yards for a standard basket)
- Scissors: For cutting the rope
- Hot glue gun and glue sticks: To secure the rope as you work
- Bucket or bowl: To shape your basket
- Lazy Susan (optional): For easier access while weaving
- Parchment paper or newspaper: To protect your workspace
- Fabric strips (optional): For decorative wrapping around the rope
- Magic clips or fabric clips: To hold fabric in place while gluing
- Darning needle or skewer: To help with threading and securing
1. Cut the Rope: Measure out approximately 33 yards of rope. You can adjust this length based on how large you want your basket to be.
2. Optional Fabric Wrapping: If you want to add fabric for decoration, cut fabric strips about 1.5 inches wide. You can use old clothes or fabric scraps.
3. Wrap the Rope: Apply hot glue to one end of the rope and start wrapping it with fabric, securing it with glue as you go. This step is optional but adds a nice touch.
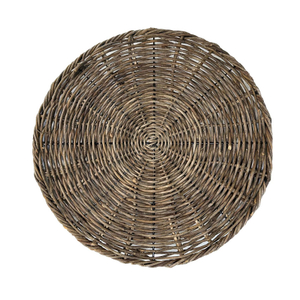
1. Create the Base: Take the wrapped or unwrapped rope and start coiling it tightly in a circular shape. Use your bucket as a mold if needed.
2. Secure the Base: Use hot glue to secure each coil as you go, ensuring that they stay in place.
3. Build Up Layers: Continue adding layers of rope, coiling them around the previous layer until the base reaches your desired diameter (usually around 6-8 inches).
1. Transitioning to Sides: Once your base is complete, begin to angle the coils upwards to form the sides of your basket.
2. Glueing Technique: Apply glue between each layer as you build up the sides, ensuring they adhere properly.
3. Maintaining Shape: Keep checking that your sides are straight and even as you progress.
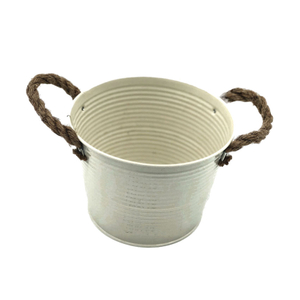
1. Creating Handles: When you reach the desired height for your basket, decide where you want to place handles.
2. Forming Handles: Loop sections of rope up to create handles and secure them with hot glue.
3. Reinforcing Handles: Add additional layers of rope around the handles for extra strength.
1. Final Layering: Continue adding layers until your basket is at your desired height.
2. Trimming Excess Rope: Once finished, carefully trim any excess rope and glue down any loose ends.
3. Allow to Dry: Let your basket dry completely before using it.

To further enhance your rope basket, consider these additional techniques:
You can dye or paint your rope before starting the project for a more personalized look:
- Use fabric dye or acrylic paint mixed with water.
- Dip-dye sections of the rope or use a brush to apply paint.
- Allow the rope to dry completely before beginning your weaving project.
Mix different types of ropes or materials for added texture:
- Combine cotton rope with jute or sisal for a rustic look.
- Use ribbons or yarn alongside the rope for colorful accents.
To create unique designs on your baskets:
- Use stencils to paint patterns onto the finished basket.
- Consider weaving in contrasting colors of rope at intervals for stripes or checks.
If you're comfortable with sewing, consider using a sewing machine instead of hot glue:
1. Sewing Method:
- Use cotton thread that matches your rope color.
- Employ a zigzag stitch over each coil as you build up layers.
- This method provides added durability compared to glue alone.
2. Creating Shapes with Sewing:
- By adjusting how tightly you pull on the material while sewing, you can create various shapes—tighter stitches yield straighter sides while looser stitches allow for rounded forms.
3. Finishing Edges Neatly:
- Use bias tape along raw edges when transitioning between different materials.
- This not only secures loose ends but also adds an extra decorative element.
You can create various sizes of baskets by adjusting:
- The length of rope used (more length equals larger baskets).
- The diameter of the base (wider bases lead to broader baskets).
Consider making small baskets for organizing items like keys or coins and larger ones for blankets or toys.

Rope baskets are not just functional; they can also serve decorative purposes:
- Use them as plant holders by lining them with plastic.
- Create gift baskets filled with goodies for special occasions like birthdays or holidays.
- Consider making themed baskets such as picnic baskets by including utensils and napkins inside.
To enhance this tutorial, consider watching video tutorials that visually demonstrate each step:
Making a rope basket is not only a fun project but also results in a beautiful and practical item for your home. With just a few materials and some creativity, you can create baskets of various sizes and designs tailored to your needs. Whether you're using them for storage, decoration, or gifts, these baskets are sure to impress.

The best type of rope for making baskets is cotton sash cord or clothesline rope because they are sturdy yet flexible enough for weaving.
Yes, synthetic ropes can be used; however, they may not provide the same aesthetic appeal as natural fibers like cotton.
The time it takes varies depending on size and complexity but generally ranges from 1 to 3 hours for a standard basket.
Rope baskets are versatile; they can be used for storage, organization, decor, or even as gift baskets.
While it's best not to submerge them in water due to glue, you can spot clean with a damp cloth if necessary.
[1] https://makeandfable.com/2015/04/tutorial-natural-rope-baske/
[2] https://www.youtube.com/watch?v=ycl7Bcbs_34
[3] https://www.youtube.com/watch?v=FYVGgyAer7s
[4] https://www.instructables.com/Easy-Wonky-Rope-Basket/
[5] https://www.youtube.com/watch?v=BZXIcZs-FTk
[6] https://www.youtube.com/watch?v=Y_l0vsEBdJI
[7] http://www.iheartorganizing.com/2012/06/diy-rope-basket.html
[8] https://labasketry.com/blogs/journal/5-helpful-tips-for-making-baskets-from-cotton-rope
[9] https://www.onehundreddollarsamonth.com/how-to-make-a-rope-basket/
[10] https://ahundredaffections.com/dollar-tree-rope-basket-diy-gift-idea/