Views: 222 Author: Tomorrow Publish Time: 2025-01-13 Origin: Site


Content Menu
● Advanced Techniques in Wire Basket Weaving
● Incorporating Innovations in Basket Weaving
● Exploring Different Styles of Wire Baskets
● Customizing Your Basket Design
● Common Challenges in Wire Basket Weaving
● FAQ
>> 1. What type of wire is best for weaving baskets?
>> 2. Can I use other materials besides wire?
>> 3. How do I clean my woven wire basket?
>> 4. What is the best way to store my baskets?
>> 5. Can I make larger baskets using this technique?
Creating a wire basket is a rewarding craft that combines creativity with functionality. Whether you want to make a decorative piece for your home or a practical storage solution, weaving a wire basket can be an enjoyable project. This comprehensive guide will take you through the steps of weaving your own wire basket, including materials needed, techniques, and tips for success.
Before you begin, gather the following materials:
- Wire: Choose a sturdy wire suitable for basket weaving (e.g., chicken wire, floral wire, or galvanized wire).
- Wire Cutters: Sharp cutters are essential for clean cuts.
- Pliers: Needle-nose pliers will help in bending and shaping the wire.
- Tape Measure: For measuring lengths of wire.
- Work Surface: A flat, stable surface to work on.
- Optional Decorations: Fabric strips, yarn, or paint to customize your basket.
Start by cutting your wire into manageable lengths. Depending on the size of the basket you wish to create, cut several pieces of wire:
- For a small basket, cut about 8-10 pieces of wire, each approximately 24 inches long.
- For larger baskets, adjust the length and number of wires accordingly.
1. Lay Out the Base Wires: Arrange four pieces of wire in a cross shape. These will serve as the foundation for your basket.
2. Secure the Center: Use one piece of wire to tie the center of the cross tightly. This will stabilize your base.
3. Shape the Base: Bend the ends of each wire upwards to form the sides of the basket.
1. Start Weaving: Take another piece of wire and begin weaving it around the vertical wires using an over-under technique:
- Pass over one vertical wire and then under the next.
- Continue this pattern until you reach your desired height.
2. Tighten as You Go: Ensure that each weave is tight and even. This will give your basket strength and stability.
3. Change Wires When Necessary: If you run out of wire, simply twist together a new piece with the old one and continue weaving.
1. Create a Rim: Once you reach your desired height, fold down the top edges of the vertical wires to create a rim.
2. Secure Ends: Use pliers to twist any excess wire ends back into the basket or trim them off carefully.
3. Add Decorative Elements (Optional): If desired, wrap fabric strips or yarn around the rim or weave them into the sides for added texture and color.
- Practice Patience: Weaving takes time and practice. Don't rush through it; take breaks if needed.
- Experiment with Patterns: Once you're comfortable with basic weaving, try different patterns or colors for unique designs.
- Watch Tutorials: Visual aids can be incredibly helpful. Consider watching video tutorials for additional guidance on techniques and styles.

Once you've mastered basic techniques, you can explore advanced methods to enhance your creations:
Coiling involves wrapping a core material with flexible material like twine or yarn. This technique creates intricate designs and is often used in larger baskets for added strength and aesthetic appeal.
Twining uses two or more strands woven around a core material. This method creates a strong structure suitable for larger baskets while allowing for creative patterns.
Plaiting involves weaving flat strips over and under each other to create various patterns. This technique can be combined with other methods to add texture and design depth to your baskets.
To take your basket weaving skills to new heights, consider these innovative ideas:
- Experiment with unconventional materials such as recycled plastic bags or metal mesh to create unique textures and shapes.
- Combine traditional weaving techniques with modern design concepts to create contemporary works of art that push boundaries.
- Explore sculptural basketry by creating baskets with unique shapes and forms that challenge conventional designs.
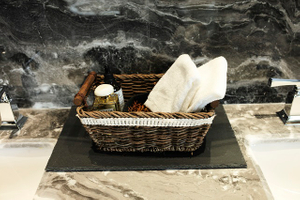
To enhance your understanding of this process, here are some visual aids that can help:
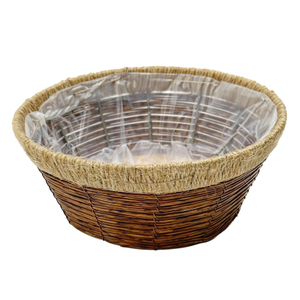
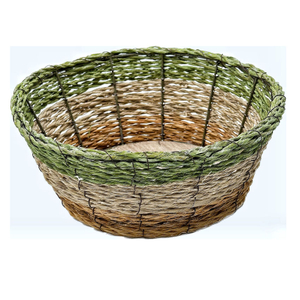
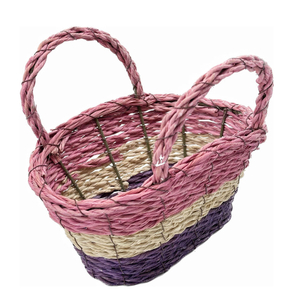
Wire baskets come in various styles that cater to different needs and aesthetics:
These are often smaller in size and used primarily for decoration rather than functionality. They can be embellished with paint, fabric lining, or even beads woven into their structure to enhance their visual appeal.
Functional baskets are designed for everyday use—such as storage solutions in kitchens or living rooms—and need to be sturdy enough to hold items without collapsing under weight. These typically have tighter weaves and may incorporate handles for easy transport.
Customizing your basket allows you to reflect personal style while ensuring practicality:
- Color Choices: Use spray paint or colored wires to match your home decor or seasonal themes.
- Size Variations: Adjust dimensions based on intended use—smaller baskets might work well as organizers on desks while larger ones could serve as laundry hampers.
- Layering Techniques: Combine multiple techniques such as coiling at the base while using twining on sides for added complexity in design.
While learning how to weave baskets can be fun, there are challenges that may arise:
- Uneven Tension: Maintaining consistent tension throughout weaving is crucial; if some areas are too tight while others are loose, it can lead to an uneven finish.
- Fraying Edges: Ensure that all cut edges are smooth; sharp edges can not only ruin aesthetics but also pose safety risks during handling.
- Material Limitations: Depending on chosen materials (e.g., softer wires), they may not hold shape well without proper reinforcement during construction—consider using thicker gauge wires where necessary.
Once comfortable with basic techniques, consider trying more advanced projects such as:
1. Nested Baskets
- Create multiple sizes that fit within one another—ideal for organizing small items like craft supplies.
2. Lidded Baskets
- Adding lids requires additional skills but results in functional storage solutions that keep contents secure from dust.
3. Planter Baskets
- Incorporate drainage holes when creating planters; these allow excess water from soil without compromising structural integrity.
4. Artistic Sculptures
- Use freeform techniques where traditional shapes aren't followed—this allows exploration into more abstract designs that serve as art pieces rather than functional items.
Weaving a wire basket is not only a practical skill but also an enjoyable craft that allows for creativity and personalization. With just a few materials and some patience, you can create beautiful baskets that serve various purposes in your home or as gifts for others. Remember to experiment with different techniques and designs to make each basket unique!
Wire basket weaving is an art form that combines creativity with practicality while offering endless possibilities for customization and innovation. By mastering various techniques—from basic weaves to advanced projects—you can create stunning pieces that serve both decorative and functional purposes in any space. So gather your materials, unleash your creativity, and start crafting beautiful wire baskets today!

The best types of wire for weaving baskets include chicken wire, floral wire, or galvanized steel wire due to their durability and flexibility.
Yes! You can incorporate fabric strips, yarns, or even recycled materials like plastic bags into your basket design for added texture and color.
You can clean your woven wire basket by wiping it down with a damp cloth or sponge. Avoid soaking it in water as this may weaken the structure over time.
Store your baskets in a dry place away from direct sunlight to prevent fading or rusting if they are made from metal wires.
Absolutely! You can scale up your design by increasing the length and number of wires used in both the base and sides of the basket.
[1] https://www.theweavingloom.com/how-to-cozy-up-a-wire-basket/
[2] https://underwaterweaving.com/blogs/news/basket-weaving
[3] https://www.sadieseasongoods.com/bread-basket-weaving-farmhouse-style/
[4] https://www.bhg.com.au/lifestyle/craft/how-to-weave-baskets/
[5] https://craftering.com/basket-weaving-skills/
[6] https://dollartreecraft.org/dollar-tree-wire-basket-crafts/
[7] https://www.youtube.com/watch?v=GZntmKOJ5KQ
[8] https://www.interweave.com/article/jewelry/wire-jewelry-making-explore-basket-weaving-techniques-with-wire-jewelry-artists/
[9] https://www.youtube.com/watch?v=7lFOTvN1NHk
[10] https://www.matttommey.com/basket-weaving-techniques
[11] https://www.instructables.com/How-to-Weave-Wire/
[12] https://www.youtube.com/watch?v=4q57l-AGrxE
[13] https://in.pinterest.com/vasumathi/wire-baskets/
[14] https://www.youtube.com/watch?v=Q-Ax6YL4M_M
[15] https://www.pinterest.com/ideas/reed-basket-weaving-patterns-free/953577277781/
[16] https://www.pinterest.com/leeannob/basket-patterns/
[17] https://www.youtube.com/watch?v=hwFK1FMb0Bw
[18] https://basketweaving.com/shopsite_sc/store/html/basket-weaving-tips-and-techniques.html
[19] https://www.youtube.com/watch?v=CewSoSC2O0w