Views: 222 Author: Tomorrow Publish Time: 2025-03-02 Origin: Site


Content Menu
● Introduction to Square Basket Weaving
● Step-by-Step Guide to Weaving a Square Basket
>> Step 5: Finishing the Basket
● Advanced Techniques for Square Basket Weaving
>> 1. What Materials Can I Use for Weaving a Square Basket?
>> 2. How Do I Secure the Ribs of My Basket?
>> 3. What Are Some Common Weaving Patterns for Baskets?
>> 4. How Do I Finish the Rim of My Basket?
>> 5. Can I Use a Square Basket for Outdoor Use?
Weaving a square basket is a fun and rewarding DIY project that can add a touch of handmade charm to any room. Whether you're using cardboard, reeds, or other materials, the process involves basic weaving techniques that are easy to learn. In this article, we'll guide you through the steps to create a beautiful square basket, including tips, materials, and techniques.
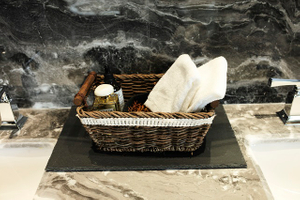
Square baskets are versatile and can be used for storing small items, as decorative pieces, or even as gift containers. The square shape provides stability and makes it easier to weave compared to round baskets. You can use various materials like cardboard, reeds, or even natural fibers like flax or coconut leaves.
- Cardboard or Reeds: For the base and ribs of the basket.
- Weaving Material: Twine, yarn, or natural fibers like flax.
- Tape: For securing strips.
- Scissors: For cutting materials.
- Tapestry Needle: For stitching the rim.
- Felt (Optional): For the base if using cardboard.
If using cardboard, cut out a square base. If using reeds, prepare your reed base by soaking them in water to make them pliable. This step is crucial as it ensures your base is sturdy and even.
Cut strips of cardboard or reeds to serve as the ribs of your basket. These will provide the structure around which you'll weave. Ensure the strips are of uniform width for a consistent look.
Place the ribs on the base and secure them with tape. Begin weaving by placing one strip over and under the ribs, securing it with tape if necessary. This initial layer sets the foundation for your basket's shape.
Continue weaving layer by layer, ensuring each layer is secure before moving on to the next. You can use different patterns like plain weave or twill weave. Experimenting with patterns can add visual interest to your basket.
Once you've reached the desired height, fold the ribs over and tuck them under the last layer. Secure the rim with a tapestry needle and twine. This final step gives your basket a polished finish.
- Use Different Materials: Experiment with various materials like flax, coconut leaves, or even paper strips. Each material offers a unique texture and look to your basket.
- Add Decorations: Use beads, shells, or paint to add a personal touch to your basket. Decorations can enhance the aesthetic appeal of your basket.
- Try Different Shapes: While this guide focuses on square baskets, you can also make round or rectangular baskets using similar techniques. Experimenting with shapes can help you create a variety of baskets for different uses.
Natural fibers like flax or coconut leaves can add a rustic charm to your basket. These materials require soaking before use to make them pliable. Here's how you can incorporate them:
1. Soaking: Soak the fibers in water for several hours or overnight.
2. Preparing Strips: Cut the soaked fibers into strips of uniform width.
3. Weaving: Use these strips as you would any other weaving material.
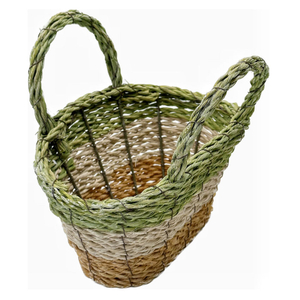
Adding handles to your basket makes it more functional. You can use twine or leather strips for this purpose:
1. Cutting Handles: Cut two strips of your chosen material.
2. Attaching Handles: Use a tapestry needle to stitch the handles to the sides of the basket.
Weaving a square basket is a fun and creative project that can be completed with minimal materials. Whether you're a beginner or an experienced crafter, this guide provides a comprehensive overview of the process. With practice, you can create beautiful and functional baskets that add a personal touch to any space.

You can use a variety of materials such as cardboard, reeds, flax, coconut leaves, or even paper strips. Each material offers a unique texture and look to your basket.
Use tape to secure the ribs to the base initially. As you weave, the strips will hold the ribs in place. For a more durable basket, you can use glue or stitching.
Common patterns include plain weave, twill weave, and triple weave. Each pattern creates a different texture and visual effect on your basket.
To finish the rim, use a tapestry needle to stitch twine around the top of the basket. This secures the last layer of weaving and adds a decorative touch.
While square baskets can be used outdoors, they are best suited for indoor use unless you use waterproof materials and sealants to protect them from the elements.
[1] https://www.instructables.com/Cardboard-Square-Basket/
[2] https://www.youtube.com/watch?v=YjFq_XJQh9M
[3] https://www.matttommey.com/basket-weaving-techniques.html
[4] https://www.sohu.com/a/723598532_784099
[5] https://www.craftpassion.com/easy-basket-weaving/
[6] https://www.youtube.com/watch?v=aEvTPO2J2Ps
[7] https://www.pinterest.com/ideas/square-basket-weaving-diy/911770783963/
[8] https://blog.csdn.net/u012549626/article/details/127719965
[9] https://www.textileindie.com/beginners-guide-basket-weaving/
[10] https://www.bbc.com/learningenglish/chinese/features/q-and-a/ep-200318
[11] https://flaxandtwine.com/blogs/blog/hand-woven-basket-tutorial
[12] https://www.youtube.com/watch?v=VvvjDlMCA4s
[13] https://www.youtube.com/watch?v=nlPyXVY8JN8