Views: 222 Author: Tomorrow Publish Time: 2024-11-26 Origin: Site


Content Menu
● Step-by-Step Guide to Cutting a Hole
>> 5. Reinforce the Hole (if necessary)
● Additional Techniques for Customization
● Maintenance After Modification
>> 1. What materials are best for woven baskets?
>> 2. How do I maintain my woven basket?
>> 3. Can I cut any type of woven basket?
>> 4. What if my cut edges fray?
>> 5. Are there alternative ways to modify my basket?
Woven baskets are not only functional but also serve as beautiful decorative pieces. However, there may come a time when you want to modify your basket by cutting a hole into it. Whether for adding a handle, creating a unique design, or repurposing an old basket, knowing how to cut a hole properly is essential. This guide will walk you through the process step-by-step, ensuring that you achieve a clean and professional-looking result.

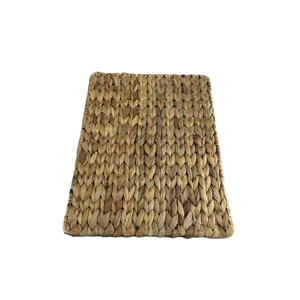
Before you begin cutting, it's crucial to understand the structure of your woven basket. Most baskets are made using various weaving techniques such as coiling, twining, or plaiting. Each technique may require a slightly different approach when cutting.
- Coiling: This method involves wrapping materials around a core and stitching them together. Cutting into a coiled basket can affect its stability.
- Twining: In this technique, two or more wefts are woven around vertical warp rods. Cutting through twined sections may require additional reinforcement afterward.
- Plaiting: This method creates a checkerboard pattern and is generally more forgiving when cutting.
Understanding these techniques will help you make informed decisions about where and how to cut your basket.
To cut a hole in your woven basket effectively, gather the following tools:
- Sharp utility knife or scissors
- Ruler or measuring tape
- Pencil or fabric marker
- Cutting mat (optional)
- Needle and thread (for reinforcement)
- Sandpaper or a small file (for smoothing edges)
- Safety goggles (to protect your eyes)
Before making any cuts, determine the size and location of the hole you want to create. Use a ruler to measure and mark the area with a pencil or fabric marker. Consider what the hole will be used for; for example, if it's for a handle, ensure it's large enough to accommodate your hand comfortably.
Ensure you have a clean and flat surface to work on. If you're using a cutting mat, place it underneath your basket to protect your table and provide stability. Good lighting is also essential; make sure your workspace is well-lit so you can see your markings clearly.
Using your sharp utility knife or scissors, carefully cut along the marked lines. If you're cutting through thick material, you may need to make several passes with the knife for a clean cut. Always cut away from yourself to avoid injury.
Once you've made the cut, check the edges of the hole. If they are rough or uneven, use sandpaper or a small file to smooth them out gently. This step is crucial for both aesthetics and safety; sharp edges can snag on clothing or skin.
Depending on the type of basket and how much material was removed, you may need to reinforce the edges of the hole to prevent fraying or further damage. Use needle and thread to stitch around the perimeter of the hole if needed. This reinforcement will help maintain the structural integrity of your basket.
Once you've successfully cut a hole in your woven basket, consider additional customization options:
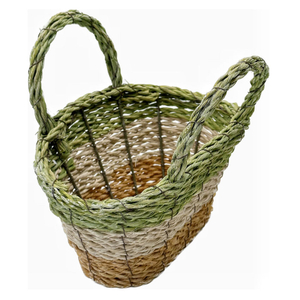
- Adding Handles: If you've created holes on opposite sides of your basket, consider threading sturdy rope or fabric strips through them to create handles.
- Decorative Trims: Use ribbons, beads, or other embellishments around the edges of the hole for added flair.
- Creating Compartments: If you're cutting multiple holes in larger baskets, think about how you can create compartments within your basket for better organization.
To enhance understanding and provide further guidance, consider watching tutorial videos that demonstrate these techniques in action:
These videos will give you visual insights into the weaving techniques and cutting methods discussed above.
When cutting holes in woven baskets, it's easy to make mistakes that could compromise the final product:
- Cutting Too Large: Always start with smaller cuts; you can always enlarge them later if necessary.
- Forgetting Reinforcement: Failing to reinforce edges can lead to fraying over time.
- Not Using Proper Tools: Dull tools can lead to jagged cuts and increase the risk of injury.
By being mindful of these common pitfalls, you can ensure that your project goes smoothly.
After successfully cutting and customizing your woven basket, it's important to maintain it properly:
- Regular Cleaning: Dust off your basket regularly using a soft cloth or brush. For deeper cleaning, lightly dampen a cloth with water and wipe down the surface; avoid soaking it as this can weaken the fibers.
- Avoiding Moisture: Keep your basket in dry areas as moisture can lead to mold growth or weakening of materials.
- Storing Properly: When not in use, store your baskets in a cool place away from direct sunlight to prevent fading and warping.
Cutting a hole into a woven basket can be an enjoyable project that allows for creativity and customization. By following these steps and using the right tools, you can achieve professional results that enhance your basket's functionality and aesthetic appeal. Remember always to plan your cuts carefully and reinforce any areas that may need it.
With patience and attention to detail, you'll not only improve an existing piece but also gain valuable skills that can be applied in future crafting endeavors.

Woven baskets can be made from natural materials like grasses, reeds, rattan, and synthetic materials like plastic fibers.
To maintain your woven basket, keep it dry, avoid exposure to direct sunlight for prolonged periods, and clean it with a damp cloth as needed.
While most woven baskets can be modified by cutting holes, it's essential to consider the weaving technique used as some methods may require additional reinforcement after cutting.
If your cut edges fray, consider reinforcing them with needle and thread or applying fabric glue to prevent further damage.
Yes! Instead of cutting holes, consider adding embellishments like handles or decorative elements that don't require cutting into the basket itself.
This article contains approximately 1,067 words.