Views: 222 Author: Tomorrow Publish Time: 2025-02-06 Origin: Site


Content Menu
● Step-by-Step Guide to Hand Weaving a Rope Basket
>> 5. Adding Handles (Optional)
>> 6. Embellishments and Decorations
● Tips and Tricks for Perfecting Your Rope Basket
● Creative Ideas for Rope Baskets
● FAQ
>> 1. What type of rope is best for weaving baskets?
>> 2. How do I prevent the rope ends from fraying?
>> 3. Can I use different colors of rope in one basket?
>> 4. How do I maintain the shape of the basket while weaving?
>> 5. What can I do with my finished rope basket?
Hand weaving a rope basket is a rewarding craft that combines practical skills with artistic expression[6]. Whether you're a seasoned crafter or a beginner, this comprehensive guide will walk you through the process of creating your own beautiful and functional rope basket. This article provides detailed steps, tips, and creative ideas to help you master the art of rope basket weaving.
Before you start, gather all the necessary materials. Having everything on hand will make the process smoother and more enjoyable. Here's a list of what you'll need:
Rope:
-Cotton Rope: A good option for beginners because it is soft and easy to work with. Consider using about 45 meters of 8mm cotton window sash cord[3].
-Jute Rope: This provides a more rustic look and is very durable[2].
-Hemp Twine: An excellent choice for a more natural and textured basket[7].
Scissors: For cutting the rope and tidying up the ends[3].
Bucket: To use as a mold for shaping the basket[3].
Heavy-Duty Liquid Adhesive: To secure the ends of the rope (optional)[3].
Heavy-Duty Sewing Needle and Thread: Another option for securing the ends (optional)[3].
Macrame Board: (or foamboard/corkboard) useful for pinning and holding the rope in place[1].
Wooden Sticks: These can be incorporated for added structure and design[2].
Hot Glue and Tacky Glue: For securing elements[2].
Cardboard: Can be used for creating a sturdy base[2].
Paper and Plastic Containers: For shaping and support[2].
Lace: For decorative touches[2].
Clips: To hold the rope in place, especially when creating handles[4].
Fabric: To wrap around the rope for a unique look[4].
Plastic Plate: to use as base[8].
Iron Wire: For added structure[8].
Self-Adhesive Linen: To line the basket[8].
Red Cat Cloth: For decorative accents[8].
Pumpkin Handle: for a decorative touch[8].
Connect Tube: To connect elements securely[8].
Cloth-Based Adhesive: For various adhering needs[8].
Wool: for embellishing the basket[5].

The base of your rope basket is crucial for its stability and overall shape. Here are a few methods to create a solid foundation:
Star Shape Method:
1. Cut eight 1-meter lengths of cord[3].
2. Take three lengths and cross them over each other at the centers to form a star shape[3].
3. Hold the center together and weave one of the cords around the five spokes, going under one, over the next, and so on. Continue until the entire length is used, and tuck the end back into the weaving to secure it[3].
Larks Head Knot Method:
1. Cut three 40cm lengths of rope and set them aside[1].
2. Pin the remaining length of rope to your macrame board about 30cm from one end[1].
3. Fold one of the 40cm lengths in half and slide it under both ends on the board[1].
4. Bring the ends through the loop and pull tight to create a larks head knot[1].
5. Repeat with the other two 40cm lengths[1].
6. Unpin the main piece of rope from the board and pull both ends through the loop. Pull into a circle[1].
Weaving the Base:
1. Cut ten bundles of four cords, nine of which are 25" long each. Cut one bundle at 30" long, which will be the handle[7].
2. Tape five of the 25" long bundles vertically side by side about ½” apart[7].
3. Weave the other five bundles horizontally in an over/under pattern at the mid-point of the vertical cords[7].
4. Tape these horizontal bundles to the surface as you weave[7].
5. Weave the 30” bundle in the middle of this set of five horizontal bundles, which will eventually become your handle[7].
Using a Bucket as a Mold:
1. Turn the bucket upside down and place the woven disc on top, with the spokes of cord hanging down over the side at regular intervals[3].
2. Take one of the remaining lengths of cut cord and thread it through the last round of weaving between two of the spokes, pulling it through so the ends are even and folded in half over the last round of weaving. Allow the ends to hang over the side of the bucket[3].
3. Repeat with each of the gaps between the original spokes, so you now have 15 spokes hanging over the side of the bucket[3].
4. Using the remaining uncut cord, anchor one end into the woven disc and continue weaving as before, incorporating the new spokes into the pattern[3].
5. When you reach the edge of the bucket base, stop and tug lightly on the spokes to ensure they are evenly spaced around the base and that the weaving is firm and secure[3].
Freeform Weaving:
1. Unpin the stakes and start weaving upwards off the board, sitting each pass of rope slightly on top of the previous, rather than at its side[1].
2. Keep weaving, being careful not to pull too tightly, until you are happy with the height of your basket[1].
1. Continue Weaving:
Continue weaving around the spokes and working down the side of the bucket until you reach the desired height[3].
Ensure that the stakes (shorter lengths) are at least as long as the basket is high[1].
2. Joining New Cord:
If you need to start a new packet of cord, tuck the ends into the previous round of weaving[3].
Alternatively, tape the new rope to the end of the old rope and sew through the taped section to hold it securely[4].
3. Maintaining Shape:
Regularly check the shape of your basket to ensure it is uniform[3].
Tug lightly on the spokes to keep the weaving firm and evenly spaced[3].
1. Tucking the Ends:
Once you reach the desired height, finish weaving by cutting the cord and tucking the end back into the weaving[3].
Lightly tug on the ends of the spokes to ensure they are evenly spaced and the weaving is firm[3].
2. Securing the Spokes:
For stakes that finish on the outside: bring them down the inside, over the top two weavers, then under the next two[1].
For stakes that finish on the inside: bring them over the top to the outside, over the top two weavers, and through to the inside of the basket[1].
Weave each stake down through the weavers to the bottom of the basket[1].
Cut off any excess and apply a small amount of glue to secure the ends and prevent fraying[1].
3. Alternative Finishing Method:
Take the end of a spoke and lay it along the top edge of the basket, wrap the next spoke over it, and allow the tails to fall inside the basket[3].
Pass the tails of each cord around the next spoke along, between the top two rows of weaving, and tug lightly to secure[3].
Trim off the cord ends close to the weaving inside the basket[3].
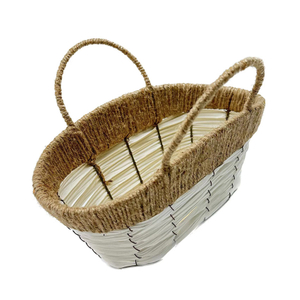
1. Measuring the Handle:
Wrap the rope around the basket to get the measurement for the handle[4].
Allow extra length for the handle to come out and loop[4].
Measure the rope three more times to make the handle three widths of the rope thick, allowing for a loop on the handle[4].
2. Creating the Loops:
Mark where the handles will start and stop[4].
Sew the cording just to the marked points, then stop[4].
Squish the sides together to find the middle point on the opposite side and place a pin there[4].
3. Securing the Handle:
Lift the presser foot, angle the rope out a bit, and sew the two ropes together[4].
Swing into the handle and continue sewing around[4].
Finish off the handle by backstitching to secure it[4].
1. Adding Fabric:
Wrap fabric around the rope as you sew for a unique look[4].
Secure the fabric by sewing through it[4].
2. Using Wool:
Incorporate wool into the weaving process for added texture and color[5].
Tie a knot at the end of the wool and trim any loose ends[5].
3. Lace and Other Decorations:
Glue lace or other decorative elements onto the basket for an enhanced aesthetic[2].
Use hot glue or tacky glue to ensure these embellishments stay in place[2].

Maintain Consistent Tension: Consistent tension is key to a uniform and sturdy basket. Avoid pulling the rope too tightly or leaving it too loose.
Use a Sturdy Base: A well-made base ensures the basket sits flat and doesn't wobble.
Hide Imperfections: If you run out of rope, tape the new rope to the old one and sew through the taped section. The fabric or weaving will hide any imperfections[4].
Get Creative with Colors: Use different colors of rope or fabric to create unique patterns and designs.
Experiment with Different Materials: Try using jute, hemp, or other types of cord for different textures and looks[2].
Secure the Ends Well: Use glue or thread to secure the ends of the rope to prevent fraying and ensure the basket's longevity[1].
Take Breaks: Weaving can be tiring, so take breaks to stretch your hands and avoid strain.
Watch Video Tutorials: Sometimes, seeing the process in action can be more helpful than reading instructions.
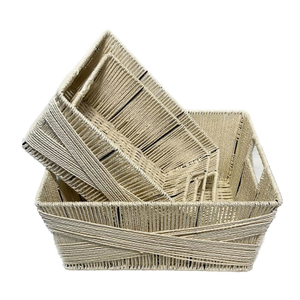
Storage Basket: Use your rope basket to store keys, pot plants, yarn, children's toys, or pet toys[3][4].
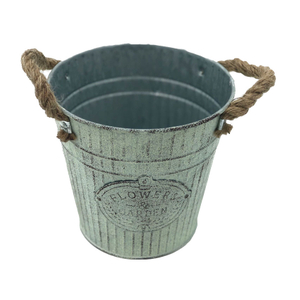
Decorative Planter: Add a stylish touch to your indoor plants by using a rope basket as a planter cover.
Gift Basket: Create a personalized gift basket by filling it with goodies and wrapping it in cellophane.
Bread Basket: Serve bread or rolls in a charming hand-woven basket.
Wall Decor: Attach a handle and hang your rope basket on the wall for a rustic, decorative touch.
Holiday Decor: Customize your basket with holiday-themed embellishments for Easter, Christmas, or other special occasions.
Hand weaving a rope basket is a fulfilling and creative project that anyone can undertake. By following this comprehensive guide, you can create beautiful, functional baskets that add a personal touch to your home decor. Whether you choose to make a simple storage basket or an elaborate decorative piece, the possibilities are endless. So gather your materials, unleash your creativity, and start weaving your own unique rope basket today!

Cotton rope is often recommended for beginners due to its softness and ease of handling. Jute and hemp ropes are also excellent choices for a more rustic or textured look. The best type of rope depends on the desired aesthetic and the basket's intended use.[3]
To prevent fraying, apply a small amount of clear-drying liquid adhesive to the ends of the rope, or stitch them securely with a heavy-duty sewing needle and thread. You can also wrap the ends with tape before cutting to keep them from unraveling.[1]
Yes, using different colors of rope can create unique and eye-catching patterns. Experiment with alternating colors in your weaving to add visual interest to your basket.
Using a mold, such as a bucket or container, can help maintain the shape of the basket. Ensure that the spokes are evenly spaced and that you pull the rope with consistent tension as you weave.[3]
Finished rope baskets can be used for a variety of purposes, including storage, planters, gift baskets, bread baskets, and wall decor. Customize your basket to suit your specific needs and decor style.
[1] https://makeandfable.com/2015/04/tutorial-natural-rope-baske/
[2] https://www.youtube.com/watch?v=uPzjNWImu-0
[3] https://www.homestolove.com.au/lifestyle/how-to-make-a-rope-basket-12198/
[4] https://www.youtube.com/watch?v=U_kr4T5xABM
[5] https://www.youtube.com/watch?v=2HLVVrLiHss
[6] https://basketweavee.com/how-to-hand-weave-a-rope-basket/
[7] https://flaxandtwine.com/blogs/blog/hand-woven-basket-tutorial
[8] https://www.youtube.com/watch?v=JbcJ5-yEaa8