Views: 222 Author: Tomorrow Publish Time: 2025-03-17 Origin: Site


Content Menu
● Introduction to Basket Liners
>> Step 1: Measure Your Basket
>> Step 2: Calculate Fabric Requirements
>> Step 4: Sew the Liner Together
>> Step 5: Add a Top Cuff or Drawstring
>> Step 6: Insert the Liner into the Basket
>> Instructions
>> 1. What Type of Fabric Should I Use for a Basket Liner?
>> 2. How Do I Measure an Oval Basket?
>> 3. Can I Use a No-Sew Method for Lining a Basket?
>> 4. How Do I Add a Drawstring to My Basket Liner?
>> 5. What Are Some Common Mistakes to Avoid When Making a Basket Liner?
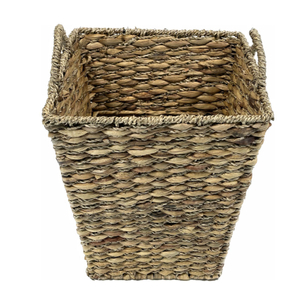
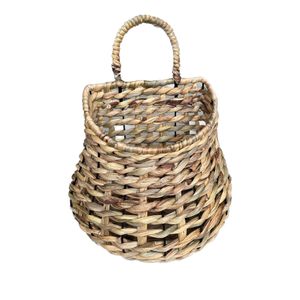
Lining an oval wicker basket can be a fun and creative DIY project that adds a touch of elegance and functionality to your home decor. Whether you're looking to enhance the aesthetic appeal of your basket or protect its contents, a well-made liner is essential. In this article, we'll guide you through the process of creating a beautiful and durable liner for your oval wicker basket.
Basket liners are not only visually appealing but also serve practical purposes. They can help keep your basket clean by preventing dust and debris from accumulating inside, and they can also protect delicate items from scratches or damage. Moreover, liners can be easily removed and washed, making them a convenient addition to any basket.
- Aesthetics: Liners can add color and texture to your basket, matching or contrasting with your home decor.
- Protection: They protect the basket from spills and stains, extending its lifespan.
- Ease of Cleaning: Liners are removable and washable, making cleaning easier.
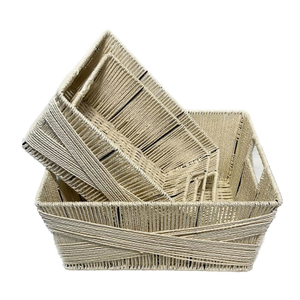
To line an oval wicker basket, you'll need the following materials:
- Fabric: Choose a durable, washable fabric that complements your home decor. Cotton or linen work well.
- Measuring Tape: For accurate measurements of your basket.
- Scissors: To cut the fabric according to your measurements.
- Sewing Machine: For sewing the liner together.
- Thread: Matching the color of your fabric.
- Seam Allowance: Typically 1/4 inch to 1/2 inch.
- Optional: Hemming Tape or Ribbon for Ties
Measuring your basket accurately is crucial for a well-fitting liner. Here's how to do it:
1. Measure the Length and Width: Measure across the top and bottom of the basket to get the length and width.
2. Measure the Height: Measure from the top edge down to the bottom of the basket.
3. Measure the Perimeter: Wrap a flexible measuring tape around the widest part of the basket to get the circumference.
Based on your measurements, calculate how much fabric you need. Add a seam allowance to each dimension.
- Length: Height of the basket + 2-3 inches for folding over the top.
- Width: Circumference of the basket + 1-2 inches for overlap.
- Seam Allowance: Add 1/4 inch to 1/2 inch to each edge.
Using your calculated dimensions, cut out two pieces of fabric. One will be the main liner, and the other can be used for any additional features like pockets or a drawstring casing.
1. Place the Fabric Pieces Right Sides Together: Ensure the edges align perfectly.
2. Sew Around the Edges: Leave a small opening for turning the liner right side out.
3. Turn the Liner Right Side Out: Use a blunt object like a chopstick to push out corners.
4. Press the Liner: Iron the seams flat to create a crisp fold.
1. Fold Over the Top Edge: Create a cuff by folding the top edge over twice and sewing in place.
2. Optional: Add a Drawstring: Create a channel for the drawstring by folding the top edge over once and sewing, leaving a small gap to insert the drawstring.
Carefully place the liner into the basket, ensuring it fits snugly and evenly.

If you prefer not to sew, you can create a no-sew liner using fabric strips and ties.
- Fabric Strips: Two long strips of fabric.
- Ties or Twine: To secure the fabric in place.
1. Measure the Basket:
2. Cut Fabric Strips: Based on your measurements, cut two fabric strips.
3. Place Strips in the Basket: Lay the strips on top of each other in the basket.
4. Secure with Ties: Use twine or ribbon to tie the fabric in place at each corner.
- Choose a Patterned Fabric: Adds visual interest to your basket.
- Add Pockets: Useful for storing small items like keys or remotes.
- Use Different Shapes: Experiment with different shapes for a unique look.
- Incorporate Embellishments: Add ribbons, buttons, or appliques for extra flair.
Adding pockets to your liner can be incredibly useful for organizing small items. Here's how to do it:
1. Cut Pocket Fabric: Cut out small squares or rectangles based on the size of the items you want to store.
2. Place Pockets: Position the pockets on the inside of the liner before sewing it together.
3. Sew in Place: Sew around the edges of each pocket, leaving a small opening for turning right side out.
Experimenting with different shapes can add a unique touch to your liner. Consider using hexagons or triangles for a more modern look.
1. Cut Out Shapes: Use a template or draw the shapes directly onto the fabric.
2. Sew Together: Sew the shapes together, leaving a small opening for turning right side out.
3. Insert into Basket: Place the shaped liner into the basket, adjusting as needed.
When making a basket liner, there are a few common mistakes to watch out for:
- Insufficient Seam Allowance: Ensure you add enough seam allowance to prevent fraying.
- Poor Fabric Choice: Choose a fabric that is durable and suitable for the intended use.
- Incorrect Measurements: Double-check your measurements to ensure a snug fit.
Lining an oval wicker basket is a straightforward DIY project that can enhance both the functionality and aesthetic appeal of your basket. Whether you choose to sew or go for a no-sew option, the process is enjoyable and rewarding. With the right materials and a bit of creativity, you can create a beautiful and practical liner that complements your home decor.

You should use a durable, washable fabric like cotton or linen. These materials are easy to clean and can withstand regular use.
To measure an oval basket, take the length and width across the top and bottom, and measure the height from top to bottom. Use a flexible tape to measure the circumference.
Yes, you can use a no-sew method by laying fabric strips in the basket and securing them with ties or twine. This method is quick and easy.
To add a drawstring, create a channel at the top of the liner by folding the edge over once and sewing, leaving a small gap to insert the drawstring.
Common mistakes include not adding enough seam allowance, not pressing the seams flat, and not ensuring the liner fits snugly in the basket.
[1] https://www.youtube.com/watch?v=pJmp9Z4CZbA
[2] https://www.delineateyourdwelling.com/no-sew-basket-liners/
[3] https://blog.csdn.net/u012549626/article/details/127719965
[4] https://heartworkorg.com/2015/03/31/how-to-make-diy-basket-liners-for-round-baskets/
[5] https://bebraveandbloom.com/how-to-make-a-diy-basket-liner/
[6] https://blog.csdn.net/weixin_40289064/article/details/79669930
[7] https://sewfearless.com/2013/02/basket-liners-tutorial/
[8] https://www.youtube.com/watch?v=h65UpPPyBQw