Views: 222 Author: Tomorrow Publish Time: 2024-12-09 Origin: Site


Content Menu
● Understanding Seagrass Baskets
>> Step 3: Replace Broken Strands
>> Step 4: Secure Loose Weaves
● FAQ
>> 1. How often should I clean my seagrass basket?
>> 2. Can I use water on my seagrass basket?
>> 3. What should I do if my basket loses its shape?
>> 4. Is it possible to dye my seagrass basket?
>> 5. When should I consider professional repair services?
Seagrass baskets are not only functional but also add a touch of natural beauty to any space. However, like any woven item, they can suffer from wear and tear over time. Whether it's a broken handle, a loose weave, or a damaged rim, knowing how to repair your seagrass basket can extend its life and maintain its aesthetic appeal. This guide will walk you through the necessary steps to effectively repair your seagrass basket.

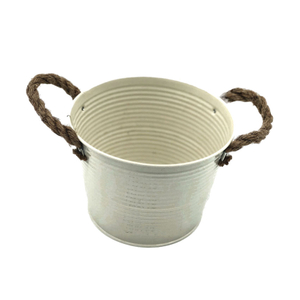
Seagrass baskets are made from the dried leaves of seagrass plants, which are woven together to create durable and flexible containers. These baskets are popular for their eco-friendly nature and versatility in home decor. However, they can become damaged due to frequent use or environmental factors.
Before you begin repairing your seagrass basket, gather the following tools and materials:
- Seagrass or reed strands: For replacing broken parts.
- Wicker glue: To secure loose weaves.
- Scissors: For trimming excess material.
- Wicker needle: For weaving new strands into the existing pattern.
- Spray bottle with water: To moisten the seagrass for flexibility.
- Clamps: To hold pieces in place while drying.

Begin by closely examining your basket to identify all areas that require repair. Look for:
- Broken or frayed strands
- Loose weaves
- Damaged handles
- Weak joints
If the basket is particularly dirty, clean it gently with a soft brush or damp cloth. Allow it to dry completely before proceeding with repairs.
1. Remove Damaged Sections: Use scissors to cut away any broken or frayed strands. Be careful not to damage adjacent strands.
Removing Damaged Strands
2. Cut New Strands: Measure and cut new seagrass strands that match the thickness and color of the original weave.
3. Weave New Strands: Using a wicker needle, thread the new strands into the existing pattern. Make sure to weave tightly to ensure stability.
For areas where the weave has loosened:
1. Apply Wicker Glue: Use a small amount of wicker glue on loose strands and press them back into place.
2. Clamp in Place: Use clamps to hold the repaired area until the glue dries completely.
If your basket's handle is damaged:
1. Remove Broken Handle Parts: Carefully cut away any broken sections of the handle.
2. Replace with New Material: Cut new pieces of seagrass to replace the broken parts, ensuring they are securely attached.
3. Reinforce with Extra Weaving: Weave additional strands around the handle for added strength.
Once all repairs are made:
1. Moisten the Basket: Lightly spray the entire basket with water to make it more pliable for reshaping.
2. Reshape as Needed: Gently mold the basket into its original shape or desired form while it is damp.
3. Allow to Dry Completely: Place the basket in a warm area with good airflow to dry thoroughly.
Repairing a seagrass basket is a straightforward process that can significantly extend its lifespan while preserving its beauty. By following these steps, you can restore functionality and aesthetics to your beloved woven item. Regular maintenance and prompt repairs will keep your seagrass baskets looking their best for years to come.
Regular cleaning every few months is recommended, or more often if it's used frequently.
Yes, but use it sparingly; too much moisture can weaken the fibers over time.
Soak it lightly in water, reshape it while damp, and let it dry in that position.
Yes, you can dye it using fabric dyes; however, ensure even application for best results.
If the damage is extensive or if you're unsure about DIY repairs, seeking professional help is advisable.