Views: 222 Author: Tomorrow Publish Time: 2024-12-01 Origin: Site


Content Menu
● Step-by-Step Guide to Staining a Woven Basket
>> Step 1: Prepare Your Workspace
>> Step 5: Wipe Off Excess Stain
● Tips for Staining Woven Baskets
● Maintenance of Stained Baskets
● Creative Ideas for Stained Baskets
>> 1. Can I use regular paint instead of stain on my woven basket?
>> 2. How long does it take for the stain to dry completely?
>> 3. Is it necessary to seal the stained basket?
>> 4. Can I stain a basket that has already been painted?
>> 5. What should I do if the stain is too dark?
Staining a woven basket is a fantastic way to enhance its aesthetic appeal and prolong its life. Whether you have a natural wicker basket that has seen better days or a new one that you want to customize, staining can transform its look and feel. In this comprehensive guide, we will explore the materials needed, the step-by-step process of staining a woven basket, tips for achieving the best results, and maintenance advice to keep your basket looking great for years to come.

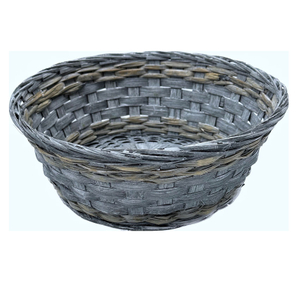
Woven baskets come in various materials, including rattan, willow, and seagrass. Each type of material has its unique characteristics and may require different staining techniques. Before you begin, it's essential to understand the type of basket you are working with, as this will influence your choice of stain and application method.
1. Rattan Baskets: These are made from the rattan vine and are known for their durability and flexibility. Rattan baskets can be stained easily and hold color well.
2. Willow Baskets: Made from willow branches, these baskets are lightweight and have a rustic charm. They can also be stained, but the process may require more care to avoid damaging the fibers.
3. Seagrass Baskets: These are made from dried seagrass and are often used for decorative purposes. Staining seagrass can be tricky, as it may not absorb color as well as other materials.
4. Synthetic Baskets: Some baskets are made from synthetic materials that mimic natural fibers. These can often be painted rather than stained, as traditional stains may not adhere well.
Before you start staining your woven basket, gather the following materials:
- Basket: Choose a clean, dry woven basket.
- Stain: Select a wood stain or fabric dye suitable for the material of your basket. Water-based stains are easier to work with and clean up.
- Brushes: Use a foam brush or a natural bristle brush for even application.
- Rags: Have some old rags or paper towels on hand for wiping off excess stain.
- Gloves: Protect your hands with disposable gloves.
- Drop Cloth: Lay down a drop cloth to protect your work surface from spills.
- Sealer: A clear sealer or topcoat to protect the stained surface after it dries.

Start by setting up your workspace. Choose a well-ventilated area to work in, as stains can have strong fumes. Lay down a drop cloth to protect your surfaces from any spills or drips.
Before applying any stain, ensure that your basket is clean. Dust off any dirt or debris and wipe it down with a damp cloth. If the basket is particularly dirty, you may want to wash it with mild soap and water. Allow it to dry completely before proceeding.
Select a stain that complements your decor. You can choose from a variety of colors, from natural wood tones to vibrant hues. Test the stain on a small, inconspicuous area of the basket to see how it looks once dry.
Using a brush, apply the stain evenly across the surface of the basket. Work in small sections to ensure that the stain does not dry before you have a chance to blend it. Use long, even strokes to avoid streaks. If you want a darker color, apply additional coats after the first one has dried.
After applying the stain, use a rag to wipe off any excess. This step is crucial, as it helps to prevent the stain from becoming too dark or uneven. Wipe in the direction of the weave to maintain a natural look.
Let the basket dry completely. This may take several hours or overnight, depending on the type of stain used and the humidity in your environment. Ensure that the basket is in a dust-free area to avoid particles sticking to the wet stain.
Once the stain is dry, apply a clear sealer to protect the finish. This step is especially important if the basket will be used for food or in a high-moisture area. Follow the manufacturer's instructions for application and drying times.
After the sealer has dried, inspect your basket for any areas that may need touch-ups. You can apply additional stain or sealer as needed to achieve the desired look.
- Test First: Always test the stain on a small area before applying it to the entire basket.
- Work in Sections: Stain the basket in small sections to ensure even coverage and prevent the stain from drying too quickly.
- Use the Right Tools: A foam brush can help you apply the stain evenly, while a natural bristle brush can be used for more detailed work.
- Consider the Environment: Staining in a humid environment can affect drying times. If possible, choose a dry day to work on your project.
- Layering Colors: For a more complex look, consider layering different colors of stain. Start with a lighter base coat and add darker shades for depth.
To keep your stained basket looking its best, follow these maintenance tips:
- Regular Cleaning: Dust your basket regularly with a soft cloth. For deeper cleaning, use a damp cloth and mild soap, but avoid soaking the basket.
- Avoid Direct Sunlight: Prolonged exposure to sunlight can fade the stain. Store your basket in a shaded area when not in use.
- Reapply Sealer: Depending on usage, you may need to reapply the sealer every few years to maintain protection.
- Handle with Care: Avoid placing heavy items in the basket that could cause it to lose its shape or damage the weave.
Stained baskets can serve various purposes beyond mere storage. Here are some creative ideas for using your stained baskets:
- Decorative Centerpieces: Use a stained basket as a centerpiece on your dining table, filled with seasonal decorations or fresh flowers.
- Gift Baskets: Create personalized gift baskets for special occasions by staining a basket and filling it with themed items, such as spa products or gourmet treats.
- Wall Art: Hang stained baskets on the wall as part of a gallery display. This adds texture and interest to your decor.
- Planters: Line a stained basket with plastic and use it as a planter for indoor or outdoor plants. The stain will enhance the natural beauty of the plants.
Staining a woven basket is a rewarding project that can breathe new life into an old item or personalize a new one. By following the steps outlined in this guide, you can achieve a beautiful finish that enhances the natural beauty of the basket while providing protection against wear and tear. With the right materials and techniques, your stained basket can become a stunning centerpiece in your home.

While you can use paint, it may not adhere well to all types of woven materials. Stain penetrates the fibers and provides a more natural look, while paint sits on the surface and can chip or peel over time.
Drying times can vary based on the type of stain used and environmental conditions. Generally, water-based stains dry within 1-2 hours, while oil-based stains may take longer, up to 24 hours.
Sealing is recommended, especially if the basket will be exposed to moisture or heavy use. A sealer protects the stain and helps maintain the basket's appearance over time.
Yes, but you may need to strip the paint first to allow the stain to penetrate the fibers. This can be a more labor-intensive process, so consider whether it's worth the effort.
If the stain is too dark, you can lighten it by applying a coat of clear sealer or by using a damp cloth to wipe off some of the excess stain before it dries. If it's already dry, you may need to sand it lightly and reapply a lighter stain.