Content Menu
● Introduction to Basket Weaving
>> Step-by-Step Guide to Weaving a Basket
>>> Adding a Rim
>>> Upsetting
>> Common Mistakes and Solutions
● FAQs
>> 1. What materials are best for basket weaving?
>> 2. How do I join new weavers when they become too short?
>> 3. What is the purpose of twisting and twining in basket weaving?
>>> 4. How do I create a rim for my basket?
>> 5. Why is it important to stagger the joints when joining new weavers?
Weaving a basket, particularly one that involves techniques like "upsetting" or creating a sturdy base, can be a rewarding and creative process. In this article, we'll explore the steps and techniques involved in weaving a basket, focusing on the "butt" method, which involves joining the ends of the weavers together. We'll also provide guidance on how to create a solid base and sides for your basket.
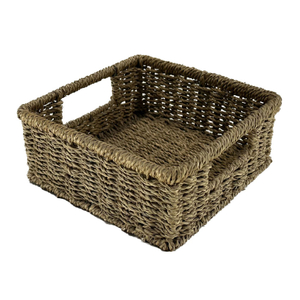
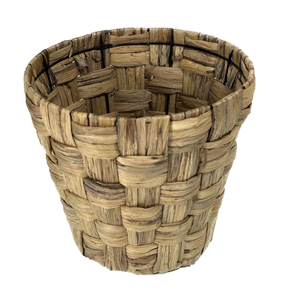
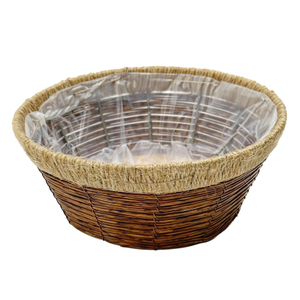
Basket weaving is an ancient craft that involves using various materials, such as willow, rattan, or reeds, to create functional and decorative items. The process requires patience, skill, and attention to detail. Here, we'll focus on weaving a basket using willow shoots, which are commonly used for their flexibility and durability.
- Willow shoots: These are the primary material for weaving. You'll need both thicker stakes for the base and thinner weavers for the sides.
- Water: Soaking the willow shoots in water makes them more pliable and easier to work with.
- Measuring tape or string: For measuring and marking the base.
- Scissors or pruning shears: For cutting the willow shoots.
- A flat surface: For laying out your base.
- Twine or wire: For securing the rim.
1. Prepare the Willow Shoots: Soak the thicker willow shoots (stakes) and thinner shoots (weavers) in water overnight to make them flexible.
2. Lay Out the Base: Place four stakes on a flat surface in a square shape to form the foundation of your basket.
3. Weave the Base: Begin weaving by crossing two weavers over the stakes, then twist them and continue around the base. This twisting motion helps secure the weavers in place.
When your weavers become too short, you'll need to join new ones. This is done by placing the butt end of the new weaver alongside the butt end of the old one, ensuring they meet tip to tip and butt to butt. This method helps maintain the basket's shape and prevents bulging.
Once the base is complete, you can start weaving the sides. Use two weavers at a time, twining them tightly around each stake. Ensure the stakes are evenly spaced to maintain the basket's shape.
To finish your basket, you'll need to create a rim. This involves lashing the top row of weaving with a thinner piece of willow or another material. The rim provides stability and a clean finish to your basket.
- Staggering Joints: When joining new weavers, stagger the joints around the basket to maintain evenness and prevent bulging.
- Twisting and Twining: Regularly twist and twine your weavers to keep them secure and maintain the basket's shape.
- Even Spacing: Ensure stakes are evenly spaced to keep the basket symmetrical.
- Handling Different Materials: Depending on the material you choose, you may need to adjust your technique. For example, rattan is more rigid than willow and may require more force to bend.
Upsetting involves bending the stakes outward to create a wider base. This technique is useful for creating larger baskets or adding more volume to your basket.
As you weave, gently shape the basket to maintain its desired form. This can involve pushing the stakes outward or inward to achieve the desired shape.
- Bulging Sides: If your basket starts to bulge, check that your joints are staggered and your weavers are evenly spaced.
- Loose Weaving: If your weaving feels loose, try tightening the weavers by twisting them more frequently.
- Start Small: Begin with a small basket to get a feel for the materials and techniques.
- Practice Regularly: The more you weave, the more comfortable you'll become with the techniques.
- Experiment with Different Materials: Try using different materials to see which ones you prefer working with.
Weaving a basket is a rewarding craft that requires patience and practice. By following these steps and techniques, you can create a beautiful and functional basket using willow shoots. Remember to stagger your joints, twist and twine regularly, and maintain even spacing for a professional finish. Whether you're a seasoned craftsperson or just starting out, basket weaving offers a creative outlet that can be both calming and fulfilling.

The best materials for basket weaving include willow shoots, rattan, and reeds. Willow is particularly popular due to its flexibility and durability.
To join new weavers, place the butt end of the new weaver alongside the butt end of the old one, ensuring they meet tip to tip and butt to butt. This helps maintain the basket's shape.
Twisting and twining help secure the weavers in place, maintaining the basket's shape and ensuring it remains sturdy.
To create a rim, lash the top row of weaving with a thinner piece of willow or another material. This provides stability and a clean finish.
Staggering the joints helps maintain evenness and prevents bulging, ensuring your basket remains symmetrical and visually appealing.
[1] https://www.motherearthnews.com/diy/forager-basket-weaving-tutorial-zm0z19jjzbut/
[2] https://www.youtube.com/watch?v=3d2Fzpyg6Fw
[3] https://blog.csdn.net/Angelina_Jolie/article/details/139147709
[4] https://www.youtube.com/watch?v=iaPbg3C3lLE
[5] https://www.youtube.com/watch?v=irR-3D7YLKA
[6] https://blog.csdn.net/u012549626/article/details/127719965
[7] https://www.youtube.com/watch?v=l4tRWXoxccM
[8] https://www.pinterest.com/pin/295196950592170036/