Content Menu
● Exploring Different Patterns
● Choosing the Right Rope for Your Project
● Historical Context of Basket Weaving
● Advanced Techniques for Experienced Crafters
● Maintenance Tips for Your Rope Basket
● FAQ
>> 1. What type of rope is best for making baskets?
>> 2. How long does it take to make a rope basket?
>> 3. Can I wash my rope basket?
>> 4. What are some creative uses for my finished basket?
>> 5. Can I customize my basket's size?
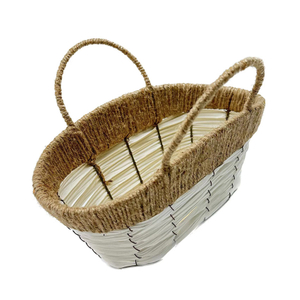
Creating a rope basket is a rewarding and practical craft that allows you to combine creativity with functionality. This guide will walk you through the process of weaving your own rope basket, providing you with all the necessary steps, materials, and tips to achieve a beautiful result. Whether you're a beginner or an experienced crafter, this tutorial will help you create a unique storage solution for your home.
Before you start weaving your rope basket, gather the following materials:
- Rope: Approximately 8-10 yards of cotton rope (3/8" thick is ideal).
- Hot glue gun: For securing the rope as you weave.
- Glue sticks: Ensure they are compatible with your glue gun.
- Scissors: For cutting the rope.
- A bowl or bucket: To shape your basket.
- Fabric strips (optional): If you want to add color or texture to your basket.
Cut your rope into manageable lengths. For a standard basket, you might want to start with lengths of about 3 feet. This will allow you to work without constantly needing to join new pieces.
1. Start Coiling: Begin by coiling one end of the rope tightly to form a small circle. This will be the base of your basket.
2. Secure with Glue: Use your hot glue gun to secure the coils together. Apply glue every few inches as you wrap the rope around itself.
3. Expand the Base: Continue adding more coils around the base until it reaches your desired diameter, typically around 6-8 inches.
1. Begin Vertical Weaving: Once the base is complete, start wrapping the rope vertically around the base. Make sure each new layer sits slightly on top of the previous one.
2. Glue as You Go: Apply glue to secure each layer in place. Be careful not to pull too tightly; this can distort the shape of your basket.
3. Shape Your Basket: As you build up the sides, periodically check that your basket is even and symmetrical.
1. Create Handles (Optional): If you'd like handles on your basket, leave two sections of rope longer than others at the top of your basket. You can braid these or simply loop them over for a handle effect.
2. Secure Ends: When you're satisfied with the height of your basket, cut any excess rope and secure the ends with glue to prevent fraying.
3. Add Fabric (Optional): If you want to add color or texture, wrap fabric strips around sections of rope before gluing them down.

- Choose Quality Rope: Cotton rope is recommended for its flexibility and ease of use.
- Use a Lazy Susan: If available, use a lazy Susan to easily rotate your basket as you work on it.
- Experiment with Colors: Consider dyeing your rope before starting or using colored fabric strips for added flair.
Once you're comfortable with basic weaving techniques, consider experimenting with various patterns to enhance the aesthetic appeal of your baskets:
- French Weave: This technique creates tight, elegant patterns that add sophistication.
- Twining Weave: Producing a more open and rustic look, this method involves intertwining two strands together as you build up the sides.
- Incorporating Knots and Braids: Adding decorative knots or braids can provide unique textures and visual interest.
As with any craft, there are common pitfalls when weaving rope baskets:
- Over-tightening Your Rope: Pulling too tightly can distort your basket's shape. Maintain a consistent tension throughout.
- Inconsistent Layering: Ensure each layer sits evenly on top of the previous one for a uniform appearance.
- Neglecting Glue Application: Be diligent in applying glue at regular intervals; otherwise, sections may come apart over time.
Including images and videos in this tutorial can significantly enhance understanding and engagement. Here are some helpful resources:
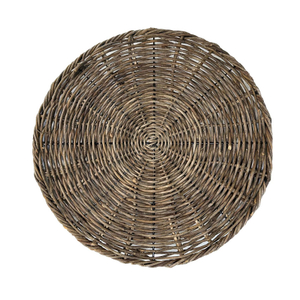
The type of rope you choose significantly impacts both aesthetics and functionality:
- Natural Fibers vs Synthetic Ropes:
- Natural fibers like cotton provide an earthy look and feel but may not be as durable outdoors.
- Synthetic ropes such as nylon or polypropylene offer increased durability and weather resistance but may lack the rustic charm of natural fibers.
When selecting your rope, consider where you'll use your basket—indoors or outdoors—and what items you'll store in it.
Basket weaving is an ancient craft dating back thousands of years across various cultures worldwide:
- In ancient Egypt, baskets were made from reeds and used for storage and transport.
- Indigenous peoples in North America created intricate woven baskets from natural materials like grasses and bark for both functional uses and ceremonial purposes.
Understanding this rich history can inspire modern crafters to appreciate their creations more deeply while incorporating traditional techniques into their work.
For those looking to elevate their crafting skills further:
- Dyeing Techniques:
Experiment with natural dyes derived from plants or synthetic dyes designed for textiles to create vibrant colors in your baskets.
- Mixed Media Baskets:
Incorporate other materials such as wire or beads into your design for added texture and visual interest.
These advanced techniques require practice but can lead to stunning results that stand out in any space.
To ensure longevity:
- Store baskets in dry areas away from direct sunlight when not in use.
- Occasionally clean them using mild soap and water; avoid soaking them completely as this may weaken natural fibers over time.
By following these maintenance tips, you'll keep your handmade baskets looking fresh and vibrant for years to come!
Weaving a rope basket is not only an enjoyable craft but also results in a practical item that can be used throughout your home. With just a few materials and some creativity, you can create beautiful baskets that serve various purposes—from organizing craft supplies to storing toys or even as decorative pieces in any room.

Cotton rope is ideal due to its flexibility and ease of handling, but other types like sisal or jute can also be used for different textures.
The time varies based on size and complexity, but most baskets can be completed within 1-2 hours.
Yes, if made from cotton or similar materials, they can often be spot cleaned or hand washed gently.
Rope baskets are great for organizing items like yarn, toys, magazines, or even as planters for indoor plants.
Absolutely! You can adjust the size by changing the diameter of the base and how tall you want the sides to be.
[1] https://makeandfable.com/2015/04/tutorial-natural-rope-baske/
[2] https://basketweavee.com/how-to-weave-rope-basket/
[3] https://www.onehundreddollarsamonth.com/how-to-make-a-rope-basket/
[4] https://www.youtube.com/watch?v=0iv9hBMQQTw
[5] https://www.youtube.com/watch?v=U_kr4T5xABM
[6] https://www.youtube.com/watch?v=FYVGgyAer7s
[7] https://www.youtube.com/watch?v=RhUVWmX_4PY
[8] https://www.youtube.com/watch?v=ycl7Bcbs_34
[9] https://www.happinessishomemade.net/diy-no-sew-rope-baskets/
[10] https://my100yearoldhome.com/jute-rope-basket-diy/