Views: 222 Author: Tomorrow Publish Time: 2025-01-01 Origin: Site


Content Menu
● Exploring Different Weaving Techniques
● Tips for Successful Basket Weaving
● FAQs
>> 1. What types of sticks are best for weaving baskets?
>> 2. How long does it take to weave a basket?
>> 3. Can I use dried twigs instead of fresh ones?
>> 4. What is the best way to secure my weaving?
>> 5. Can I decorate my basket?
Basket weaving is an ancient craft that combines creativity, practicality, and a connection to nature. Using simple materials like sticks or twigs, you can create beautiful and functional baskets for various purposes. This guide will walk you through the process of weaving a basket with sticks, covering everything from gathering materials to finishing touches.
Before you begin, it's essential to gather the right materials for your basket. Here's what you'll need:
- Sticks or Twigs: Look for flexible, pliable branches like willow or other similar woods. Aim for about 10-15 sticks that are roughly the same length (12-15 inches).
- Knife or Pruning Shears: For cutting and shaping your materials.
- Twine or String: Useful for securing parts of the basket as you weave.
- Water: Soaking your twigs in water for a few hours can make them more pliable and easier to work with.
1. Select Your Base Sticks: Choose three thick sticks to serve as the foundation of your basket. Lay them parallel to each other, spaced evenly apart.
2. Create a Cross: Take another set of sticks and lay them across the first three, forming a cross shape. Ensure that they intersect at right angles.
3. Secure the Base: Use twine to tie the points where the sticks intersect. This will hold your base together as you begin weaving.
1. Choose Your Weavers: Select thinner, flexible twigs to act as your weavers. These will be woven around the base sticks.
2. Begin Weaving: Take one weaver and start by going over one base stick and under the next, alternating as you move around the basket. This technique creates a sturdy structure.
3. Continue Weaving: As you weave, push down on each row to ensure it's tight and secure. You can add more weavers as needed by overlapping them with existing ones.
1. Raise the Sticks: Once your base is wide enough (usually after several rows), begin lifting the base sticks upright to form the sides of your basket.
2. Weave Around the Sides: Continue weaving around these raised sticks, ensuring that each new row is tightly packed against the previous one.
3. Splicing in New Weavers: When your weaver gets short, splice in a new piece by overlapping it with an existing one and continuing to weave.
1. Trimming Excess Sticks: Once you've reached your desired height, trim any excess length from the top of your vertical sticks.
2. Creating a Rim: Bend the tops of your vertical sticks over to create a rim around your basket. Secure them in place by weaving them back into the basket.
3. Final Adjustments: Make sure all ends are tucked in neatly, and trim any loose ends for a clean finish.

As you become more comfortable with basic basket weaving, consider exploring various techniques that can enhance your skills and allow for more intricate designs:
- Plain Weave: This is one of the simplest techniques where you alternate between going over one stick and under another consistently throughout the weaving process.
- Twining: This involves using two strands of material twisted together while weaving, creating a textured appearance that adds stability to your basket.
- Twill Weave: In this method, you weave over multiple stakes before going under others in a repeating pattern, resulting in diagonal lines that add visual interest.
- Coiling: This technique uses coils of material stitched together to form shapes, ideal for creating rounded baskets or decorative items.
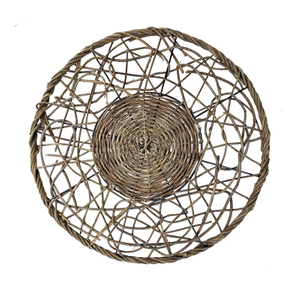
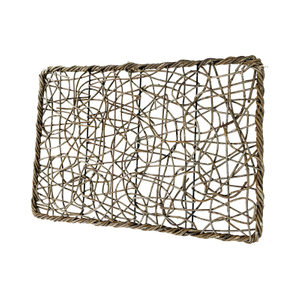
- Random Weaving: A more freeform approach where materials are woven without strict adherence to patterns or symmetry, allowing for organic shapes reminiscent of natural forms like bird nests[1][5][9].
Different styles of baskets can serve various purposes:
- Berry Baskets: These are small containers designed specifically for collecting berries or small fruits. They typically have tapered sides for easy stacking[7].
- Frame Baskets: Known for their larger openings, these baskets are great for carrying groceries or gardening supplies[7].
- Asymmetric Baskets: Featuring an uneven top edge, these baskets often incorporate handles made from natural wood branches[7].
Each style has its unique construction method and aesthetic appeal, allowing you to choose based on personal preference or intended use.
1. Keep Materials Moist: Always keep your twigs damp while working; this prevents them from drying out and becoming brittle.
2. Work Tightly but Gently: While it's essential to keep your weave tight for stability, excessive force can break fragile materials.
3. Plan Your Design Ahead of Time: Sketching out your design can help visualize how many materials you'll need and how they will fit together[4][9].
4. Practice Patience: Like any craft, basket weaving requires practice; don't be discouraged by initial difficulties—each attempt will improve your skills!
5. Join a Community or Workshop: Engaging with other weavers can provide valuable insights and techniques that enhance your learning experience[6][8].
Weaving a basket with sticks is not only a rewarding craft but also an opportunity to connect with nature and express creativity. With practice, you can refine your technique and experiment with different styles and materials. Whether you're making a decorative piece or a functional item for storage, each basket tells its own story through its unique design and craftsmanship.

Flexible woods like willow, cedar, or other pliable branches are ideal for weaving baskets due to their ability to bend without breaking.
The time varies based on size and complexity, but a simple basket can take anywhere from one hour to several hours to complete.
Yes, but dried twigs may be more brittle and challenging to work with; soaking them in water can help restore some flexibility.
Using twine or string at key junctions helps keep everything secure as you weave; ensure tight packing between rows for stability.
Absolutely! You can incorporate different colors of twigs or even embellish with beads or fabric after completing your weave for added flair.
[1] https://www.textileindie.com/beginners-guide-basket-weaving/
[2] https://debhart.co.uk/history-of-basket-weaving/
[3] https://underwaterweaving.com/blogs/news/basket-weaving
[4] https://www.textileindie.com/basket-weaving-tools/
[5] https://www.matttommey.com/blog/the-5-best-basket-weaving-techniques-using-natural-materials
[6] https://csa-living.org/oasis-blog/a-brief-history-of-basket-weavingnbsp
[7] https://www.joyfarms.co.uk/blog/what-are-different-types-of-baskets-made-in-basket-weaving
[8] https://hhperkins.com/collections/basket-supplies
[9] https://www.countryseat.com/basketweaving-tips.html
[10] https://study.com/academy/lesson/basketry-materials-techniques-processes.html