Views: 222 Author: Tomorrow Publish Time: 2025-02-14 Origin: Site


Content Menu
● FAQs
>> 1. What type of reed is best for weaving?
>> 2. How long does it take to weave a hammock basket?
>> 3. Can I use other materials besides reed?
>> 4. How do I maintain my woven basket?
>> 5. Is this project suitable for beginners?
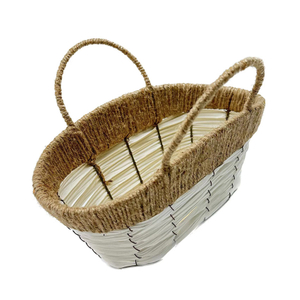
Creating a hammock basket is a rewarding craft that combines creativity with practical skills. This guide will take you through the entire process, from gathering materials to finishing touches. We will also include images and videos to help visualize each step. By the end of this article, you will have all the knowledge needed to weave your own hammock basket.
Before starting, gather the following materials:
- Reed: Various sizes of flat reed for the base, sides, and rim.
- Scissors: For cutting reed to appropriate lengths.
- Measuring Tape: To ensure accurate measurements.
- Clamps: To hold the reed in place while weaving.
- Water: To soak the reed and make it pliable.
- A Work Surface: A flat area where you can comfortably work on your basket.
- Spray Bottle: For misting the reed during weaving to keep it moist.
- Wooden Dowels or Weaving Pins: Optional, but helpful for keeping the structure in place as you work.
1. Soak the Reed: Begin by soaking your flat reed in water for about 30 minutes. This will soften it and make it easier to work with. The soaking process is crucial as it ensures flexibility, allowing you to manipulate the reed without breaking it.
2. Cutting the Reed: Measure and cut your reed pieces:
- 1 piece at 27 inches for the bottom.
- 5 pieces at 20 inches for the sides.
- 2 pieces at 26 inches for handles.
3. Organize Your Workspace: Arrange your workspace so that all materials are within reach. This will streamline the process and make weaving more enjoyable.
1. Lay Out the Base: Place your 27-inch piece horizontally on your work surface. This will serve as the base of your basket. Ensure it is straight and positioned securely.
2. Position the Side Stakes: Take your 20-inch pieces and position them vertically around the base, spacing them evenly. It's essential to have an even distribution to maintain balance in your basket.
3. Secure with Clamps: Use clamps to hold these stakes in place while you weave. This will prevent any shifting and allow you to focus on weaving without worrying about maintaining structure.

1. Start Weaving: Begin weaving with a quarter-inch flat oval reed. Use an over-under pattern around each stake, ensuring that you keep tension consistent throughout. The over-under technique creates a strong bond between each piece of reed.
2. Create Corners: As you reach a corner, press down gently to create a crease before continuing around. This helps maintain a smooth curve and prevents sharp angles that can weaken the structure.
3. Continue Until Desired Height: Keep weaving until your basket reaches the desired height, usually around 10-12 inches. Remember to check for evenness as you go; adjusting any uneven areas early on will save time later.
4. Using a Spray Bottle: Occasionally mist your reed with water using a spray bottle during this process if it begins to dry out; this keeps it pliable and easy to work with.
1. Attach Handle Stakes: Use your 26-inch pieces as handles by securing them to opposite sides of the basket. Position them so they are evenly spaced and parallel to one another.
2. Weave Around Handles: Continue weaving around these handle stakes for added strength. This part is crucial as handles need to support weight; ensure they are well-integrated into the basket structure.
3. Reinforce Handle Areas: You may want to double up on weaving in areas where handles connect to ensure they can withstand pulling when lifting or carrying items in your basket.
1. Rim Weaving: Use half-inch flat braid to create a rim around the top of your basket. This adds stability and a finished look while also providing a comfortable edge when handling.
2. Trimming Excess Reed: Carefully trim any excess reed and tuck in loose ends to prevent fraying. You can use scissors or wire cutters for thicker reeds.
3. Final Soaking (Optional): For added flexibility, you can soak the entire basket again briefly before letting it dry completely. This final soak allows any adjustments needed before setting into its final shape.
4. Drying Your Basket: Place your completed basket in a cool, dry area away from direct sunlight to allow it to dry completely without warping or cracking.
5. Optional Decoration: Once dried, consider adding embellishments such as painted designs or fabric liners for added personality and flair.
For a visual guide, check out this video tutorial that walks through each step of weaving a hammock basket:
- Practice Makes Perfect: If you're new to weaving, don't hesitate to practice with scrap reeds before starting on your final project.
- Experiment with Patterns: Once you've mastered basic weaving techniques, try experimenting with different patterns and colors of reeds for unique designs.
- Join a Community: Consider joining local or online crafting communities where you can share tips, ask questions, and showcase your completed projects.
- Safety First: Always be cautious when using scissors or cutting tools; keep fingers away from blades and cut away from yourself.
Weaving a hammock basket is not only a fun activity but also allows you to create something beautiful and functional that can be used around the home or given as gifts. With practice, you'll be able to customize your baskets with different colors and patterns, making each piece unique. Enjoy your crafting journey!

The best types of reed for weaving are flat reeds, as they are flexible yet sturdy enough to hold shape during weaving.
The time required can vary based on experience and complexity, but typically it takes about 3-5 hours to complete one basket.
Yes! You can experiment with other materials such as willow, seagrass, or even fabric strips for different textures and aesthetics.
To maintain your woven basket, avoid exposing it to excessive moisture and direct sunlight for prolonged periods; clean it gently with a damp cloth when necessary.
Absolutely! While some experience can help, this project is designed with beginners in mind and includes detailed steps to guide you through each phase.
[1] https://www.youtube.com/watch?v=nD-bmF2WWmU
[2] https://www.bhg.com.au/lifestyle/craft/how-to-weave-baskets/
[3] https://www.ynceyi.com/Ideas/1848.html
[4] https://www.youtube.com/watch?v=QkZDiy3trE0
[5] https://www.youtube.com/watch?v=Hv1hDlh-K_M
[6] https://www.cambridgeinternational.org/Images/520575-june-2022-examiner-report.pdf
[7] https://www.marchingnorth.com/diy-macrame-fruit-hammock/
[8] https://www.matttommey.com/basket-weaving-techniques/how-to-weave-a-basket-with-kudzu-runners