Views: 222 Author: Tomorrow Publish Time: 2025-02-14 Origin: Site


Content Menu
● Historical Significance of Basket Weaving
>> Cultural Variations in Basket Weaving
● Advanced Techniques in Basket Weaving
>> Step 3: Start Weaving the Base
● Creative Ideas for Miniature Baskets
● FAQ
>> 1. What type of thread is best for making miniature baskets?
>> 2. Can I use any type of glue?
>> 3. How long does it take for the glue to dry?
>> 4. What if I don't have a mould?
>> 5. Can I paint my miniature basket?
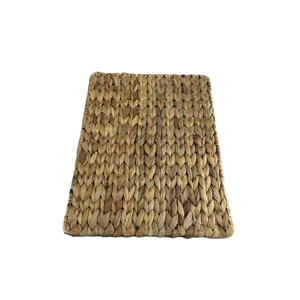
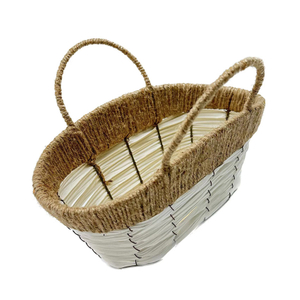
Creating miniature baskets is a delightful craft that allows for creativity and skill development. This comprehensive guide will walk you through the process of weaving a miniature basket, from gathering materials to completing your project. With detailed steps, images, and video tutorials, you'll be able to follow along easily.
Basket weaving has been practiced across cultures worldwide for thousands of years. It serves both functional purposes—such as storage and transport—and artistic expression through intricate designs and patterns unique to different cultures.
Different cultures have their own styles:
- Native American Baskets: Often made from natural materials like reeds and grasses, these baskets are known for their intricate designs that tell stories or represent tribal traditions.
- African Baskets:These are often vibrant in color and used in daily life; they also serve ceremonial purposes in many communities.
- Asian Baskets: In countries like Japan and China, bamboo is commonly used; these baskets often feature elegant designs reflecting nature's beauty.
Once you're comfortable with basic techniques, consider exploring advanced methods such as coiling or plaiting:
- Coiling involves wrapping threads around each other in spirals which creates unique textures.
- Plaiting, on the other hand, uses multiple strands woven together in braids which adds complexity to designs.
Before starting, gather the following materials:
- Crochet thread or twine: Choose a color that suits your design.
- Wire: 26-gauge covered wire is ideal for the basket's structure.
- Glue: Tacky glue works best for securing the threads.
- Scissors: For cutting the thread and wire.
- Mould: You can use a small cup or any cylindrical object as a base for shaping your basket.
- Needle: A large-eyed needle or tapestry needle for sewing.

Select a mould for your basket. It should be at least 1 inch tall. If using a plastic mould, it will help prevent the glue from sticking. You can also create your own mould using cardboard by cutting out a circular base and attaching a vertical strip around the edge.
Cut two lengths of crochet thread:
- One length of 40 inches
- One length of 60 inches
These will be used for weaving and creating the handle. Make sure to cut more if you plan to create a larger basket or want to experiment with different designs.
1. Coat the Thread: Apply glue to the crochet thread to make it easier to work with. This step is crucial as it helps keep the threads together while you weave.
2. Begin Wrapping: Start wrapping the thread around the base of your mould in a circular pattern. Keep the layers tight and snug. You can create a spiral pattern by slightly overlapping each round.
Continue wrapping the thread around until you reach your desired height. Remember to keep applying glue as you go. This part of the process may take some time, so be patient and ensure that each layer is secure before moving on.
Once you reach the desired height:
1. Cut the thread and press it down inside the basket.
2. Use another piece of wire for the rim. Bend it around the top edge of your basket and secure it with glue.
Creating a sturdy rim is essential as it provides stability and structure to your miniature basket.
1. Cut another length of wire for the handle.
2. Shape it into a curve and attach it to either side of your basket using sewing thread.
3. Secure with glue and trim any excess.
The handle can be made thicker or thinner depending on your preference, but ensure that it is securely attached to avoid any mishaps later.
Once everything is glued and set, trim any excess thread or wire sticking out. You may want to add a final layer of glue for extra stability. At this point, you can also embellish your basket with beads, ribbons, or paint.
- Choose Your Colors Wisely: When selecting colors for your threads, consider how they will complement each other. You can use contrasting colors for an eye-catching design or stick with monochromatic shades for a more subtle look.
- Experiment with Patterns: Don't hesitate to try different weaving techniques! You can create patterns such as checkerboards or stripes by alternating colors as you weave.
- Practice Makes Perfect: If this is your first time weaving baskets, don't get discouraged if it doesn't turn out perfectly on your first try. Practice will improve your technique over time.
1. Overstretching Threads: Be careful not to pull too tightly on your threads while weaving; this can cause them to snap or create an uneven appearance.
2. Inconsistent Tension: Maintain consistent tension in your threads throughout the process to ensure an even finish.
3. Skipping Glue Application: Always apply glue when necessary; skipping this step may result in a fragile structure that falls apart easily.
For a visual guide, check out this helpful video tutorial on how to weave a miniature basket:
Once you've mastered basic weaving techniques, consider these creative ideas:
- Gift Baskets: Use miniature baskets as unique gift holders for small treats or trinkets.
- Decorative Items: Create decorative pieces for home decor by using various colors and designs.
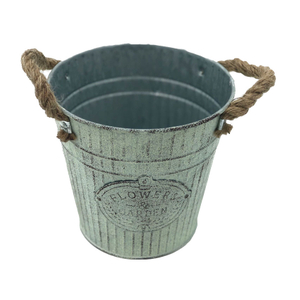
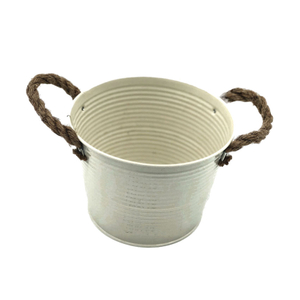
- Plant Holders: Line your miniature baskets with plastic and use them as charming plant holders for succulents or small flowers.
- Party Favors: These baskets make excellent party favors; fill them with candies or small gifts for guests.
Weaving a miniature basket is an enjoyable craft that can be completed in just a few hours. With practice, you can create various designs and sizes, making them perfect for decorations or gifts. This guide provides all necessary steps and resources to help you succeed in this creative endeavor.

Using crochet thread or twine is ideal due to its flexibility and strength.
Tacky glue is recommended as it provides strong adhesion without being too messy.
Typically, tacky glue takes about 30 minutes to set, but it's best to let it cure for several hours before handling.
You can use any cylindrical object like cups or jars as an alternative mould for shaping your basket.
Yes! You can paint your basket after it has dried completely for added color and design.
[1] http://www.cdhm.org/tutorials/making-miniature-baskets.html
[2] https://a-suozhang.xyz/2020/04/21/Paper-Writing/
[3] https://lifeinmini.com/how-to-make-mini-baskets/
[4] https://www.ynceyi.com/Ideas/1848.html
[5] http://1inchminisbykris.blogspot.com/2011/07/weaving-basket-with-crochet-thread.html
[6] https://www.cambridgeinternational.org/Images/520575-june-2022-examiner-report.pdf
[7] https://www.youtube.com/watch?v=b32qitjh9JA
[8] https://service.chasedream.com/ChaseDream/BeYourBetterSelf/Be_Your_Better_Self_2nd_Edition_by_Sonia.pdf