Views: 222 Author: Tomorrow Publish Time: 2025-02-21 Origin: Site


Content Menu
>> 3. Wrap the Rope into a Coil
● Incorporating Decorative Elements
● Creative Uses for Your Nautical Rope Basket
● Frequently Asked Questions (FAQ)
>> 1. What type of rope is best for making a nautical basket?
>> 2. Can I use other materials instead of hot glue?
>> 3. How do I clean my nautical rope basket?
>> 4. Can I customize my basket's size?
>> 5. What are some creative uses for my nautical basket?
Creating a nautical rope basket is a rewarding DIY project that combines creativity with functionality. This guide will walk you through the process step-by-step, providing detailed instructions, materials needed, and tips for success. Whether you're looking to organize your home or add a decorative touch, this basket will serve multiple purposes.
To get started on your nautical rope basket, gather the following materials:
- Rope: Approximately 10-15 meters of cotton or jute rope.
- Hot Glue Gun: Essential for securing the rope together.
- Scissors: For cutting the rope.
- Pail or Mold: To shape your basket (a tapered pail works best).
- Parchment Paper: To line the mold and prevent sticking.
- Tape: To secure the parchment paper.
- Optional: Fabric for handles or embellishments.
Start by choosing a pail that will act as the mold for your basket.
- Wrap the surface of the pail with parchment paper and secure it with tape. This will prevent the glue from sticking to the pail and make it easier to remove your basket once completed.
The base of your basket is crucial for stability.
- Take one end of your rope and apply a small line of hot glue (about one inch long).
- Fold the rope over onto itself to create a stub and press down firmly to secure it in place.
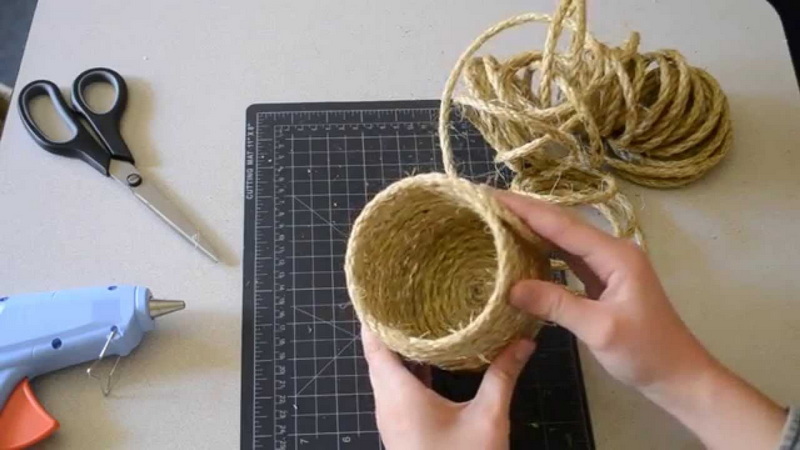
Now it's time to build up the base.
- Apply 1-2 inches of hot glue at a time and wrap the rope tightly into a coil. Continue this process until you have created a circular disc that is slightly larger than the base of your pail.
With the base complete, you can start constructing the walls of your basket.
- Place the pail on top of your rope disc.
- Apply hot glue along the top edge of your base and begin wrapping more rope around, securing it with glue as you go. Ensure that each layer is tightly wound to maintain structure.
Once you reach your desired height:
- Cut the rope, leaving about two inches at the end.
- Fold this end in half and secure it to the body of the basket using hot glue.
To personalize your basket:
- Consider adding handles made from leftover rope or contrasting materials like fabric or leather.
- Cut two pieces of material for handles and attach them securely using hot glue or by stitching them into place.

- Use a high-temperature hot glue gun for better adhesion.
- Be patient when wrapping; take your time to ensure each layer is tight and secure.
- Experiment with different colors and types of rope to create unique designs.
To make your nautical rope basket even more appealing, consider adding decorative elements:
Before starting, you can dye or paint your rope in colors that match your decor. Natural fibers like cotton and jute accept dye well, allowing for vibrant results.
You can embellish your finished basket with seashells, driftwood, or nautical-themed charms. Simply use hot glue to attach these items to enhance its aesthetic appeal.
For added flair and functionality, consider lining your basket with fabric. Choose patterns that complement your home decor, such as stripes or floral designs. This not only adds softness but also protects delicate items stored inside.
Once you've completed your nautical rope basket, think about how you can use it creatively around your home:
Use it as a stylish storage solution for blankets in your living room or toys in a child's bedroom. The natural look of the rope adds warmth to any space while keeping clutter at bay.
Place it on a dining table as a centerpiece filled with seasonal decorations like pinecones in winter or flowers in spring.
If you're an avid gardener, use it as a planter holder for indoor plants. The breathable nature of natural fibers allows for good air circulation around plant roots.
Fill it with goodies such as snacks, candles, or bath products and give it as a thoughtful gift during holidays or special occasions.
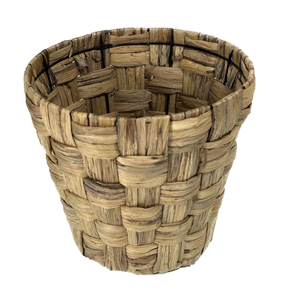
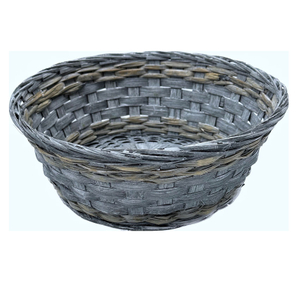
Weaving a nautical rope basket is not only an enjoyable craft project but also results in a practical item that can enhance any space in your home. By following these steps and utilizing creative materials, you can create beautiful baskets tailored to your style and needs. Whether used for storage, decoration, or as gifts, these baskets are sure to impress.

Cotton or jute rope is recommended due to its durability and ease of handling.
While hot glue is preferred for its quick setting time, you can also sew or use fabric glue if desired.
Spot clean with mild soap and water; avoid soaking as it may damage the rope fibers.
Yes! Adjusting the amount of rope used allows you to create baskets in various sizes.
These baskets can serve as storage for toys, laundry, decorative pieces, or even as planters.
1. https://www.youtube.com/watch?v=10UlqjTh1_o
2. https://www.youtube.com/watch?v=wFkILZkIkb0
3. https://yarnandchai.com/nautical-basket/
4. https://bookdown.org/rexarski/bookdown/section-3.html
5. https://www.youtube.com/watch?v=5aFzyS6KCJs
6. https://www.ropesdirect.co.uk/blog/how-to-make-a-rope-basket/
7. https://thenewenglandtradingcompany.com/blogs/default-blog/25-ways-to-use-a-lobster-rope-basket
8. https://blog.csdn.net/qq_34917728/article/details/125122327
9. https://labasketry.com/collections/basketkits-materials