Views: 222 Author: Tomorrow Publish Time: 2025-02-08 Origin: Site


Content Menu
● Materials and Tools You'll Need
>> Step 2: Cut Along the Lines
>> Step 3: Prepare the Weaving Strips
>> Step 5: Form the Basket Shape
>> Step 1: Gather and Prepare Materials
>> Step 1: Prepare the Template and Base
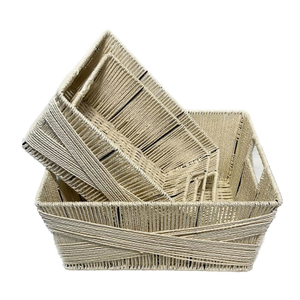
● Hand Woven Basket with Hemp Twine
● Tips and Tricks for Perfect Weaving
● FAQ
>> 1. What materials are best for weaving a sturdy Easter basket?
>> 2. How can I prevent the weaving strips from moving while making a paper basket?
>> 3. What tools do I need to weave a wire basket?
>> 4. Can I make a woven Easter basket with yarn?
>> 5. How do I finish the top edge of a hand-woven basket to make it look neat?
Creating a hand-woven Easter basket is a delightful and rewarding craft that can be enjoyed by both kids and adults. This article provides a comprehensive guide on how to make various types of woven Easter baskets, complete with step-by-step instructions, images, and video resources to ensure a seamless crafting experience. Whether you're aiming to create a traditional paper-woven basket, a natural woven basket using materials from your backyard, or a modern wire basket, this guide covers it all.
Before diving into the weaving process, it's essential to gather all the necessary materials and tools. The specific items will vary depending on the type of basket you plan to create, but here's a general list to get you started:
-Colored Paper: For paper-woven baskets, you'll need at least two sheets of different colored paper[1].
-Natural Materials: If you're opting for a natural basket, gather pliable branches or vines from your backyard[2].
-Wire: For wire baskets, you'll need heavy-duty twistable soft tie plant wire[2].
-Yarn: For yarn-woven baskets, select your favorite colors of yarn[3].
-Scissors: Essential for cutting paper, yarn, or natural materials[1].
-Glue Stick: To secure paper strips and other elements[1].
-Ruler and Pencil: For measuring and marking precise lines[1].
-Paper Twist Ties: To temporarily secure branches or wire[2].
-Coir Twine: For hanging baskets and wrapping wire structures[2].
-Wire Cutters: To cut wire to the desired lengths[2].
-Soft Nose Pliers: To tuck in and secure wire ends[2].
-Bowl or Vase: To shape wire baskets[2].
-Hole Puncher: For creating holes in paper for weaving[3].
-Darning Needle: For weaving yarn and burying ends[9].
-Craft Glue: To adhere paper strips[7].
-Painter's Tape: To hold paper strips in place during weaving[4].
-Stapler: To gather and secure paper strips[4].
One of the simplest and most popular methods for creating an Easter basket is paper weaving. This craft is perfect for kids and beginners due to its straightforward steps and minimal material requirements[1].
1. Fold one sheet of colored paper in half. Ensure the fold is at the bottom[1].
2. Using a ruler and pencil, measure and draw vertical lines one inch apart, starting an inch from the edge. Make sure the lines don't go all the way to the top, leaving about an inch of space[1].
1. Cut upwards along each of the lines you've marked. Stop about one inch from the top edge of the paper[1].
1. Take the second sheet of colored paper and turn it to a portrait orientation[1].
2. Draw horizontal lines an inch apart (or the same width as the lines cut on the first piece of paper)[1].
3. Cut along these horizontal lines to create weaving strips[4].
1. Weave the horizontal strips through the vertical cuts, alternating over and under to create a woven pattern[4].
2. Slide the strips together to tighten the weave, forming the base of the basket[4].
3. To prevent the strips from moving, use painter's tape to secure them to the table[4].
1. Gather the strips on one side of the square and staple them together[4].
2. Repeat this process for all four sides. This will cause the woven section to curl up, creating the basket shape[4].
1. Take an extra strip of construction paper and staple it across the basket to form a handle[4].
2. Reinforce the handle by adding another strip on the opposite side[4].

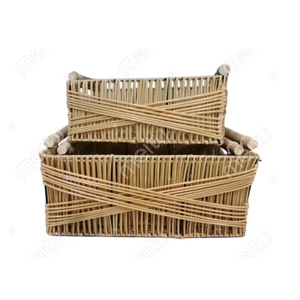
For a more rustic and eco-friendly approach, consider weaving a basket using natural materials sourced from your backyard[2].
1. Using clean and sharp secateurs, cut pliable branches or vines up to 3 meters long and trim the cuttings[2].
2. Fashion up to 8 branches at least 2 meters long into U shapes, securing them at the base with paper twist ties[2].
1. Wrap plant wire around the branches at least 200mm from the ends. Wrap a branch around the join 6-8 times to cover the wire, tucking in the ends[2].
2. Starting at the base, poke a branch in the center and weave it over and under the cage branches, alternating the weaving on each row[2].
3. At the top, tuck in the branch end and use a length of coir twine as a hanger[2].
Creating a wire basket involves shaping and weaving soft tie plant wire to form a sturdy and unique container[2].
1. Cut soft tie into six 400mm lengths[2].
2. Lay out two groups of three soft ties horizontally[2].
3. Center a set of three ties vertically on the other set to make a cross. Use 3-4 paper twist ties to join the cross at the center[2].
1. Wrap coir twine around the center of the cross, going around three soft ties at a time[2].
2. Start weaving twine over and under soft ties at the center, spreading the ties out as you go[2].
3. Use a bowl or vase to shape your basket, taking twine over and under each soft tie that makes up the warp. Keep weaving in this way until you reach the top of the vessel you are using[2].
1. Remove the vessel and cut the twine with a long tail[2].
2. Bend each soft tie over its neighbor to the outside of the basket[2].
3. Weave the twine tail around the last few ties to tuck into the basket to secure. Finish the last few soft ties[2].
4. Keep taking each soft tie over and under its neighbor until tightly coiled[2].
5. Trim the ends of the soft ties and tuck them into the woven rim using pliers[2].
This project uses yarn to create a colorful and textured basket. It's a great way to use up leftover yarn and customize your Easter décor[3].
1. Print a basket template on heavy print paper[3].
2. Cut along the outline. Cut a circle shape along the short strips and then cut out the triangles between the strips of paper[3].
3. Take a hole puncher and punch all the holes that are marked on the basket base[3].
4. Fold the strips at their base and then unfold[3].
1. Wrap one end of the yarn around one of the strips and make a knot[3].
2. Weave your way around, making S shapes as you go[3].
3. Continue in the same direction, making circles until you reach the punched holes[3].
1. Thread the yarn through the holes. For younger kids, make a “needle” out of leftover paper by cutting a thin, long triangle, folding it in half, and cutting a small hole at the wider end to push the yarn through[3].
2. Make two rounds, or more, until you are happy with the result. Tie a knot[3].
1. Glue the longest two strips of paper at the top to create the handle[3].

This tutorial uses hemp twine to create a classic basket with a twisted handle and scalloped edge[9].
1. Cut ten bundles of four cords, nine of which are 25" long each. Cut one bundle at 30" long, which will be the handle[9].
2. Tape five of the bundles together[9].
3. Move the woven area close together, re-taping as necessary so your woven base is tighter[9].
1. With the remaining hemp cord ball (your working cord), line the end up at the bottom of the horizontal cords[9].
2. Weave the working cord over and under the bundles around the base. Remove the tape as you go[9].
3. As you go around, tighten your woven base even more[9].
1. Take each bundle of cords and bring it behind the next bundle all the way around the basket. Place the bundles here temporarily to organize the strands[9].
2. When you get back around to where you started, tuck the last bundle through the arc created by the first bundle[9].
3. For each end of each bundle, use your darning needle to bury the end down into the weaving about three visible rows[9].
1. With the extra-long bundle, twist the lengths to become the handle[9].
2. Bring the two ends of your twisted handle through the arc and two ends under one row of the working cord to the inside of the basket. Tie a knot with the ends of your handle on the inside of the basket. Trim all ends[9].
-Tighten the Weave: Regularly tighten the weave to ensure a sturdy and well-formed basket[2].
-Secure the Ends: Properly secure the ends of the weaving materials to prevent unraveling[7].
-Use Templates: Utilize templates for consistent shapes and sizes, especially for paper baskets[7].
-Get Creative with Decorations: Add embellishments like ribbons, flowers, or paint to personalize your basket[6].
Creating a hand-woven Easter basket is a fulfilling and creative activity. By following the detailed instructions provided in this guide, you can craft beautiful and unique baskets using a variety of materials and techniques. Whether you choose the simplicity of paper weaving, the natural charm of backyard materials, the modern appeal of wire, or the colorful texture of yarn, the possibilities are endless. Enjoy the process of weaving your own Easter baskets and adding a personal touch to your holiday celebrations.

Sturdy Easter baskets can be woven using a variety of materials depending on the desired aesthetic and durability. Natural materials like pliable branches or vines[2] and round reed[8] provide a rustic and robust structure. For a more modern approach, heavy-duty twistable soft tie plant wire[2] can be used to create a durable frame. Paper-woven baskets are best for lighter use, while yarn-woven baskets offer a flexible and colorful option[3].
To prevent paper strips from moving during the weaving process, use painter's tape to secure the strips to the table[4]. This will hold the strips in place as you weave, ensuring a tighter and more uniform base. Additionally, tightening the weave by sliding the strips together after each pass can help maintain its integrity[4].
Weaving a wire basket requires several essential tools to shape and secure the wire effectively. These include heavy-duty twistable soft tie plant wire, paper twist ties, coir twine, wire cutters, scissors, a bowl or vase for shaping, and soft nose pliers[2]. The wire cutters are used to cut the wire to the desired lengths, while the soft nose pliers help in tucking and securing the wire ends[2].
Yes, you can make a woven Easter basket with yarn[3]. This involves using a template to create a base with punched holes, then weaving yarn through these holes to form the sides of the basket[3]. This method allows for colorful and creative designs, and it is particularly suitable for kids. You can also create a paper needle to help younger children thread the yarn through the holes more easily[3].
To finish the top edge of a hand-woven basket neatly, take each bundle of cords and bring it behind the next bundle all the way around the basket[9]. Tuck the last bundle through the arc created by the first bundle. Use a darning needle to bury the ends down into the weaving about three visible rows, ensuring they are securely hidden[9]. Trim the ends about an inch away from where they exit the basket, and organize the arcs as desired before trimming away each cord as close as possible to where it exits the basket[9].
[1] https://www.thecraftballoon.com/paper-weaving-easter-basket/
[2] https://www.bhg.com.au/lifestyle/craft/how-to-weave-baskets/
[3] https://www.easypeasyandfun.com/woven-easter-basket-craft/
[4] https://craftcornerdiy.com/holiday-crafts/easter-craft/easy-diy-paper-woven-easter-basket
[5] https://www.funlittles.com/easter-craft-paper-weaving-basket/
[6] https://musthavemom.com/paper-weaving-basket-easter-crafts-for-kids/
[7] https://www.craftsy.com/post/paper-easter-basket-template
[8] https://www.basketryguild.org/calendar/2021/4/10/basic-basket-techniques-round-reed-easter-basket
[9] https://flaxandtwine.com/blogs/blog/hand-woven-basket-tutorial