Views: 222 Author: Tomorrow Publish Time: 2025-02-11 Origin: Site


Content Menu
>> Willow
>> Tools
● Attaching the Basket to Your Bike
● Alternative Materials and Methods
>> DIY Basket with Metal Supports
● Frequently Asked Questions (FAQ)
>> 1. How long does it take to weave a bicycle basket?
>> 2. Can I use different types of willow for different parts of the basket?
>> 3. How do I maintain my willow bicycle basket?
>> 4. Where can I source willow for basket weaving?
>> 5. What if I'm unhappy with the course?
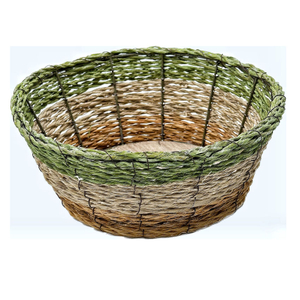
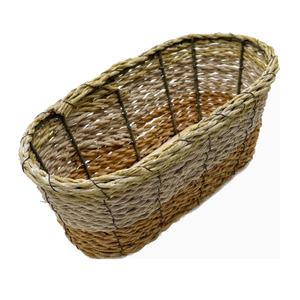
Weaving a bicycle basket is a rewarding skill that combines practicality with artistic expression[8]. Whether you're aiming for a classic wicker look or a sturdy design for carrying groceries, creating your own bike basket allows for personalization and a unique touch. This comprehensive guide will take you through the process step-by-step, complete with visual aids and resources to help you master the craft.
Before you begin, gather the necessary materials and tools. Having everything on hand will make the weaving process smoother and more enjoyable.
-Description: Willow is the primary material for traditional basket weaving, known for its flexibility and durability[1].
-Types: Choose between buff willow (with the bark removed) or brown willow (with the bark on)[1]. Note that brown willow typically requires soaking before use[1].
-Preparation: Soak brown willow for a few days before weaving to make it pliable[1].
-Secateurs: Essential for cutting and trimming willow rods to specific lengths[1][2].
-Rapping Iron: Used to tamp down woven rods, tightening the weave to prevent loosening as the basket dries[2].
-Bodkin: Helps to gently open up space in the weave, guiding rods through pre-existing sections[2].
-Soaking Bag: Needed for soaking the willow to make it pliable[1].
-Weights: To keep the form in place[2].
-Tethering Material: To bundle upright rods while weaving the sides[2].
-Screwblock: For making square sided bases and lids[2].
-Felt pad: For cushioning the base so that the bark doesn't rub off as you rotate the basket[2].
-Ruler/Tape Measure: For keeping everything even - symmetry is paramount[2]!
1. Soaking: Submerge the willow in water using a soaking bag for several days. The soaking time depends on the type of willow; brown willow generally needs longer soaking than buff willow[1].
2. Testing for Flexibility: Check the willow's flexibility by bending it gently. If it bends without cracking, it's ready to use.
3. Draining: Once adequately soaked, drain the willow and allow it to sit for a short period to remove excess water.
The base of the bicycle basket needs to be sturdy and shaped appropriately for attachment to the handlebars[1]. Here's how to weave a D-shaped base, which is ideal for bike baskets:
1. Start with the D-Shape: Begin by creating the D-shape using thicker willow rods. This will form the foundation of the basket[1].
2. Weaving Technique: Use a basic weaving technique, such as pairing or twining, to fill in the D-shape. Pairing involves using two rods, weaving them over and under each other around the stakes[1].
3. Tightening: Regularly tamp down the weave with a rapping iron to ensure a tight and even base[2].

1. Upsetting: "Upsetting" is the process of setting the stakes (upright rods) into the base to begin forming the sides of the basket[1]. Ensure the stakes are evenly spaced and securely inserted.
2. Three Rod Wale: Use a three-rod wale for the first few rows to add strength and stability to the base of the sides[1]. This involves weaving three rods together in a specific pattern around the stakes.
3. Slewing Weave: Incorporate a slewing weave for the main body of the basket. This multifaceted weave adds a decorative touch and enhances the basket's structural integrity[1].
4. Tapering: As you weave upwards, gradually taper the sides if desired. This can be achieved by gently bending the stakes inward as you weave.
1. Top Waling: Finish the top edge of the basket with a waling technique to provide a neat and robust border[1]. This involves weaving several rows of willow around the top of the stakes.
2. Border Weave: Choose a decorative border weave to add a finishing touch. Options include a rolled border, a plaited border, or a simple folded border[1].
3. Securing the Ends: Securely tuck the ends of the willow rods into the weave to prevent them from unraveling[1]. Trim any excess material for a clean finish.
1. Straps: Use leather straps to securely attach the basket to the handlebars. Ensure the straps are durable and adjustable[1].
2. Positioning: Position the basket so that it is stable and does not interfere with the bike's operation. The D-shape should fit snugly against the handlebars[1].
While willow is traditional, other materials and methods can be used to create a bicycle basket.
1. Select a Basket: Choose a basket that fits your style and bike[6].
2. Gather Supplies: You'll need metal struts, zip ties, a drill, a hacksaw, metal files, and a vice grip[6].
3. Measure and Cut: Measure the distance from the basket to the attachment point on the bike. Cut the metal struts accordingly[6].
4. Drill Holes: Drill holes in the metal struts for attachment[6].
5. Attach Struts: Secure the struts to the basket and the bike using zip ties and bolts[6].
6. Finishing Touches: File down any sharp edges on the metal struts[6].
Consider adding a custom-sewn bag to your basket[9]. This keeps your contents secure and protected from bumps[9]. The bag can be designed with internal pockets and a drawstring closure for added convenience[9].
Weaving a bicycle basket is a fulfilling project that combines traditional crafts with modern functionality. Whether you choose to use willow or alternative materials, the result is a unique and personalized accessory for your bike. By following this guide and utilizing the provided resources, you can create a beautiful and practical basket that enhances your cycling experience.

The time required to weave a bicycle basket varies depending on your experience level and the complexity of the design. A simple basket can take around half a day, while more intricate designs may take longer[1].
Yes, you can use different types of willow to achieve different effects. For example, you might use thicker willow for the base and thinner willow for the sides[1].
To maintain your willow bicycle basket, keep it clean and dry. Avoid leaving it in direct sunlight for extended periods, as this can cause the willow to dry out and become brittle.
Willow can be sourced from various suppliers, including willow farms and craft stores[2]. Ensure that the willow is of good quality and suitable for basket weaving.
The course offers a refund. If you are unsatisfied with your purchase in any way, contact them in the first 14 days and they will give you a full refund[1].
[1] https://myown2hands.co/pages/bicycle-basket-course-and-kit
[2] https://www.foggyblossomfarm.com/stories/beginners-guide-to-willow-basketry
[3] https://www.hillandellis.com/blogs/news/behind-the-design-our-wicker-bicycle-baskets
[4] https://bing.com/rebates/welcome?url=https%3A%2F%2Fvimeo.com%2Fondemand%2Fbikebasket&murl=https%3A%2F%2Fwww.jdoqocy.com%2Fclick-9069228-15373608%3Furl%3Dhttps%253a%252f%252fvimeo.com%252fondemand%252fbikebasket%26afsrc%3D1%26SID%3D&id=vimeo&name=vimeo&ra=10%25&hash=56c22b601b7234d17665ae76d42c33fc225de0497f0872c93c9546de5642ec33&network=CJ
[5] https://www.youtube.com/watch?v=Ys_1z0Kk3I4
[6] https://www.liv-cycling.com/global/campaigns/diy-how-to-make-your-own-bike-basket/19019
[7] https://www.mayacycle.com/bike-baskets/
[8] https://basketweavee.com/how-to-weave-a-bicycle-basket/
[9] https://www.youtube.com/watch?v=rmP8NkzKc2o
[10] https://www.greensandmachines.com/2017/03/bicycle-basket-modifications.html
[11] https://www.apartmenttherapy.com/how-to-make-a-diy-bike-basket-apartment-therapy-tutorials-218460